- Home
- Basic embroidery stitches
STITCH LIBRARY
Basic Embroidery Stitches
Building blocks for every project
I like to think of basic embroidery stitches as building blocks. Much like any other skill, embroidery requires a strong foundation. Learn and practise these simple stitches until you know them by heart — you'll find yourself returning to them again and again.
Even if you've been embroidering for years, you may discover something new here. A stitch you haven't tried before, or an easier way of working one you've struggled with. All you need to get started is a hoop, some fabric, and a skein of embroidery floss.
Click any stitch to learn how
A – C

C – L


P – Z
Create Your Own Stitch Sampler
Here's a tip I always share with beginners: practise each new stitch on a scrap of fabric and label it. Before long, these little experiments become a project all on their own — your very own stitch sampler.
Think of it as your stitching yearbook, a record of all the stitches you've met and mastered. Keep it tucked in your needlework basket as a handy cheat-sheet for future projects.
And don't worry about making it perfect — a sampler is the ideal playground to experiment, make a "happy little accident" or two, and discover which stitches become your favourites. Have patience, practise, and persevere.
Choosing the Right Stitch
If you're stepping into embroidery for the first time, there's no need to feel overwhelmed. You could start with a ready-made kit, but be warned — some kits offer little more than a quick diagram and a "good luck" note for instructions. Stick with kits that name the stitches, so you can look them up here or in a reference book.
As you grow more confident, start thinking about how your finished piece will be used. A stitch that looks lovely in a hoop may not be practical on a shirt that needs regular washing. Bumpy stitches might feel uncomfortable on a cushion, and raised textures could send glasses sliding on a tablecloth.
The best way to learn? Experiment with different stitches on scrap fabric. See how they look, how they feel, and which ones suit your project best. Did you know it's possible to create a beautiful project with just one stitch? Don't be in a hurry to complicate matters — start simple and build from there.
Beyond the Basics
Once you've mastered these foundation stitches, there's a whole world of specialist techniques waiting for you.
Hardanger Stitches
Geometric counted thread embroidery with cut and drawn thread work.
Pulled Thread Stitches
Delicate openwork patterns created by pulling fabric threads apart.
Needlepoint Stitches
Canvas work stitches for rich textures and decorative designs.
Every stitch you learn is a new tool in your creative toolkit.
Start simple, keep practising, and enjoy the journey.
You might like these
Learn stem stitch and variations of this basic embroidery stitch
This stem stitch tutorial covers the basic stitch, raised stem and portuguese knotted stem. Videos explain how to work the stitches.
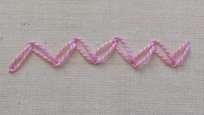
Chevron stitch embroidery tutorial with step by step photos
Learn the correct way to work chevron stitch embroidery and discover interesting new ways to use it in your next needlework project
Needlepoint Stitches: Choose the Right One for Stunning Designs
Struggling to choose the right needlepoint stitch? Get expert tips on selecting stitches for texture, direction, and style. Learn effortlessly


Stay connected between projects
If you’d like occasional updates from my embroidery room, including new patterns, gentle tips, and little things I think you might enjoy, you’re warmly invited to join the Stitchin’ Times newsletter.
About Me - Contact Carol - Privacy Policy - Site Map - Testimonials
Please do not copy the content of this site. It is protected by Copyscape.
Copyright © 2006- www.needlework-tips-and-techniques.com All rights reserved