- Home
- What do I need?
GETTING STARTED
Embroidery Supplies and Equipment
What to buy first, what can wait, and where to learn more about each one
If you're new to embroidery, it's easy to think you need a mountain of equipment before you can begin. You don't. A small set of well-chosen basics will take you a long way, and you can add extras later as your confidence grows.
I've gathered the most useful embroidery supplies and equipment here in one place. Start with the checklist below, then use the guides further down to learn more about each item in your toolbox.
Your Basic Embroidery Toolbox
These seven items are all you need to begin. Everything else on this page can wait.
Fabrics, Threads, Needles and Basic Tools
These are the core supplies every embroiderer needs. Each card links to a detailed guide.
Fabric for Surface Embroidery
What to use, what to avoid, and how to pick with confidence
Surface fabric guide →Comfort, Lighting and Organisation
None of these are essential on day one, but they make stitching more comfortable and enjoyable as your projects grow.
Laying Tool
Keep your threads flat and smooth for neater, more lustrous stitches
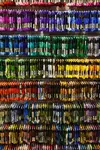
Laying tool guide →Organising Embroidery Floss
Storage ideas to stop your thread collection becoming a tangled mess
Floss storage →Specialty Materials
These are for particular types of needlework. You'll know when you need them.
Metallic Embroidery Thread
Add sparkle and shimmer to your stitching without the tangles
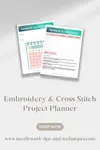
Metallic thread guide →Like to stay organised?
My Project Planner helps you keep track of your embroidery projects: fabrics, threads, progress, and notes all in one place.
Got Your Basics? Here's Your Next Step
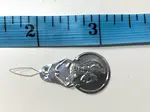
Keep a tape measure and dressmaking shears nearby for measuring and cutting fabric, and set up a storage system for your threads once your collection starts growing.
You don't need to buy everything on this page before you pick up a needle. Start with the basics, get comfortable, and add to your toolbox as you go.
Our beginner's guide walks you through your first stitches
You might like these
How to Thread a Needle (Plus Threaders That Do It for You)
Struggling to thread a needle? The method that works every time, plus fixes for fraying thread, tiny eyes and metallics. Includes a guide to needle threaders.
Embroidery Floss Guide: Strands, Threads & How to Use Them
Your complete guide to embroidery floss: how to separate strands, how many to use for each fabric, plus DMC, Anchor and alternative thread options.
How to Use & Tighten Embroidery Hoops (Step-by-Step Photos)
How tight should an embroidery hoop be? Learn to get drum-tight tension without puckers. Step-by-step photos show hooping, tightening, and fixing loose fabric

Stay connected between projects
If you’d like occasional updates from my embroidery room, including new patterns, gentle tips, and little things I think you might enjoy, you’re warmly invited to join the Stitchin’ Times newsletter.
About Me - Contact Carol - Privacy Policy - Site Map - Testimonials
Please do not copy the content of this site. It is protected by Copyscape.
Copyright © 2006- www.needlework-tips-and-techniques.com All rights reserved