- Home
- Basic embroidery stitches
- Fishbone Stitch
Fishbone Stitch - ideal for embroidered leaves
Have you ever noticed how some embroidery stitches are named after things in nature?
The herringbone stitch mimics a fish skeleton, and Victorian embroiderers even used real fish scales in their work! While using actual scales is a bit too antiquated for modern tastes, there's one stitch that still evokes images of the underwater world: the fishbone stitch.
Breathe life into your embroidery with this versatile stitch that adds beautiful, organic texture.
Whether you're stitching leaf veins, vines, or intricate patterns, this stitch allows you to change direction, resulting in a wonderfully natural look.
As my go-to for directional linear elements, the fishbone stitch is a must-have in any embroiderer's repertoire, from beginners to seasoned pros.
Ready to master this eye-catching stitch in both flat and raised forms? Let's get started!
 fig 1 - raised fishbone leaves in a floral design
Although I used embroidery floss for my samples, you could choose to stitch with crewel wool if you want a matt effect.
How to work flat fishbone stitch
To get started, thread your needle with a fairly long length of thread, as this stitch can use more than you first expect.
- Bring your needle to the front in the middle of the leaf (A) and work a straight stitch up to the tip (B).
- Bring your needle up at point C on the diagram, which is just below, and to the left, of point B. Take it down close to the center, on the right-hand side (D).
- Come back up at point E, to the right of the central straight stitch and level with point C. Go down at point F, just to the left of the center.
- Come back up at point G, to the left and a little lower than point C. Go down at point H, below point D.
 fig 2 - fishbone stitch diagram
Continue to follow the outside shape, working stitches on alternate sides until you have filled the shape. You can either place the stitches close to each other or spaced out a little, for different effects.
Try to keep the stitches that go down in the center lined up as best you can. This results in a nice smooth vein line.
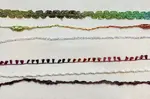
If you leave a small gap between your stitches, you will achieve an open fishbone leaf, as in fig 3, with a plaited effect down the center.
You can also see an example of this on my filling stitches page.
 fig 3 - open fishbone leaf
What's the difference between the two versions?
So what is the difference between the two forms of fishbone stitch?
- For the basic version take each stitch through the fabric close to the center of the leaf.
- When working raised fishbone you take the stitch across the entire width of the shape each time, forming a double layer of stitches which creates a more padded effect.
Raised fishbone stitch instructions
You can see the depth this gives in fig 4, as the leaf is causing a shadow on the fabric. A flatter leaf would not do this.
I have split the stitch diagram (fig 5) in to 3 stages to make it easier to see what is happening.
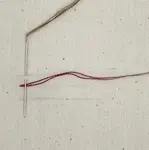
Start with a vertical stitch, which is around 1/3rd to 1/2 the length of the leaf.
Then bring the needle out to the right of point 2, at point 3, on the outside edge of your shape.
Take the needle back to the top and down through the fabric right next to point 1, and up at 5. This forms a short horizontal stitch on the back of the work.
Take the needle back down at 6, on the same invisible line as point 3.
This time, taking a slightly sloping horizontal stitch on the back between points 6 and 7, bring the needle back to the front of the work.
Take the thread across the worked area and insert the needle at point 8 on the outside edge.
Bring it back up at point 9, again forming a horizontal stitch on the back. Continue in this manner, forming diagonal stitches on the front and horizontal stitches on the back to fill the area.
 fig 4 - raised fishbone stitch
 fig 5 - raised fishbone diagram
You could use both variations of this stitch in the same design, to create more interest in the leaves. I do hope you will give one or both variations a try.
Check my how to embroider a leaf page for more stitches you can use for this purpose.
Been There, Stitched That? Share Your Work!
Now it's your turn! Did you give the stitch a go? Did you discover a brilliant colour combination or have a little "aha!" moment of your own?
I would be so thrilled to see your creations and maybe even feature them here to inspire other stitchers. Seeing your work is the best part of my day!
Drop a photo and your story in the form below. Your experiments and questions are what make this little corner of the internet so special.
You might like these
Couching Stitch Embroidery: Types, Techniques & Designs
Explore couching stitch embroidery with easy step-by-step photos. Discover different types, creative designs, and add stunning texture to your projects.
Learn Hand Embroidery Stitches for Textured Fills
Learn hand embroidery stitches to fill shapes with texture and confidence. Follow Carol's step-by-step photos to practise new stitches at your pace.
My Secret to Perfect Cretan Stitch | Step-by-Step Tutorial
Tired of messy, wobbly Cretan stitch? Learn my simple secret in this step-by-step tutorial. I even show you my own mistakes to help you succeed!
Stay connected between projects
If you’d like occasional updates from my embroidery room, including new patterns, gentle tips, and little things I think you might enjoy, you’re warmly invited to join the Stitchin’ Times newsletter.
About Me - Contact Carol - Privacy Policy - Site Map - Testimonials
Please do not copy the content of this site. It is protected by Copyscape.
Copyright © 2006- www.needlework-tips-and-techniques.com All rights reserved