- Home
- Basic embroidery stitches
- Cretan Stitch
CRETAN STITCH TUTORIAL
My Secret to the Non-Wobbly Cretan Stitch
A step-by-step guide to taming this beautiful stitch with guide lines, honest mistakes, and creative ideas to try once you've nailed it.
We've All Been There
Oh, the Cretan stitch. For years, it was my stitching nemesis. I'd see it in books and on beautiful crazy quilts, looking like a lovely, elegant little braid. But when I tried it? I got a wobbly, uneven zig-zag that looked like it had had one too many coffees.
If you've ever felt that frustration, please know: you're not the only one, and it's not your fault!
The secret to taming this stitch is wonderfully simple: guide lines.
Creating a path for your stitches removes all the guesswork and lets you focus on the relaxing rhythm of stitching, which is what this is all about!
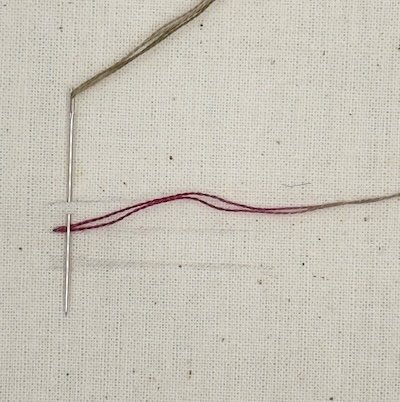
We are going to draw three parallel lines. For a delicate decorative stitch, aim for a total width of about a quarter-inch (around 6mm) from the top line to the bottom line. Of course you can make this wider if you are planning to use a chunky thread.
The top and bottom lines will be the edges of your stitch, and that middle line will be your trusty anchor point.
What You'll Need
Grab your supplies, and let's do this together. It'll be fun, I promise! For our method, we are going to draw all three guide lines to ensure you get a beautifully neat result right from the start.
Let's Stitch! Your Step-by-Step Guide to a Flawless Cretan Stitch
Now that you've got the perfect pen for your pace, let's get those lines drawn and start stitching!
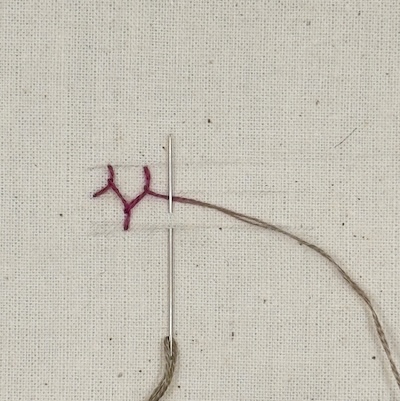
The First Stitch and The "Blanket Stitch" Connection
With your three guide lines carefully drawn, bring your needle up from the back of the fabric, right on the middle line. Guide your needle down on the top line, just a tiny bit to the right, then bring the tip back up halfway between the top and middle lines. Tuck the working thread underneath the needle tip before pulling through. That's the first half of your very first stitch!
The Little Flip
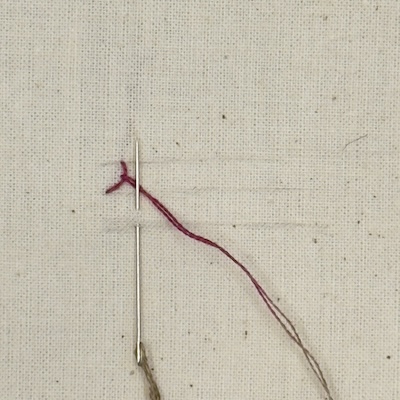
Turn your needle so it's pointing up and guide it into the fabric on the bottom line. Bring the tip back up halfway between the bottom and middle lines. Just like before, tuck the working thread underneath the needle's tip before you pull it through.
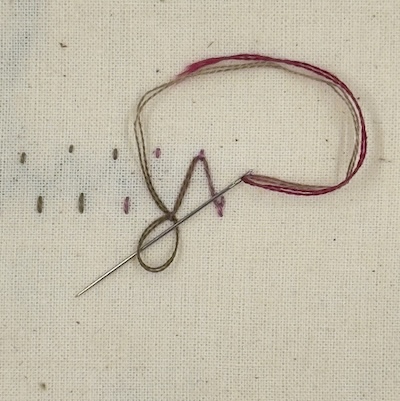
Finding Your Rhythm
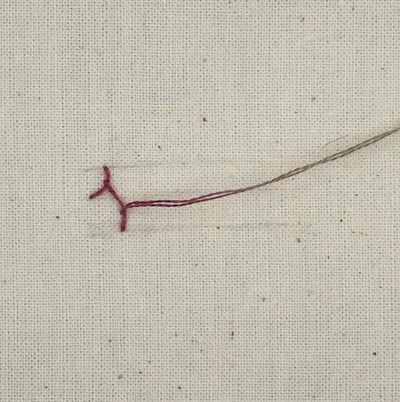
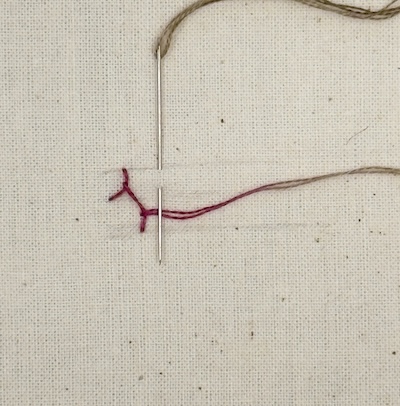
Now we just repeat that lovely little dance. Turn your needle so it's pointing down again. Guide it into the fabric on the top line and bring the tip back up halfway between the top and middle lines. Tuck the working thread under the needle before pulling through.
Keep on Groovin'
You've totally got the rhythm now! This is the fun part where you see that beautiful, textured braid start to form. Continue that gentle, alternating dance down the line — a stitch on the top, then a stitch on the bottom, and so on. Your three guide lines are doing all the hard work for you!
The Tidy Finish
Fantastic work! Flip the hoop over and admire the back — you should see wonderfully tidy vertical stitches. To fasten off: slide your needle under the last stitch, then under the one before it. On that second stitch, loop your thread around the needle tip to form a tiny, secure knot. Snip close, and that's it!
That's it. That's the whole dance.
A Little "Oops" and a Big Lesson
I want to show you something that happened as I was stitching the very sample in these photos, and it's the best lesson I can give you.
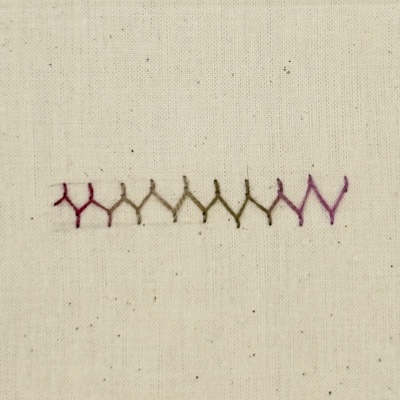
For the first few repeats, I was carefully hitting my top, middle, and bottom guide lines, and the braid is nice and even. But then... I got a little complacent. You'll see the row suddenly widens — that's where I missed hitting the bottom line. A few stitches later, it widens again where I missed the top line too.
Instead of unpicking it, I left it in as a reminder. This little "oops" is the perfect visual for why sticking to those guide lines is so useful. They are your ticket to a neat, even braid, while veering off-course gives you a more organic, freeform look.
Help! Why Does My Stitch Look Like Barbed Wire?
Are you following the guide lines, but your stitch is coming out flat, with sharp little spikes? Does it look less like a delicate braid and more like a tiny, embroidered strand of barbed wire?
The Cause
This "barbed wire" effect happens when you bring your needle up on the centre guide line every single time, instead of in the space between the lines.
The Simple Fix
After the starting point, your needle should always come up in the empty space — halfway between the top and middle lines, or halfway between the bottom and middle lines. This lets the stitches overlap and weave together, creating that beautiful braid.
Your Cretan Stitch Adventure Begins!
You've done it! You've learned the rhythm, sidestepped the "barbed wire" pitfall, and mastered a beautiful new stitch. But this is just the beginning. The Cretan stitch is a superstar in crazy quilting and for adding unique textures to any project.
Here are a few ideas to get your own creativity flowing:
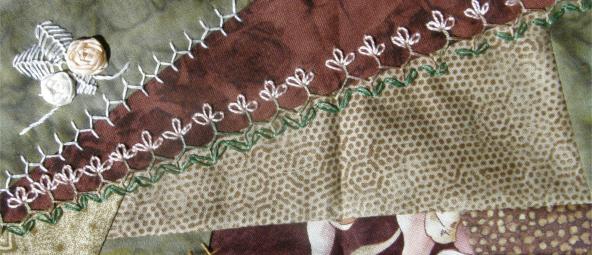
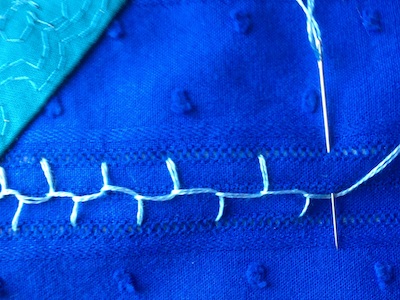
Simple & Elegant Seams
As you can see on this crazy quilt block, just a single row of Cretan stitch along a seam is beautifully effective. It creates a clean, textured braid that adds a touch of handmade elegance all on its own.
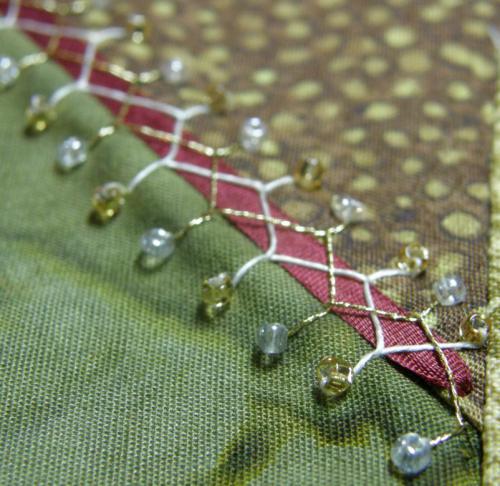
A Touch of Sparkle
Try adding a tiny seed bead to the tip of each "arm" of the stitch. You can even stitch two overlapping rows and add beads. It's such a simple touch, but it catches the light beautifully.
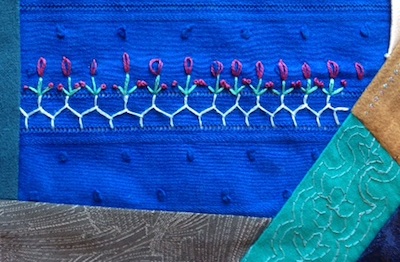
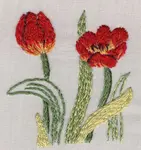
Stitch a Whimsical Garden
Use your Cretan stitch as a vine and add other stitches to create flowers and leaves. I added straight stitches in green, topped with lazy daisy and French knot buds. Try different combinations to grow your own garden!
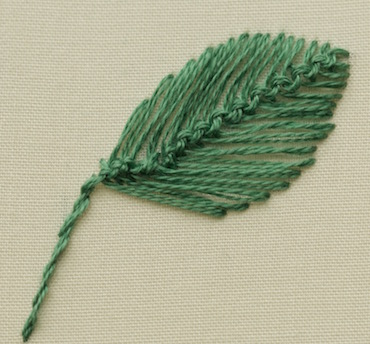
Create Leaves with a Raised Vein
Draw a simple leaf shape and fill it with tightly packed Cretan stitches. The central braid creates a perfect "vein" for the leaf, giving it a wonderfully natural texture.
Three guide lines. One simple rhythm.
That's the whole secret.
You might like these
Chevron stitch embroidery tutorial with step by step photos
Learn the correct way to work chevron stitch embroidery and discover interesting new ways to use it in your next needlework project
A Beginner's Guide to Split Stitch for Lines and Fillings
Learn how to embroider with split stitch! This step-by-step guide shows you how to create smooth outlines and filled shapes for your embroidery projects
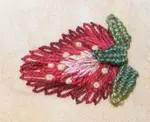
Lazy Daisy Stitch Embroidery: How to Stitch a Sweet Strawberry
With our how-to guide, you'll learn that lazy daisy stitch is not just for flowers! Get creative and stitch a sweet strawberry project

Stay connected between projects
If you’d like occasional updates from my embroidery room, including new patterns, gentle tips, and little things I think you might enjoy, you’re warmly invited to join the Stitchin’ Times newsletter.
About Me - Contact Carol - Privacy Policy - Site Map - Testimonials
Please do not copy the content of this site. It is protected by Copyscape.
Copyright © 2006- www.needlework-tips-and-techniques.com All rights reserved