- Home
- Basic embroidery stitches
- Couching Stitch
STITCH TUTORIAL
Couching Stitch: The Secret to a Harmonious Embroidery Session
Lay it down, tack it in place, and open up a world of texture — this might be the most versatile stitch you'll ever learn.
A Happy Marriage (and a Quieter Evening)
There I was, settled into my favourite chair, happily stitching away, when my other half glanced over and said — with feeling — "Can you STOP making that noise?"
The culprit? A chunky yarn being dragged through tightly hooped fabric. Every stitch made a pop and a scrape. Not exactly the peaceful evening I'd had in mind.
That's when I discovered couching — and suddenly, everything changed. No more wrestling thick threads through the fabric. No more noise. Just smooth, satisfying stitching.
So What Exactly Is Couching Stitch?
Couching is beautifully simple. You lay a thicker thread, cord, or ribbon on the surface of your fabric, then use a finer thread to secure it with small stitches over the top. The thick thread stays on the surface — it never has to pass through the fabric at all.
It's like tacking down a ribbon with invisible tape. The result? You can use threads that would never fit through a needle eye, add texture and dimension to your work, and do it all without any friction or noise.
A Stitch With History
Couching might feel like a simple, practical technique — lay a thread down, tack it in place — but it has a remarkable past.
In medieval England, a specialised form of couching called Opus Anglicanum made this country's embroidery famous across Europe. The technique used underside couching, where gold thread was laid on the fabric surface and secured from beneath. On the front, the gold formed a chevron pattern that resembled satin stitch. On the back, you'd see parallel linen threads with gold encircling them — the stitcher worked entirely from underneath to keep the surface smooth and unbroken.
The finest surviving example is the Syon Cope, a ceremonial cloak from the late 13th century. Every inch of the linen ground is hidden under gold and coloured silk, with scenes from the life of Christ framed in interlacing quatrefoils. The craftsmanship is extraordinary — and at its heart, it's couching.
Fibres You Can Couch Down
One of the joys of couching is the sheer range of materials you can use. If it sits on fabric, you can couch it.
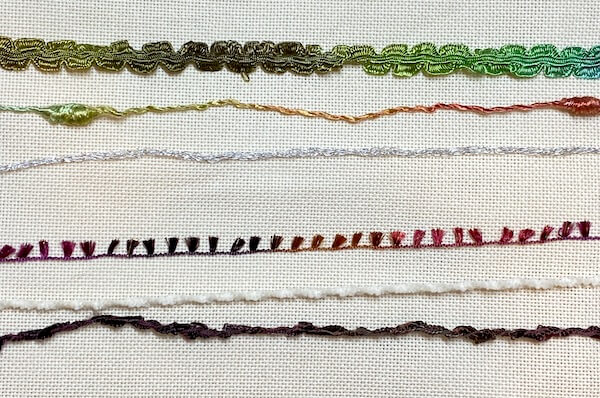
Cords and braids — thick, rope-like threads that add depth and dimension, or decorative trimmings in various colours and styles.
Chunky metallic threads — add sparkle without the struggle of pulling them through fabric.
Flat and tubular ribbons — available in all widths and colours for bold, graphic effects.
Bouclé and bobbly yarns — textured, playful threads that create interest all on their own.
Faux fur and Arctic Rays — soft, fluffy materials for realistic fur or shimmery fringe effects.
Beaded, sequinned, and Estaz threads — ready-made texture and sparkle, from seed bead flower petals to tinsel-like festive accents.
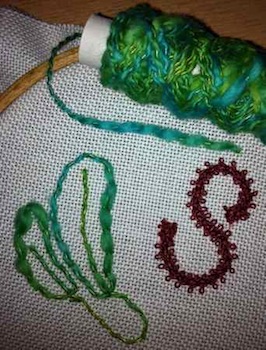
The Impact of Colour Choices
The thread you use to secure the couched fibre is just as important as the fibre itself. You have two main approaches:
Contrasting Colours
A vibrant cord secured with fine white floss creates a bold, defined look. Picture a red cord with white couching stitches — it gives a festive candy-cane effect.
Harmonising Colours
Match the couching thread to the laid thread and fabric for a seamless, subtle finish. Beige threads on neutral fabric with tan couching virtually disappear.
Get Creative With Your Couching
Couching doesn't have to follow straight lines. Use a disappearing ink pen to trace a guide, or go completely freeform — swirls, spirals, gentle curves, whatever takes your fancy.
You can also layer couched threads, crossing them over each other for a checkerboard effect, or fold the thread back on itself at the end of each row — like a hairpin turn — using different colours for each layer.
Couching Stitch Techniques
The basic method is straightforward: bring your securing thread up on one side of the laid thread, take it over the top, and go back down on the other side. A tiny straight stitch, repeated along the length. If you reuse the same holes, the stitches become almost invisible.
Where it gets interesting is in the spacing and arrangement:
Even spacing — regular intervals for a neat, controlled look.
Random placement — scattered stitches for a looser, more organic feel.
Brickwork pattern — alternate the position of stitches in adjacent rows so they offset like bricks in a wall.
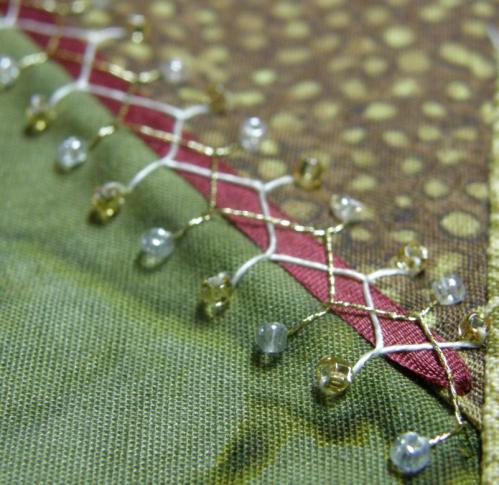
Diaper patterns — in goldwork, silk couching stitches are arranged in geometric patterns over gold threads to create surface texture.
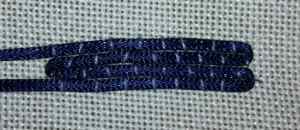
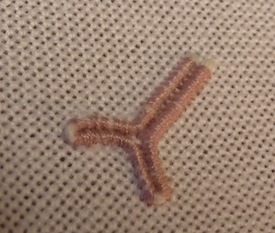
Raised Cording and Stumpwork
When you place your couching stitches very close together, they hide the thicker thread underneath entirely — creating a smooth, raised line on the surface. This is raised cording, and it's perfect for fine details like stems, tendrils, or tiny features.
Picture stitching a tiny bird's foot. Each toe is a length of cord, held in place with closely packed couching stitches that cover the cord completely. The result is a neat, three-dimensional line with real presence.
This same principle is used in stumpwork — the raised embroidery technique where motifs are padded and built up to create miniature sculptures on the fabric surface.
Bokhara Couching
Bokhara couching takes things a step further. You lay horizontal stitches across an area and then work tiny securing stitches over them, creating a woven appearance — like stitching and weaving at the same time. The effect is a rich, textured surface that's surprisingly quick to build up.
Couching With Other Embroidery Stitches
Who says you have to use plain straight stitches? You can secure your couched thread with all sorts of embroidery stitches for completely different effects:
Cretan Stitch
Creates a beautiful undulating line — perfect for securing ribbons on crazy quilt blocks.
Herringbone Stitch
Diagonal crossing stitches add a decorative zigzag over the laid thread.
Chain Stitch
Worked down the middle of a ribbon for a playful, whimsical finish.
Couching in Needlelace
Couching plays a surprising role in needlelace. A double thread is laid over the design outline and secured with tiny stitches through the pattern layers and a folded fabric pad. This is called laying a cordonnet.
Here's the twist: the couching stitches are temporary. Once the decorative stitching is complete, the couching is removed and the lace lifts free from the fabric — a piece of free-standing lace that exists entirely on its own.
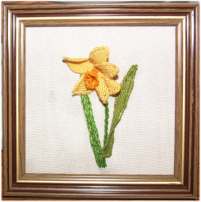
If you'd like to try it, I have tutorials for a flat heart and a 3D daffodil that walk you through the process step by step.
Tips for Couching Success
Securing the Ends
For thinner braids, thread them through from the back and leave a short tail. For thicker fibres that won't pass through, position the end on the surface and secure it with tiny stitches in a matching colour. You can camouflage the ends under other embroidery or tuck them behind a button.
Think About Durability
Couching is best for decorative pieces and special occasions rather than items that get heavy use. The long surface threads can snag, and the tiny securing stitches may break with rough handling. Save it for pieces that will be admired rather than manhandled.
Now Go and Play
You've got a technique that's beginner-friendly, endlessly versatile, and — if your household is anything like mine — a whole lot quieter than the alternative.
Grab a thread that makes you smile, lay it down, and stitch it home.
More Stitches to Explore
French Knots
Master the knot that terrifies beginners — it's easier than you think.
Learn French knots →Bullion Knot Stitch
Create roses and flowers with this beautiful wrapped stitch.
Learn bullion knots →Woven Picots
Embroider realistic petals and leaves with this elegant technique.
Learn woven picots →Gobelin Stitch
Slanted, encroaching, and interlocking variations for canvas work.
Learn Gobelin stitch →You might like these
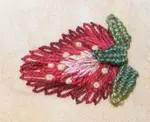
Bullion Knot Stitch Tutorial: How to Make Roses & Flowers
Learn bullion knot stitch with step-by-step photos. Make embroidered bullion roses, strawberries, flowers. Includes tips for perfect wraps every time
Woven picots: How to Embroider Realistic Petals and Leaves
Learn how to create stunning woven picots with this step-by-step guide! Perfect for adding texture and dimension to your embroidery projects
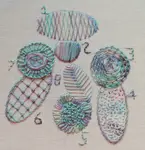
Learn Hand Embroidery Stitches for Textured Fills
Learn hand embroidery stitches to fill shapes with texture and confidence. Follow Carol's step-by-step photos to practise new stitches at your pace.
Stay connected between projects
If you’d like occasional updates from my embroidery room, including new patterns, gentle tips, and little things I think you might enjoy, you’re warmly invited to join the Stitchin’ Times newsletter.
About Me - Contact Carol - Privacy Policy - Site Map - Testimonials
Please do not copy the content of this site. It is protected by Copyscape.
Copyright © 2006- www.needlework-tips-and-techniques.com All rights reserved