- Home
- Stumpwork
STUMPWORK EMBROIDERY
Stumpwork: Embroidery That Comes to Life
A guide to the four techniques that lift your stitching off the fabric — padding, raised stitches, slips, and wired shapes
The first time you see stumpwork up close, something clicks. A petal lifts away from the fabric. A tiny basket has real depth. A leaf catches the light at an angle that flat embroidery simply can’t match. It’s the moment you realise that stitching doesn’t have to stay flat.
Stumpwork is raised embroidery — three-dimensional needlework that uses padding, detached elements, and wire-edged shapes to build texture and depth into a design. It dates back to 17th century England, and it’s still one of the most rewarding techniques you can learn today.
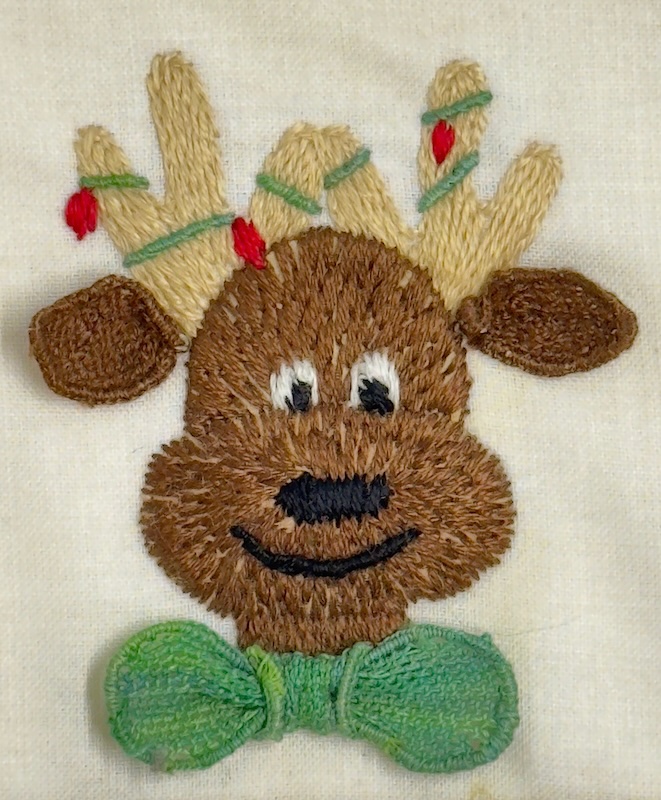
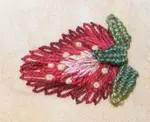
Stumpwork reindeer — combining padding with needlelace
This guide walks you through the four core techniques: padding (with thread or felt), raised stitches, fabric slips, and wired shapes. Together, they give you everything you need to start adding a third dimension to your embroidery.
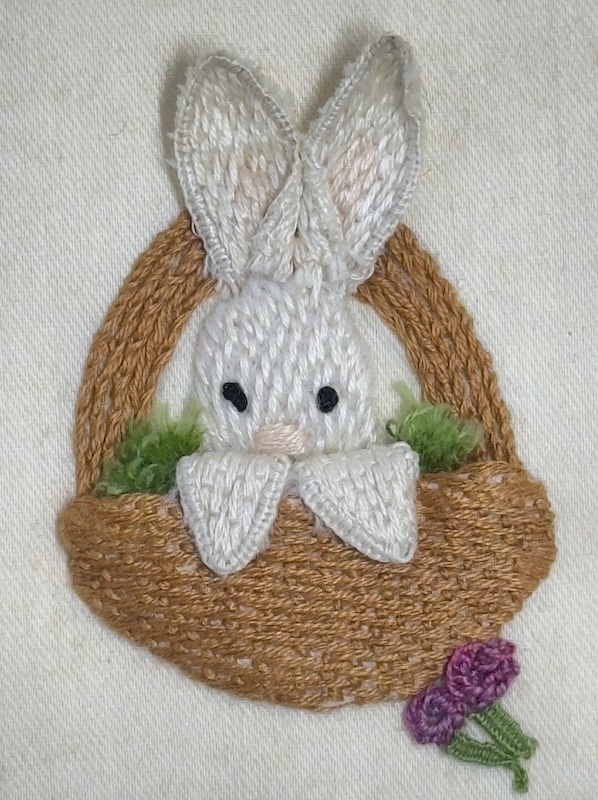
You’ll want a solid grounding in basic embroidery stitches before you begin. And when you’re ready to put these techniques into practice, my free stumpwork tutorial lets you stitch a bunny in a basket using several of the methods covered here.
A Little History
Stumpwork began in 17th century England, initially reserved for sacred items and religious vestments. It quickly found its way into homes, where it became a prized decorative art.
One of the finest surviving examples is a stumpwork box embroidered by Hannah Trapham in 1671, now on display at the National Trust’s Sudbury Hall in Derbyshire. It features animals, flowers, fruit, and scenes from the story of Jacob’s Ladder — all raised from the surface in remarkable detail.
In the past, children learned stumpwork as part of their needlework education. Many museum pieces, including those in the V&A in London, bear the child’s age as a record of their work. It was valued not just as art but as a way to develop patience and fine motor skills.
Today, stumpwork continues to fascinate stitchers. The techniques haven’t fundamentally changed — what worked in the 1600s still works now — but the creative possibilities are wider than ever.
What You’ll Need
Nothing too specialist — most of this you may already have in your stash.
- An embroidery hoop or frame
- Background fabric — plus spare fabric for working slips
- Felt for padding (craft or wool felt, in colours to match your threads)
- Embroidery threads — stranded floss for surface stitching, soft cotton (like DMC Soft Cotton) for padding
- Embroidery needles
- Soft wire for shaping (26–30 gauge jewellery or florist’s wire)
- Sharp embroidery scissors — plus a separate pair of wire cutters (never cut wire with your good scissors!)
Padding
Padding is the simplest way to add dimension. You build up layers underneath your stitches — either with thread or with felt — so the surface stitching sits raised above the fabric. There are two approaches, and you’ll often use both in the same project.
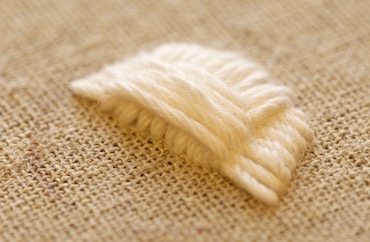
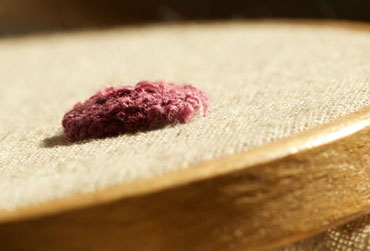
Padding with Thread
To create a soft, raised foundation, sew several layers of stitches back and forth across the area you want to lift. Build up more layers in the middle for extra height, and fewer at the edges for a gradual slope.
In this example, I used cream DMC Soft Cotton for the padding layers. Half of the design has three extra layers in the centre, adding noticeable thickness.
Once the padding is in place, cover it with satin stitch for a smooth, polished finish. The stitches glide over the raised surface and catch the light beautifully.
By placing the padding off-centre rather than building a dome, I was able to create the gentle slope of a hill descending towards a river — a subtle shape that flat satin stitch alone could never achieve.

Padding with Felt
For a firmer, more defined shape, use felt. Cut three pieces of felt in the shape you need, each one slightly smaller than the last. Start by stitching the smallest piece in place, then layer the medium piece on top, then the largest.
Use matching-coloured felt and small stitches with matching floss to attach each layer. Don’t worry too much about these holding stitches — they’ll be covered by your surface embroidery.
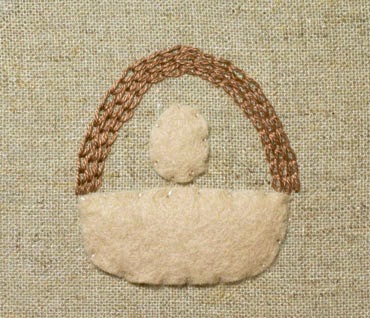
Graduating the layers like this means that even if your surface stitches don’t fully cover every edge, the felt won’t peek through. The result is a solid, rounded shape with real presence.
I padded the basket in my stumpwork bunny tutorial using this method — you can stitch it yourself if you’d like to practise.
Raised Stitches
Some embroidery stitches are designed to stand away from the fabric surface. Stitches like raised fishbone, raised buttonhole flowers, and velvet stitch all create three-dimensional texture — their names give you a clue about what to expect.
Raised Stem Band
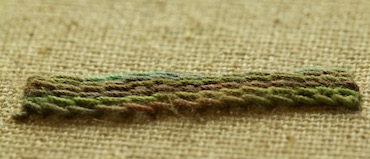
Stem stitches on their own lie flat, but add a foundation underneath and they become beautifully raised.
Start by working straight stitches across the width of your shape, evenly spaced and parallel. These are your foundation bars. Then rotate your work 90 degrees and start weaving rows of stem stitch over the bars — slide your needle underneath each foundation stitch without piercing the fabric.
If you want to secure the stem stitches, you can occasionally catch a foundation bar, but only when needed.
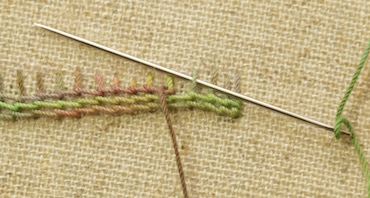
The finished band has a gorgeous rope-like texture that really catches the light. For even more height, try placing padding threads beneath the foundation stitches before you start the stem stitch rows.
For a full walkthrough of the stitch itself, see my stem stitch tutorial.
Detached Stitches
Detached stitches — stitches that are only anchored to the fabric at certain points — add lovely texture and movement. The needlewoven picot is a great example: it creates a tiny pointed leaf or petal that stands free of the surface. I use it in my stumpwork bunny project for the carrot tops.
Fabric Slips
A slip is a piece of embroidery worked on a separate piece of fabric and then attached to your main project. It’s perfect for elements that need a different background or a slightly raised, appliqued look.
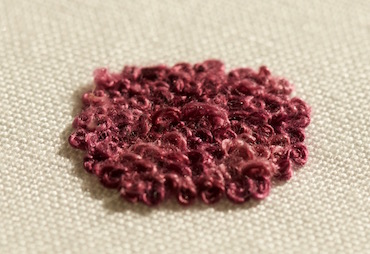
Work your embroidery on the separate fabric first. French knots are an excellent choice — they naturally create a raised, textured surface that works beautifully as a slip.
Complete the stitching before you think about cutting anything out.
Once you’re happy with the stitching, trim carefully around the shape, leaving a small margin of fabric. Fold the raw edges underneath so you get a neat outline.
Take your time with this step — a clean edge makes all the difference when you attach it to the main piece.
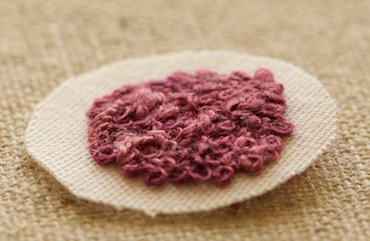
Position the slip on your main fabric and stitch it in place with small, invisible stitches around the edge.
For extra dimension, tuck a little soft cotton thread beneath the slip before you close it up. This gives a subtle lift that makes the element stand out even more from the background.
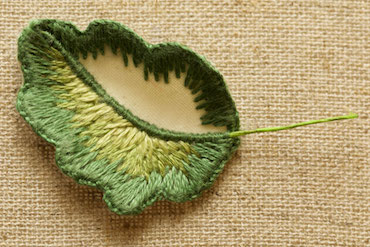
Wired Shapes
When you want an element to truly stand proud of the surface — a leaf that curves, a wing that lifts, a petal with a natural bend — wire gives you that freedom.
Work your element on a separate piece of fabric, just as you would for a slip. Lay a piece of wire along the edge of the shape and hold it in place with couching stitches, then fill the shape with your chosen stitch — I used long and short stitch for this leaf.
Once the embroidery covers the wired edge, carefully trim away the excess fabric with sharp scissors. Be gentle — you don’t want to snip your stitches or the wire. You can also lay wire down the centre as a vein for added detail.
Insert the wire ends through your background fabric and secure them on the back. The finished shape can be bent and positioned to catch the light exactly as you want it.
Frequently Asked Questions
Is stumpwork the same as 3D embroidery?
They’re closely related — stumpwork is a historical style of three-dimensional embroidery that uses specific techniques such as padding, slips, and wired edges.
What kind of wire should I use for wired shapes?
Use a soft, thin wire suited to jewellery or floristry (around 26–30 gauge). It should bend easily and hold its shape without being so stiff that it’s hard to stitch over.
Can I use regular felt for padding?
Yes — craft or wool felt cut into graduated layers works well. Make each layer slightly smaller than the one beneath so the felt doesn’t show through the stitches.
Why is my padding showing through the stitches?
Padding often shows because the underlying layers are too large or the overlay stitches are too sparse. Make each padding layer slightly smaller and work closer, denser cover stitches.
How should I clean and finish stumpwork pieces?
Avoid machine washing. Gently spot-clean or take delicate pieces to a specialist cleaner, and store or frame works flat with acid-free backing to protect the raised elements.
Ready to Put These Techniques into Practice?
Now that you know how padding, raised stitches, slips, and wired shapes work, the best way to make them stick is to stitch something real. Start with the free bunny project, or explore needle lace for even more three-dimensional possibilities.
Free Stumpwork Tutorial
Put these techniques into practice with a guided project — stitch a stumpwork bunny in a basket using padding, slips, and detached stitches.
Stitch the BunnyNeedle Lace
Take your 3D embroidery further with detached buttonhole stitches. Learn the technique with a beginner heart, then try a needlelace daffodil.
Explore Needle LaceYou might like these
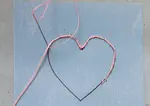
A Detailed Tutorial for Making a Pretty Needle Lace Heart
Learn to create a beautiful needle lace heart with this step-by-step tutorial for beginners. Master corded single Brussels stitch and double Brussels stitch
Stumpwork tutorial - bunny in a basket
This cute little bunny in a basket will help you learn the basics of stumpwork embroidery. Step by step instructions and photographs
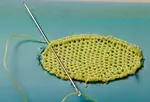
Easy Elegance - Craft a Needlelace Daffodil with These Simple Steps
Embroider your way to spring with this detailed needlelace daffodil tutorial - perfect for beginners and beyond!

Stay connected between projects
If you’d like occasional updates from my embroidery room, including new patterns, gentle tips, and little things I think you might enjoy, you’re warmly invited to join the Stitchin’ Times newsletter.
About Me - Contact Carol - Privacy Policy - Site Map - Testimonials
Please do not copy the content of this site. It is protected by Copyscape.
Copyright © 2006- www.needlework-tips-and-techniques.com All rights reserved