- Home
- Leaf Embroidery Stitches
How to Embroider Leaves: 6 Easy Stitches for Beautiful Leaf Fills
I used to panic when a pattern had dozens of leaves — until I learned six reliable leaf embroidery stitches that solve almost every leafy problem.
Below you’ll find clear step-by-step instructions, photos, and quick tips for when to use each stitch so you can stop defaulting to the same ones every time.
How to Choose the Right Stitch for Your Leaf
Before you even thread your needle, the biggest question is what you want your leaf to look like. Do you want a simple, delicate outline, or a lush, full-colour leaf?
Let’s break down the best stitches for each look.
A Note on Needles and Thread: For most of these stitches, a standard size 7 embroidery needle and 2-3 strands of six-strand cotton floss will work perfectly. I’ll mention any further suggestions in the tips for specific stitches!
For a Quick & Simple Outlined Leaf
My first decision from that box of transfers was a huge relief: no, not every leaf needs to be completely filled in! Sometimes, a simple suggestion of a leaf is even more elegant. These two stitches are my absolute favourites for a quick and satisfying result.
1. The Lazy Daisy Stitch (or Detached Chain)
This was one of the first stitches my grandmother ever taught me, and it’s perfect for tiny, teardrop-shaped leaves. My first attempts were a bit clumsy, but they had a charm all their own.
Here’s the Tip: The secret to a lovely shape is to make your little tie-down stitch at the end super tiny. It just needs to tack the loop down. If you make it longer, your leaf will look spiky (although this can be a fun effect if you want it! See the photo below.)
The Feeling: It’s such a simple stitch, but seeing that little leaf appear is so satisfying, isn’t it? It’s a perfect confidence-booster.
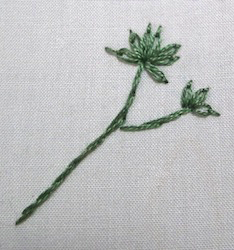
The section from one of my crazy quilt blocks, in the photo below, shows lazy daisy leaves used to decorate freestyle stem stitch tendrils.
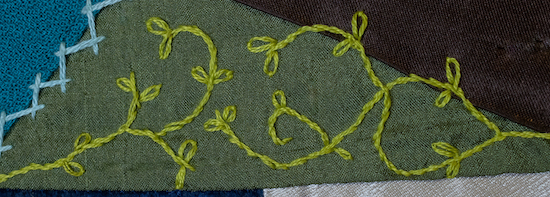 Stem stitch stalks with detached chain stitch leaves
2. The Fly Stitch
The fly stitch is another wonderfully simple way to create a leaf shape. A single, Y-shaped stitch works as a tiny leaf on its own, or you can group a few together for a larger, fern-like frond.
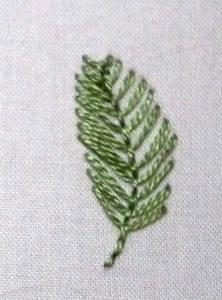
Here’s the Tip: Don't worry about placing every stitch perfectly. Remember, when was the last time you saw a perfectly symmetrical leaf in nature? Let them be a little quirky. For a larger leaf, a slightly thicker thread like Perle cotton #8 works beautifully, but for tiny leaves, stick to one or two strands of floss.
The Feeling: This stitch is so fast, you feel like you’re making progress in no time. It’s ideal for filling a background without spending hours on it.
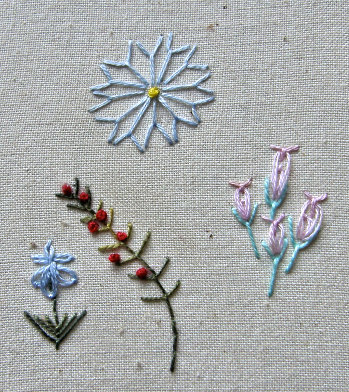
For a Lush, Full-Colour Leaf
Okay, now for the leaves you really want to make a statement with.
For the transfers that featured big, beautiful flowers, I knew the leaves needed to feel just as lush and important. My go-to stitches for a filled-in look are these beauties.
3. The Satin Stitch
Ah, the satin stitch. It's the classic choice for a bold, smooth block of colour. However, it can be a bit tricky. When you work over a larger area, the long stitches can snag.
Here’s the Tip: To keep your satin stitch neat and tidy, first outline the leaf with a split stitch or backstitch. Then, fill it in, working your satin stitches over that outline.
It gives you a wonderfully crisp edge to stitch against!
Another trick for larger leaves is to bring the needle down in the center to create a vein, effectively splitting one big stitch into two smaller ones.
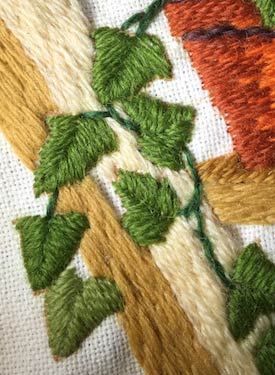
The Feeling: When you get a smooth, shiny satin stitch leaf, it feels like a massive win! It looks so professional and makes your work look incredibly polished.
4. The Fishbone Stitch
This is my secret weapon for creating a leaf with a beautiful, built-in central vein. It’s got a bit of texture and a lovely flow to it.
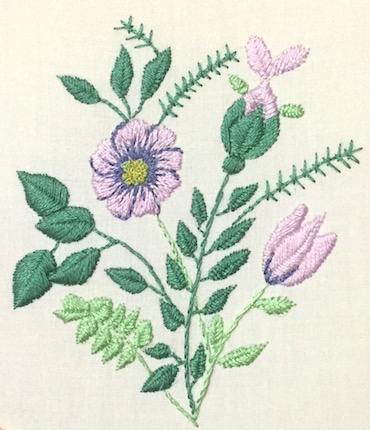
Here’s the Tip: You can change the whole look of the leaf by how you space your stitches.
Place them close together for a dense, full leaf, or leave a little space between them for a more delicate, skeletal look.
The Feeling: The rhythm of stitching fishbone is so calming. Criss-crossing your thread back and forth is wonderfully meditative, and watching the vein form stitch by stitch is just plain cool.
5. The Split Stitch
Don’t underestimate the humble split stitch! While it’s great for outlines, when you pack the rows tightly together, it creates a gorgeous, textured fill that’s almost like a woven fabric.
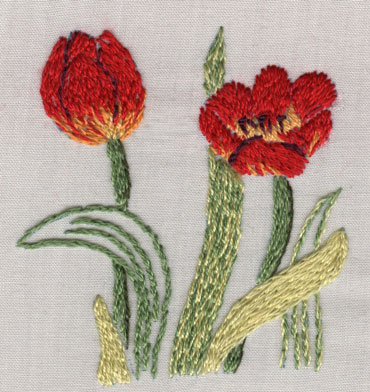
Here’s the Tip: This stitch is fantastic for long, elegant leaves. To keep the texture looking its best, try to be consistent with where you split the previous stitch. Right in the middle is usually best.
The Feeling: This is a wonderfully forgiving fill stitch. Because the stitches are so small and interlocked, it's easier to control than satin stitch, which makes it a less stressful and more relaxing way to fill a larger shape.
For a Leaf with a Little Something Extra
After I'd figured out the basics of outlining and filling the leaves from that vintage box, I started to get a bit more playful.
What if a leaf wasn't just a simple shape, but had a cool edge or a funky texture? That's when I rediscovered the fun of the blanket stitch.
6. The Blanket Stitch (or Buttonhole Stitch)
This stitch is so versatile! Most people think of it for finishing the edges of blankets (the name is a bit of a giveaway!), but it creates fantastic, stylized leaves.
Here’s the Tip: You can use the corded edge of the stitch to your advantage.
If you work two rows back-to-back, with the corded edges facing each other down the middle, you create a fabulous fern-like leaf with a built-in central vein. (This fun arrangement even has its own name: the Barb stitch!)
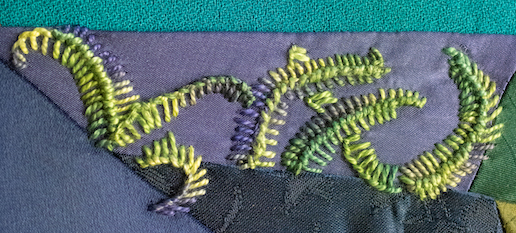
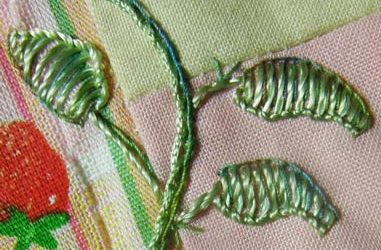
Another Idea: You can create a quirky, folded-looking leaf by working the stitch down one side only.
I remember watching a nature documentary about sundews - those amazing insect-eating plants - and was inspired to create the leaves you see below!
I used a shiny rayon thread for the blanket stitch and then added a simple backstitch line for the other side of the leaf.
The Feeling: This is where embroidery starts to feel like real artistry.
You’re not just filling in a shape anymore; you’re adding character and personality. It’s so much fun to see what kinds of unique effects you can create.
So, Which Will You Choose?
That dusty box of transfers ended up being one of the best gifts I've ever received. It forced me to get curious and turned what felt like an overwhelming task into a joyful experiment.
And now, you have the results of those experiments! You don't have to feel stuck or wonder where to begin.
- Want something quick and delicate? Give the Lazy Daisy or Fly Stitch a try (the tutorial is on my Small Flowers page, but the technique is exactly the same).
- Want a smooth, classic look? The Satin Stitch is your friend.
- Want something with lovely texture? Go for Fishbone or Split Stitch.
- And if you're feeling playful and want a unique, corded edge, the Blanket Stitch is your go-to.
The most important thing is to just pick one and give it a go. Your stitches don't have to be perfect to be beautiful.
Now that you have a guide, which leaf will you stitch first? I’d love to hear!
Stay connected between projects
If you’d like occasional updates from my embroidery room, including new patterns, gentle tips, and little things I think you might enjoy, you’re warmly invited to join the Stitchin’ Times newsletter.


