- Home
- Needlepoint
- Tent Stitch
NEEDLEPOINT STITCH GUIDE
Tent Stitch: Learn Half Cross, Continental, and Basketweave
The most useful needlepoint stitch in three variations — from simple to stunning.
Why the Tent Stitch Matters
Starting needlepoint can feel overwhelming, but the tent stitch is one of the easiest and most useful needlepoint stitches.
In this guide, you'll learn three variations: half cross, continental, and basketweave stitch. These simple, diagonal stitch variations are perfect for both beginners and experienced stitchers, whether you're working on a full design or adding fine details.
However, you may notice a problem that I encountered when I first began — my needlepoint canvas was distorting into a parallelogram instead of staying a neat rectangle!
I soon learned that the way you work the tent stitch affects both the look and durability of your project.
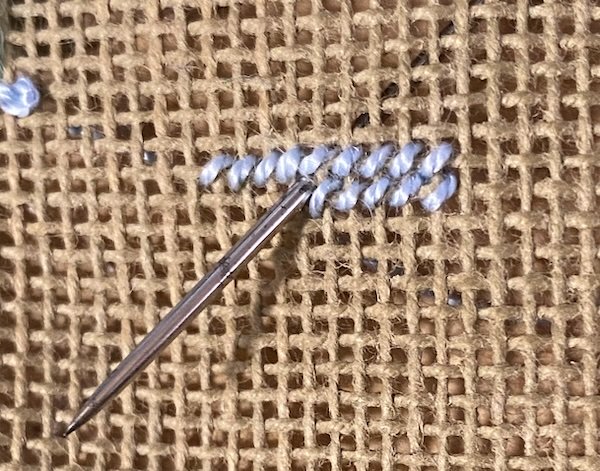
Half Cross Stitch — The Simplest Tent Stitch
The half cross stitch is suitable for items that don't get much wear, like wall hangings or framed pictures, due to minimal yarn on the back.
Before you start stitching, place your canvas in a needlepoint frame. This helps prevent warping caused by uneven tension, keeping your design in perfect shape.
Use a blunt tapestry needle to stitch with as this won't pierce the canvas threads.
As it sounds, this is just the first leg of a cross stitch. To work it follow the guide I gave for cross stitch, without making the return journey.
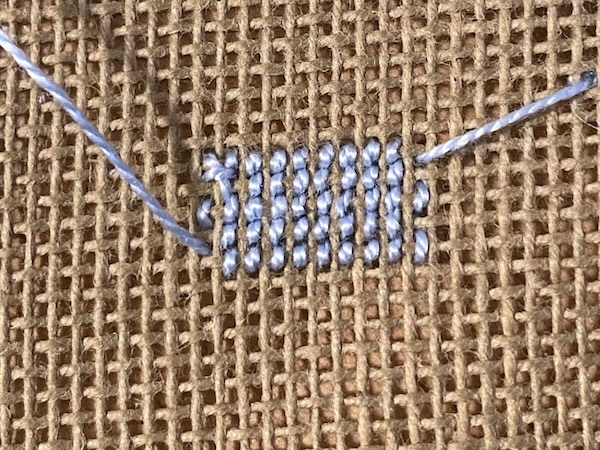
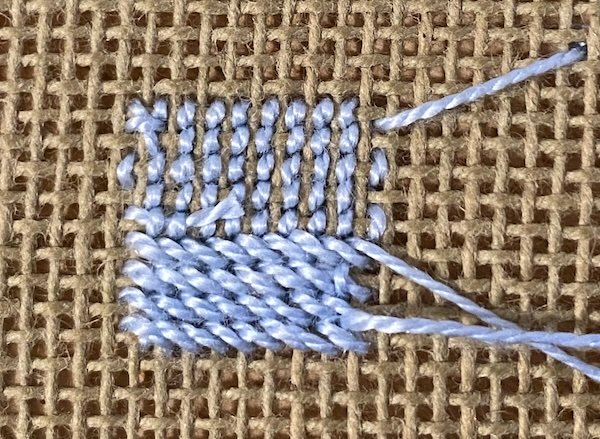
Continental Tent Stitch — More Durable & Versatile
The extra yarn on the reverse of the canvas makes the continental stitch more durable.
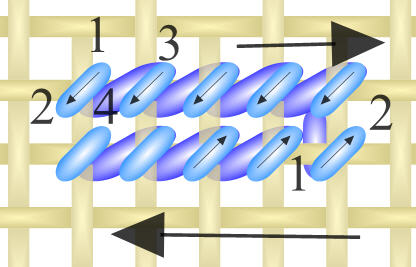
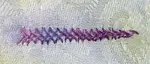
Continental stitch diagram
Start the top row by following the numbering on the diagram. Each stitch is worked in a downwards diagonal direction over 1 canvas thread (top right to bottom left).
Take the needle back up to 3 to start the second, leaving a longer diagonal stitch on the back (as shown by the purple "stitches" on the diagram).
When you reach the end of the row bring your needle up in the row of holes directly beneath your previous stitch. Then, this time working from right to left along the row, continue following the diagram — this time working each stitch in an upwards direction (bottom left to top right).
When checking the back of your work note that all the stitches will "lean" in the same direction — apart from that turning stitch at the end of each row.

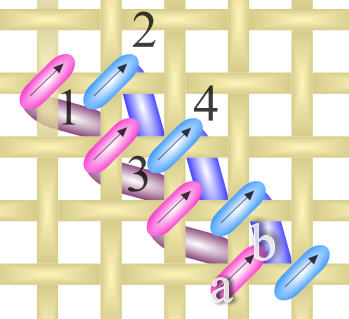
Basketweave Tent Stitch — Best for Large Areas
The neatest method of working tent stitch is with the basketweave stitch. This time you are working in diagonal rows. Start with the blue lines on the diagram.
Basketweave stitch diagram
Each stitch is worked upwards, but the actual row is travelling down the canvas. You will get an almost vertical stitch on the reverse when working down the canvas and a horizontal one on the back when working back up to the top.
As with the method above this way of working does use a little more yarn, and a little extra concentration is also needed.
I have shown the second row in pink. You start with stitch a-b and this time both the stitches and the row are going upwards. The stitches on the back will be almost horizontal.
This variation is named for its basketweave appearance, which forms on the back after a few rows. Check for mistakes by looking for stitches going in the wrong direction, which spoil the weave. Only the stitches where you move to a new row should be diagonal.
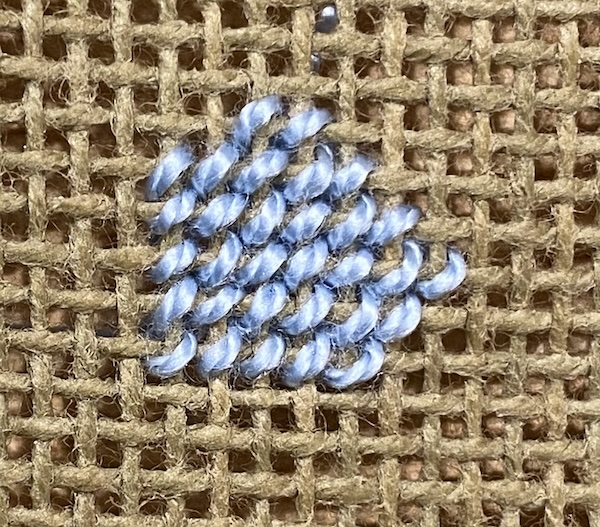

Basketweave preserves the canvas shape while you work but requires more practice. Use it for large background areas, but be prepared to adjust for frequent colour changes.
Which Tent Stitch Should You Use?
Half Cross Stitch
Best for framed needlepoint or decorative pieces where durability isn't a concern.
Continental Stitch
Best for projects that will get more wear, like pillows or bags.
Basketweave Stitch
Best for large areas where you want to maintain perfect canvas shape.
Ready to Try These Stitches?
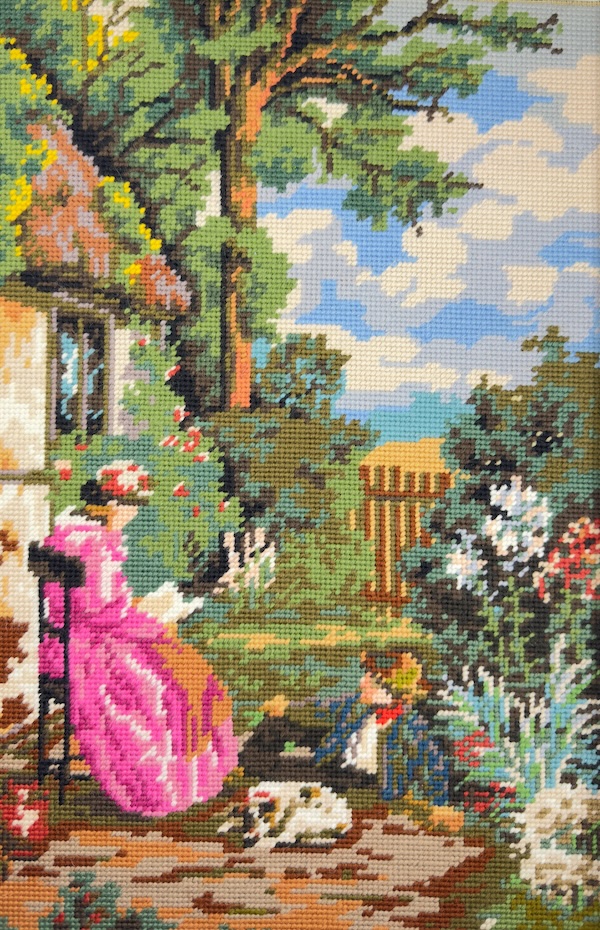
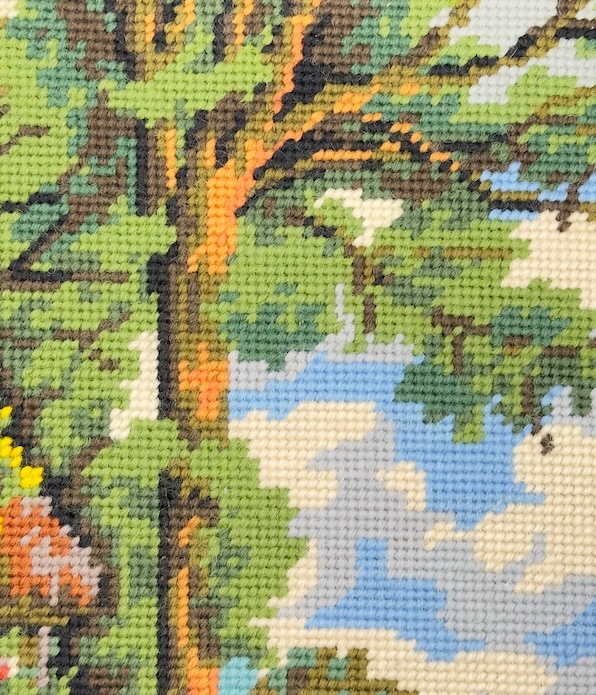
A landscape worked entirely in tent stitch
Now you know all three tent stitch variations, it's time to pick up your needle and canvas. Whether you start with the simplicity of half cross or dive straight into basketweave, the key is to enjoy the rhythm of each stitch.
Want to explore more needlepoint techniques?
You might like these
Couching Stitch Embroidery: Types, Techniques & Designs
Explore couching stitch embroidery with easy step-by-step photos. Discover different types, creative designs, and add stunning texture to your projects.
Which hand embroidery stitches are best for stems and twigs
A selection of hand embroidery stitches that are ideal for outlining shapes or stitching stems, branches, twigs, vines and even seaweed.
How to Do Herringbone Stitch: Embroidery Step-by-Step
Step-by-step herringbone stitch tutorial for hand embroidery. Clear photos show how to keep stitches neat and avoid tangles. Includes variations.

Stay connected between projects
If you’d like occasional updates from my embroidery room, including new patterns, gentle tips, and little things I think you might enjoy, you’re warmly invited to join the Stitchin’ Times newsletter.
About Me - Contact Carol - Privacy Policy - Site Map - Testimonials
Please do not copy the content of this site. It is protected by Copyscape.
Copyright © 2006- www.needlework-tips-and-techniques.com All rights reserved