- Home
- Basic embroidery stitches
- Knot Stitch
EMBROIDERY STITCH TUTORIAL
A Beginner's Guide to the Coral Knot Stitch (for a Fabulously Bumpy Texture!)
Easy to learn, wonderfully textured, and so much simpler than French knots
That Wonderfully Bumpy Texture? This Is How It's Done
Have you ever seen a piece of embroidery with a wonderfully bumpy, textured line and wondered, "How did they do that?"
Chances are, you were admiring the lovely coral knot stitch.
And I have a secret to share: despite the word "knot" in its name, it's so much easier to master than you might think!
Unlike French knots that are stitched one by one, the coral knot stitch is worked in a row. Once you get into the rhythm, you'll be looking for excuses to add its delightful texture everywhere.
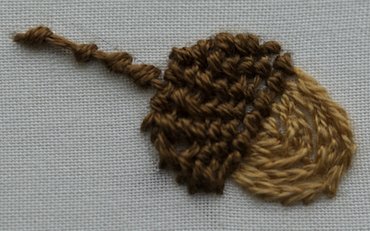
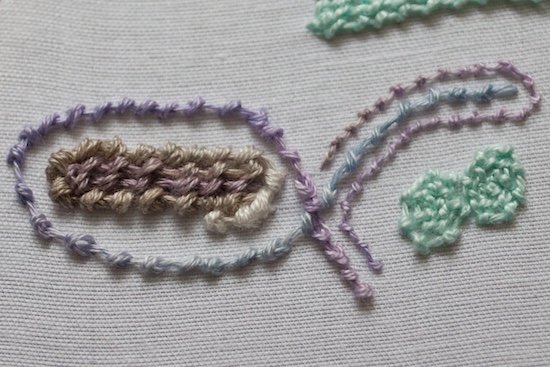
Coral knots used for the acorn cup and stalk
For example, I used rows of coral knot stitch to create the bumpy cap and sturdy stalk for this little acorn. It gives it a wonderful, touchable quality that contrasts so nicely with the smooth chain stitch of the nut itself.
Ready to create your own touchable textures? Let's get started!
Working Coral Knot Stitch
Before we begin, a quick word on supplies.
I find this stitch works up beautifully with a non-stranded thread like a pearl cotton. For this tutorial, I'm using a number 8 so you can see the knots clearly.
You might also find it easier to work this stitch "in the hand" (without an embroidery hoop) so you can scoop up the fabric with your needle. If you do, just be mindful not to pull your stitches too tight, or the fabric might pucker a bit.
Okay, let's make some knots!
How to Learn Coral Knot Stitch
1. Get into position
We're going to work from right to left, which might feel a little quirky at first, but you'll get the hang of it.
To practice, bring your knotted thread up from the back of the fabric at the start of a marked line. While practising you can use a pencil, chalk or disappearing ink pen to draw your line.
2. Take the first scoop
Pop your needle down into the fabric just above your line.
Almost immediately, bring the tip back up just below the line. Don't pull the needle all the way through yet!
3. Tuck the thread under and pull
Take your working thread and lay it over the top of the needle. Now, tuck the thread underneath the needle's tip. It should look like the photo below:
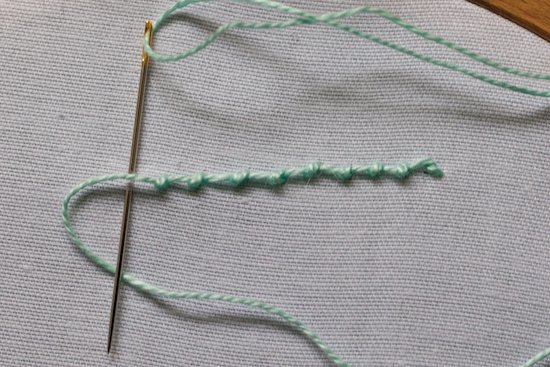
Working a row of coral knot stitch
Gently pull your needle all the way through. Keep a slight, even tension on the thread, and you'll see a neat little knot settle right onto your line.
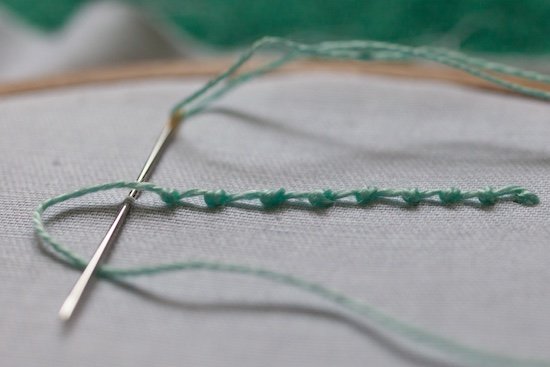
Coral knots seen from the side
Let's Practice Texture
Now that you have the basic movement down, let's play with it. On a scrap piece of fabric, let's practice controlling the texture.
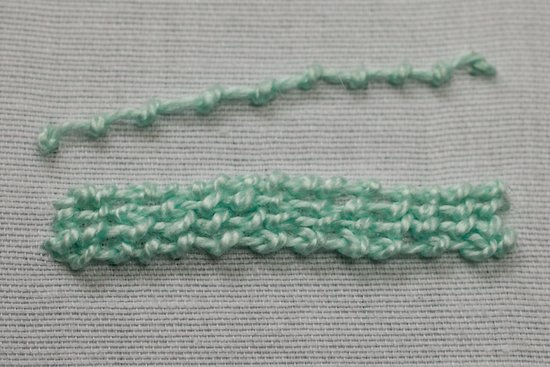
First, stitch a row where you leave a little space between each knot, just like I did in the photo above.
Next, right below that, stitch another row, but this time, snuggle the knots right up next to each other.
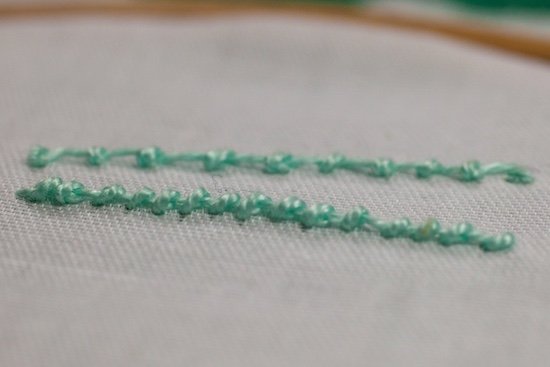
Knots worked close together
Look at that! You've already learned how to create two completely different effects. The first one is great for delicate outlines and stems, while the second creates a bold, thick, rope-like line. How easy was that?
A Creative Playground
Once you're feeling comfortable, you can start using the coral knot stitch to fill in shapes and add personality to your work. This is where the real fun begins!
Playing with Filling
You can stitch rows close together to fill a shape. To change the look, you can try:
- Stacking the knots directly on top of the ones in the previous row
- Alternating the knots (or placing them randomly). This gives a more organic, bumpy feel that's perfect for natural motifs.
- Moving the knot in each subsequent row so it gradually forms a diagonal line. Take a look at that acorn cup up top again. Can you see the spiral effect I was aiming for?
Coral knot stitch worked as a filling
Playing with Thread
Try a hand-dyed thread when filling an area. The subtle colour shifts will give a gorgeous, natural look.
Create a shaded effect by using a slightly different toned thread for each row.
Experiment with thread thickness. A single strand gives a delicate, beaded line, while using a thicker thread (or more strands of floss) creates a chunky, bold texture.
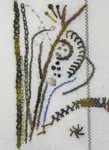
Coral knot sampler
Fun Ways to Use Coral Knot Stitch
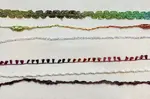
I don't know about you, but I'm a very visual person. I often stitch little samples just to see how things look.
In fact, I made a whole sampler just to compare my favourite stitches for working lines and outlines. It features this lovely coral knot right in the mix! Pop over and see the photo — it's so much easier to choose the right stitch when you can see them all together.
This stitch isn't just for straight lines! It's fantastic for:
Curved Stems & Outlines
Follow any curve to create textured stems and flower outlines with beautiful dimension.
Animal Textures
Create a woolly fleece on a stitched sheep, textured tails for rabbits and squirrels, or any furry friend.
Bold Lettering
Stitch bold, textured lettering — like the "L" I stitched on this crazy quilt block below.
Spirals & Swirls
You can even work it in a spiral! There are no rules here, only creative possibilities.
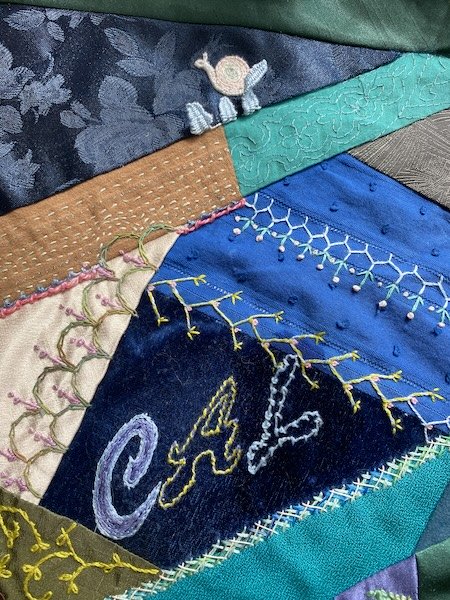
Bold lettering in coral knot stitch on a crazy quilt block
Prefer Individual Knots?
The coral knot stitch is perfect for knotted lines and textured filling. But if you need individual, free-standing knots — for flower centres, scattered dots, or soft toy eyes — the Colonial knot is your best friend. It's more secure than a French knot and won't slip through the fabric.
Go Make Some Beautiful Bumps
Give the coral knot stitch a try. Start with the basics, practice your spacing, and then let your imagination run wild.
You'll be adding fabulous, bumpy texture to your embroidery projects in no time. Whether it's a tiny acorn, a woolly sheep, or bold textured lettering on a crazy quilt — this stitch brings a touchable quality that's hard to resist.
You might like these
Couching Stitch Embroidery: Types, Techniques & Designs
Explore couching stitch embroidery with easy step-by-step photos. Discover different types, creative designs, and add stunning texture to your projects.
Embroidery Stitch Sampler: A Creative Way to Practice and Explore
Discover how an embroidery stitch sampler can help you practice stitches, experiment with techniques, and grow your confidence—no perfection required!
Scotch Stitch Needlepoint Guide: Step-by-Step Tutorial
Learn how to work the Scotch Stitch with our step-by-step needlepoint tutorial, including variations like Alternating and Chequer Stitch

Stay connected between projects
If you’d like occasional updates from my embroidery room, including new patterns, gentle tips, and little things I think you might enjoy, you’re warmly invited to join the Stitchin’ Times newsletter.
About Me - Contact Carol - Privacy Policy - Site Map - Testimonials
Please do not copy the content of this site. It is protected by Copyscape.
Copyright © 2006- www.needlework-tips-and-techniques.com All rights reserved