STUMPWORK STITCH
Woven Picots: Embroidered Leaves That Lift Off the Fabric
A step-by-step guide to creating realistic three-dimensional leaves, petals, and details using just a needle and thread
If you’ve ever wanted to add leaves, petals, or tiny details that actually stand away from the fabric, woven picots are one of the most satisfying stitches to learn. They’re the unsung heroes of dimensional embroidery — simple in principle, endlessly versatile in practice.
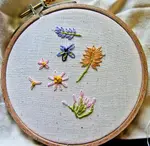
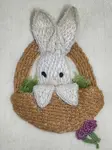
I’ve used woven picots in many of my own designs: the leaves in front of a stumpwork bunny’s basket, sepals on a lazy daisy strawberry, and even sunflower petals. Once you’ve got the knack, you’ll find yourself adding them to everything.
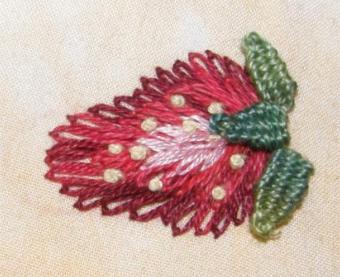
Woven picot leaves on a crazy quilt strawberry
In this tutorial I’ve used Pearl cotton number 8 so you can clearly see what’s happening in the photographs. For a more delicate effect in your actual projects, switch to a finer thread like tatting cotton. Feel free to practise with the Pearl cotton first — getting comfortable with the weaving motion is more important than the thread weight.
For an overview of how woven picots fit into stumpwork, see my stumpwork embroidery guide.
What You’ll Need
Materials for Woven Picots
A minimal kit — you probably have everything already.
- Pearl cotton, embroidery floss, or tatting thread (Fil à Dentelles size 80 for fine work)
- Two needles — one for your working thread, one for a temporary holding stitch
- Embroidery hoop for consistent fabric tension
- Fabric of your choice
Set the Foundation
You’ll need two threaded needles for this stitch. The first holds your working thread; the second is just temporary — any leftover thread will do.
Start with the temporary needle. Make a short vertical stitch as shown in the photo, and secure it by knotting the ends together at the back. This holding stitch sets the tip of your leaf — you’ll remove it once the picot is finished.
Now take your working needle. Bring it up through the fabric at the base of your leaf. The distance between the holding stitch and this point sets the length of your picot.
Slip the needle through the temporary stitch (without going through the fabric), then take it to the back at the base, to one side of where it came up. Bring it back to the front between those two base points.
Slip the needle through the temporary stitch once more to form a triangle shape with a centre line. You’re now ready to start weaving.
The triangle foundation with centre line — needle ready to weave
Begin Weaving
Weave the needle under two threads in one direction and under one thread in the other, taking care not to pierce the fabric beneath.
Keep your initial stitches tight to create a solid foundation at the tip of the leaf. After a few rows, use your needle to gently push the weaving upwards towards the tip, closing any gaps.
This is the rhythm you’ll keep for the whole picot — under two, back, under one, back. Simple and meditative once you find your flow.
The first few rows of weaving at the tip
Shape Your Leaf
Controlling the Width
Continue weaving back and forth, working down towards the base of the leaf.
As you approach the middle — the widest part — ease the tension slightly to allow the leaf to widen naturally. Keep placing stitches close together for a firm, dense picot.
Getting the tension right takes a little practice. It’s a good idea to work a few practice leaves on a scrap of fabric first. Once your hands learn the feel of it, your picots will come out beautifully consistent.
The leaf widens as you ease the tension
Complete Your Leaf
Finishing Off
As you near the base, increase the tension again to taper the leaf back to a neat point.
Keep weaving until you can’t fit any more rows in. Take the needle to the back and secure it — if there’s other stitching nearby, pass the needle under it to fasten off. If not, bring the needle up at the edge of your work where you can secure it later.
Now the satisfying part: snip the temporary holding thread at the tip and gently pull it free. Your woven picot lifts away from the fabric, completely freestanding.
Ready to snip the holding thread and set the leaf free
Tips for Better Picots
Working Over Existing Stitches
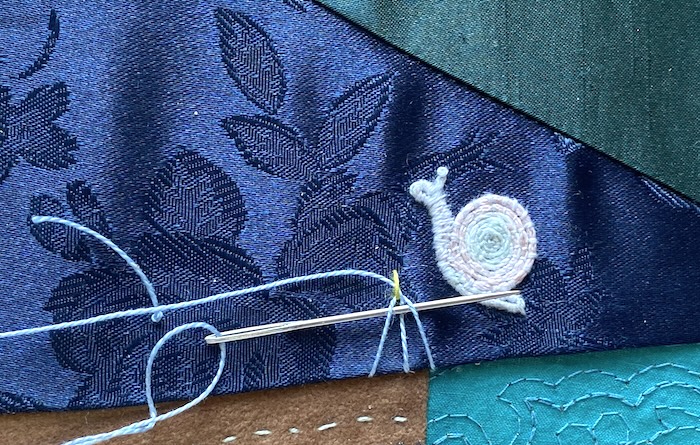
When your picot needs to overlap other embroidery (like the couched snail shown here), weave the needle through the leaf shape further down first, then slide it up into position before tensioning. This stops you from accidentally catching the threads underneath.
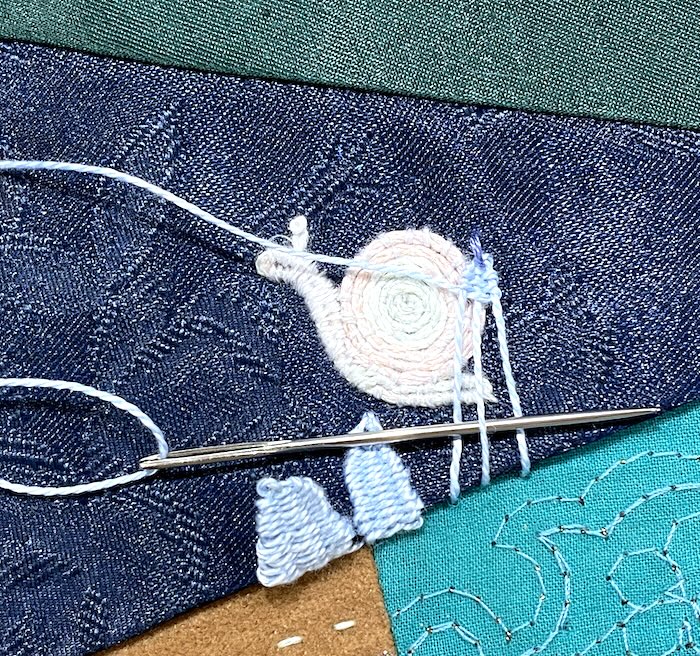
Working a picot over existing stitchery
Anchoring Longer Leaves
Longer picots can twist or move once the holding stitch is removed. To prevent this, secure the tip with a tiny stitch in matching thread after you’ve finished weaving.
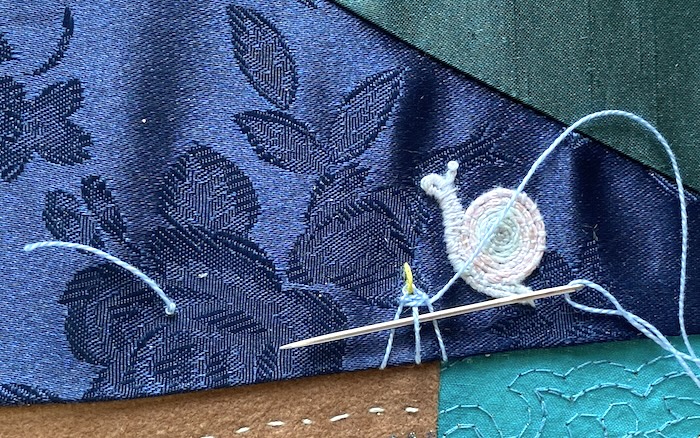
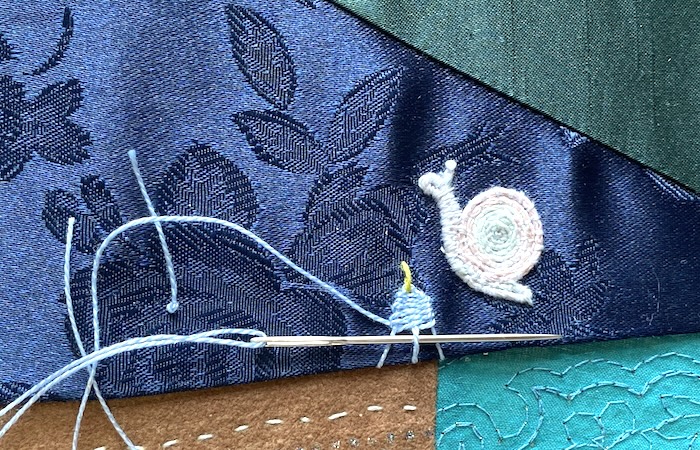
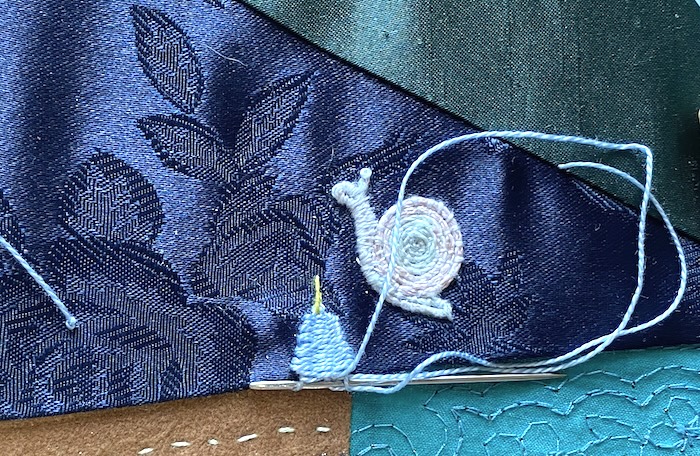
Or leave them loose on purpose — the leaf in the photo below can be moved aside to reveal the snail underneath, adding a lovely interactive 3D quality to the piece.
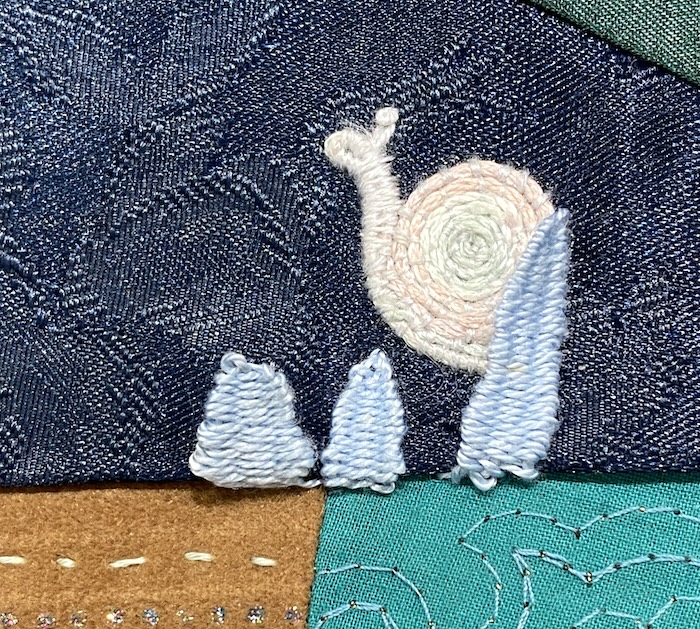
This longer leaf lifts freely to reveal the snail
Creative Uses for Woven Picots
Once you’ve mastered the basic leaf, the possibilities open up. Here are some of my favourite ways to use woven picots.
Leaves in Stumpwork
The most natural use — woven picots make lifelike leaves that lift away from the fabric. Try variegated threads for a natural look. See them in action in my bunny in a basket tutorial.
Petals and Flowers
Adjust the length for roses, daisies, or fantasy blossoms. Make really long ones and roll them up to create circular flowers that stand proud of your work.
Animal Details
Soft bunny ears, fluttering butterfly wings, or a dragonfly’s delicate form. Adjust your tension to shape the overall effect — looser for soft ears, firmer for crisp wings.
More Leaf Options
Woven picots are just one way to embroider leaves. For other approaches, check out my how to embroider a leaf guide.
Troubleshooting Tips
Woven picots are forgiving once you get the feel, but here are the most common hiccups and how to fix them.
- Uneven weaving: Check that you’re consistently going under two threads one way and under one the other. It’s easy to lose track of which direction you’re on — slow down and check each pass.
- Floppy picots: Your tension is too loose. Keep the thread snug as you weave, especially at the tip and base where the leaf needs to be firmest.
- Distorted shape: Too tight. Ease off slightly in the middle section to let the leaf widen naturally. The shape comes from varying your tension, not from pulling harder.
- Longer picots collapsing: For larger leaves, try reinforcing the foundation with fine wire, or stiffen the finished picot with a tiny amount of fabric glue on the back.
More Dimensional Stitching
Now that you can weave a picot, here are some related techniques to try next.
Stumpwork Bunny Tutorial
Put your new picot skills to use — the bunny’s basket has needlewoven leaves just like the ones you’ve practised here.
Stitch the bunny →Stumpwork Techniques
Learn padding, raised stitches, slips, and wired shapes — the full toolkit for three-dimensional embroidery.
Explore stumpwork →Needle Lace Heart
Another beautiful freestanding technique. Learn corded Brussels stitch and double Brussels stitch in this free tutorial.
Try needle lace →Embroidery Stitch Index
Browse all our stitch tutorials — from basic to specialty — with step-by-step instructions for each one.
Browse stitches →Here's what I recommend to work woven picots:
Threads: Fil à Dentelles 80 for delicate picots, or DMC embroidery floss
Needles: Milliner's Needles or Sashiko Needles for weaving
Hoops: Adjustable embroidery hoop for consistent fabric tension
Affiliate links help support this site at no additional cost to you. Thank you for your support!
You might like these
Rice stitch - an easy needlepoint stitch to learn
Try Rice Stitch - one of the simple needlepoint stitches that you can use to give many different effects
How to Embroider Flowers: Easy Stitches, Step-by-Step Photos
Learn to embroider flowers with lazy daisy, French knots and fly stitch. Photos, a French knot video, plus ideas for combining stitches into floral designs.
Stumpwork tutorial - bunny in a basket
This cute little bunny in a basket will help you learn the basics of stumpwork embroidery. Step by step instructions and photographs
Stay connected between projects
If you’d like occasional updates from my embroidery room, including new patterns, gentle tips, and little things I think you might enjoy, you’re warmly invited to join the Stitchin’ Times newsletter.
About Me - Contact Carol - Privacy Policy - Site Map - Testimonials
Please do not copy the content of this site. It is protected by Copyscape.
Copyright © 2006- www.needlework-tips-and-techniques.com All rights reserved