- Home
- Basic embroidery stitches
- Thread Painting
SURFACE EMBROIDERY TECHNIQUE
Thread Painting for Beginners
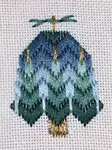
Learn the secrets to smooth shading with long and short stitch — and create a beautiful embroidered flower
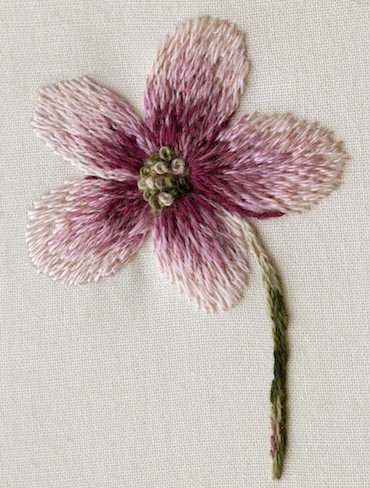
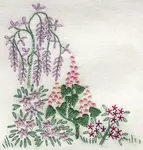
A completed thread painted flower — the project you'll learn to create
Thread painting, commonly known as needle painting or silk shading, is a unique embroidery technique that employs long and short stitches to create exquisite, nuanced works of art on fabric.
Despite the simple nature of the stitches, this technique can be a challenging but rewarding skill to master.
I know this firsthand. I first tried this as a teenager and struggled to get a neat effect.
It wasn't until I returned to it in my fifties that I discovered the incredible beauty that is attainable. It took trial and error, but I learned the secrets to achieving that beautiful, soft shading effect that makes this art form so special.
The Essentials: Techniques and Materials
Before you thread your needle, understanding a few key concepts is crucial for success. Getting these fundamentals right will save you from the most common frustrations.
Choosing the Right Thread
While the term "silk shading" might suggest the use of pure silk, thread painting can be done using various types of threads.
Embroidery Floss
The most common and economical choice. It yields fantastic results and has a soft sheen that is perfect for flower petals or animal fur. This guide uses standard embroidery floss.
Pure Silk
This thread results in exceptionally lustrous and beautiful work, but it is more expensive.
Crewel Wool
Also a popular choice, wool offers a different texture and a softer, more matte finish.
Mastering the Core Technique
The actual stitch in thread painting may seem easy — it's just a straight stitch. However, achieving the blended, seamless effect is where the skill lies.
The Three Things That Make the Difference
The Single-Strand Secret
The number one secret is to use a single strand of embroidery floss. My first failed attempts used three strands, which creates a chunky, uneven result. A single strand allows you to build up colour and shade delicately, like a painter with a fine brush.
Rethinking "Long and Short Stitch"
The term itself can be misleading. In reality, only the very first foundational row features stitches of truly varying lengths. The staggered edge created by this first row is what allows for smoother, invisible transitions between subsequent rows and colours.
Avoid the Gaps
This is the most important technical tip. To create a smooth surface, you must bring your needle UP through the existing stitches of the previous row. If you push the needle DOWN through them, you will create noticeable holes and disrupt the blend.
Step-by-Step Tutorial: Your First Flower
To help you get started, follow this simple tutorial to create a shaded flower petal.
What You'll Need
- Fabric (like a simple cotton or linen)
- 5 shades of embroidery floss (from light to dark)
- A fine embroidery needle with a small eye
- A design transfer tool (like a quilter's pencil or disappearing ink pen)
- An embroidery hoop
Prepare Your Design
I chose 5 shades of Anchor stranded cotton for this sample flower, going from light to dark: 1026, 968, 1016, 1018, 1028.
Transfer a simple design onto your fabric. I sketched a five-petaled flower with a quilter's pencil, which washes out.
Stitching the First Row
Using your palest shade and a single strand of floss, stitch the first row of long and short stitches along the outer edge of the petal.
Vary the lengths of these stitches significantly to create a staggered, uneven inside edge.
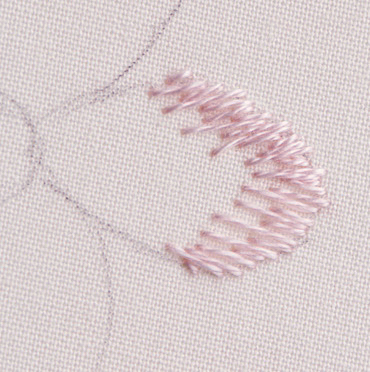
Fig. 1 — The first row of long and short stitch
Creating the Second Row
Using your second darkest colour, work the next row.
Bring your needle UP through the stitches of the previous row, filling in the gaps and blending the two shades. Start your stitches at different points to avoid creating a hard line.
Maintain a staggered bottom edge for this row as well.
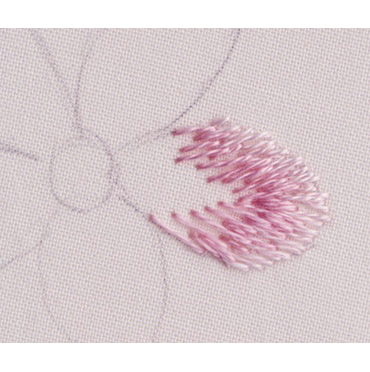
Fig. 2 — The next row of stitches in place
Adding Subsequent Rows
Continue adding rows with your subsequent colours, always directing the stitches towards the flower's centre.
Continue the technique of bringing the needle up through the previous row's stitches to blend the colours smoothly.
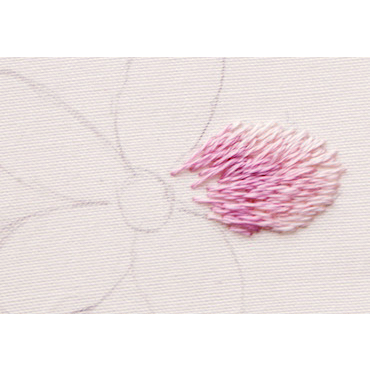
Fig. 3 — Adding the third shade
Completing the Petal
Add your final rows, using the darkest shade sparingly to create shadows and depth.
Don't worry if the outside edge isn't perfectly smooth. You could add a row of split stitch around the petal before you begin, but this isn't necessary for all projects.
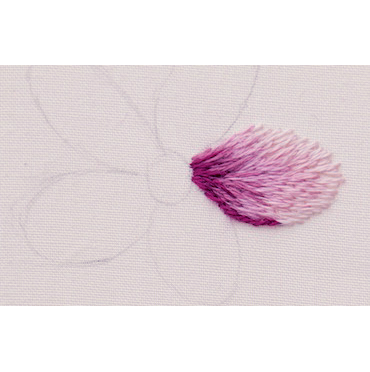
Fig. 4 — The darkest shade in place
Finishing the Flower
Work each petal of the flower in the same way. The photograph at the top of the page shows my completed flower sample. I used a hand-dyed thread to work French knots for the centre and stem stitch for the stem.
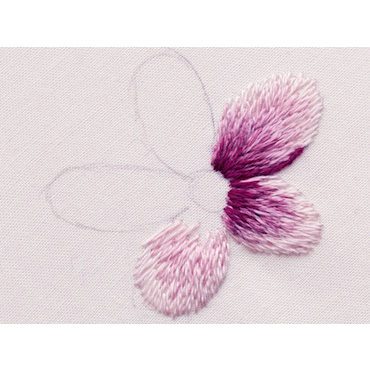
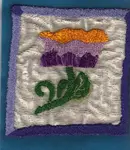
Fig. 5 — Working the third petal
A Word on Practice & Perfection
As you work, don't be afraid to make adjustments. My initial drawing for the flower in this tutorial was rather lopsided, so I adjusted the shape of the petals as I embroidered to make it more balanced.
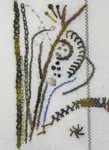
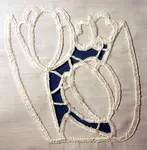
To encourage you to keep trying if at first you don't succeed, I want to show you one of my early attempts. My apologies for the awful drawing!

My first attempt at thread painting
Apart from the drawing, can you spot the fundamental errors based on what we've learned?
What Went Wrong
I used three strands of floss for this attempt, which is why it looks chunky instead of smooth.
You can see the holes where I went down through the existing stitches, instead of bringing the needle up through them.
Every artist starts with an imperfect attempt. This is part of the learning process.
Patience Makes Perfect
Achieving a smooth, painterly finish requires practice and patience. Remember that even the most skilled thread painters started with their first try.
Learn from your mistakes, and soon you will be able to create stunning thread painted masterpieces of your own.
You might like these
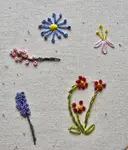
Embroidery Stitch Sampler: A Creative Way to Practice and Explore
Discover how an embroidery stitch sampler can help you practice stitches, experiment with techniques, and grow your confidence—no perfection required!
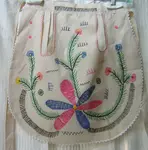
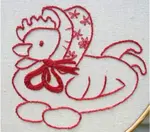
Vintage Embroidery: A Photo Gallery to Inspire Your Stitching
Love vintage charm? Explore this photo gallery of handmade vintage embroidery to inspire your own projects. See how simple stitches create timeless art.
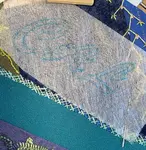
How to Learn Hand Embroidery – Beginner’s Guide and Tips
How to learn hand embroidery for beginners: Discover essential stitches, helpful tips, and easy techniques to start your embroidery journey today

Stay connected between projects
If you’d like occasional updates from my embroidery room, including new patterns, gentle tips, and little things I think you might enjoy, you’re warmly invited to join the Stitchin’ Times newsletter.
About Me - Contact Carol - Privacy Policy - Site Map - Testimonials
Please do not copy the content of this site. It is protected by Copyscape.
Copyright © 2006- www.needlework-tips-and-techniques.com All rights reserved