- Home
- Basic embroidery stitches
- Colonial Knot
EMBROIDERY STITCH TUTORIAL
How to Stitch a Colonial Knot (and Why It Beats the French Knot)
More secure, easier to control, and less likely to unravel — meet the knot you'll wish you'd learned sooner
Why the Colonial Knot Deserves a Place in Your Stitching
French knots are one of the most popular embroidery stitches, but they're also one of the most frustrating.
If yours keep slipping through the fabric or unravelling after washing, you're not alone — and there's a better option.
The Colonial knot uses two twists around the needle in opposite directions, creating a figure-eight that locks securely on the fabric. The result is a slightly larger, more rounded knot that sits firmly on the surface and won't come undone when you wash your finished piece.
Once you try it, you may never go back to French knots again.
French knots (top) compared to Colonial knots
Ready to learn? Let me walk you through it step by step.
Form a Backwards C
The following step-by-step photos show how I worked Colonial knots as part of the decoration on a crazy quilt block.
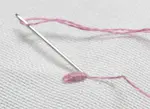
Bring the needle through the fabric in the position you wish to create the knot. Arrange the thread so it forms a backwards letter C to the right of the point where the thread comes through the fabric. Slip the needle under the thread from right to left as shown in the photograph.
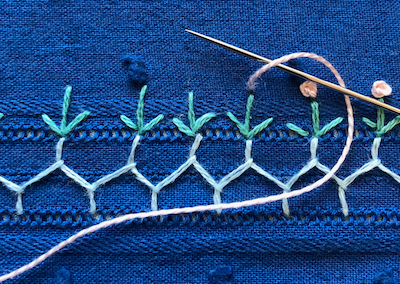
Step 1 — Slip the needle under the thread from right to left
Create the Figure Eight
Take the working thread and lay it over, then under the needle point, to create a sort of figure eight. Pull the thread towards your body firmly but gently.
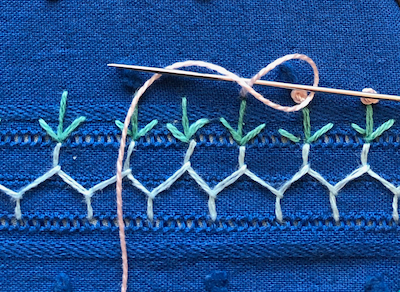
Step 2 — The thread wraps over, then under, to form a figure eight
Push Through and Secure
Angle the needle straight down into the fabric, while keeping tension on the working thread. Push the needle down through the fabric, not letting go of the thread until the last minute. This will ensure the Colonial knot is tidy, not loose and floppy.
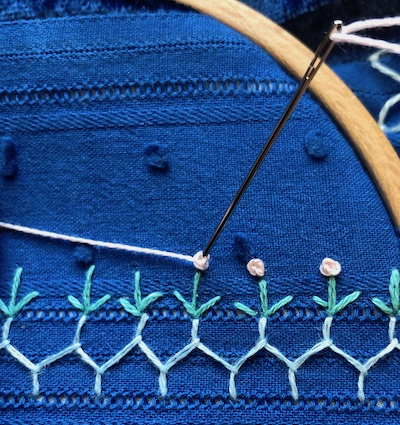
Step 3 — Keep tension until the knot is secure on the fabric
A Ring of Colonial Knots
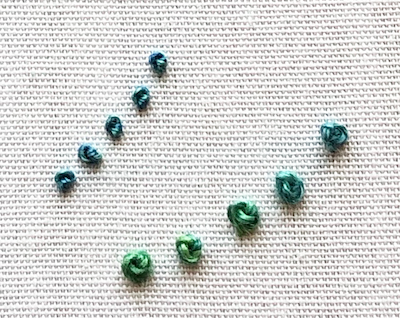
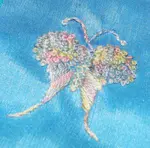
I embellished this printed fabric by stitching a Colonial knot on alternate green dots to form a ring around the rose. It somehow reminds me of a string of pearls. I could use this in a crazy quilt block. The thread used was Pearl Cotton number 8.
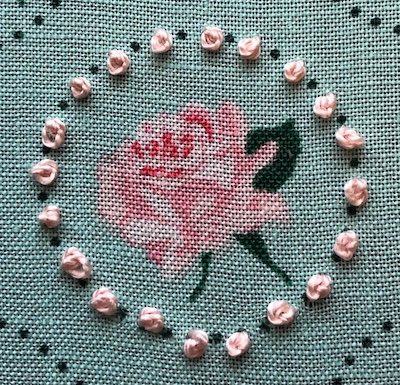
Colonial knots forming a pearl-like ring around a printed rose
Try using Colonial knots to create a similar design element on your own embroidery projects, such as adding texture to a floral pattern or creating a decorative border.
What Are Colonial Knots Used For?
Colonial knots are wonderfully versatile. Here are some of my favourite ways to use them — and if you think of others, let me know and I'll add them!
Candlewicking
A whitework embroidery technique traditionally used on bedspreads, where rows of Colonial knots create beautiful raised patterns.
Cross Stitch Designs
Use them instead of French knots or beads in counted cross stitch patterns for a more textured, dimensional effect.
Flower Centres & Sprays
Perfect for adding realistic dimension to flower centres, tiny floral sprays, and berries in autumn arrangements.
Soft Toy Features
Create safe eyes on soft toys or rag dolls — much safer than buttons or glass eyes for young children. Also great for bunny tails!
Want Knots in a Line?
Colonial knots are perfect for individual placement — flower centres, scattered textures, and decorative dots. But what if you want a continuous line of knots along a seam or design outline?
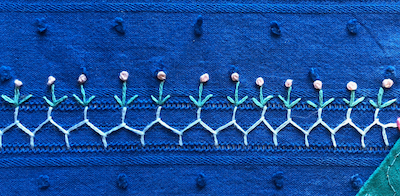
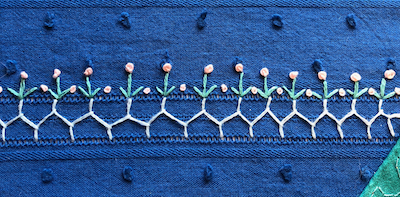
That's where the coral knot stitch comes in. It creates evenly spaced knots along a line of thread, making it ideal for outlines, crazy quilt seams, and decorative borders. Think of it as the Colonial knot's travelling cousin!
The Difference Between the Two Knots
Colonial knots (left) and French knots (right) worked with the same Pearl Cotton 8 thread
On the crazy quilt block photographed above, I used Colonial knots for the top flowers and French knots for the smaller stitches in between the leaves. For both types of knots I used the same thread — Pearl Cotton number 8.
By incorporating Colonial knots into your embroidery projects, you can create more secure and visually appealing designs that will last longer and require less maintenance.
Give the Colonial Knot a Try
If French knots have ever frustrated you, the Colonial knot might just be the answer you've been looking for.
Try using Colonial knots in your next embroidery project to see the difference for yourself. Whether you're adding texture to a floral design, creating decorative borders, or replacing French knots in a cross stitch pattern — you'll love the extra security and the satisfying, rounded finish.
You might like these
Bullion Knot Stitch Tutorial: How to Make Roses & Flowers
Learn bullion knot stitch with step-by-step photos. Make embroidered bullion roses, strawberries, flowers. Includes tips for perfect wraps every time
Which hand embroidery stitches are best for stems and twigs
A selection of hand embroidery stitches that are ideal for outlining shapes or stitching stems, branches, twigs, vines and even seaweed.
French Knot Stitch Tutorial: 4 Easy Steps to Perfect Knots
Tired of messy French knots? Easy embroidery & needlepoint tutorial: the 4-step rhythm and 3 secrets for perfect, tidy stitches that won't pull through

Stay connected between projects
If you’d like occasional updates from my embroidery room, including new patterns, gentle tips, and little things I think you might enjoy, you’re warmly invited to join the Stitchin’ Times newsletter.
About Me - Contact Carol - Privacy Policy - Site Map - Testimonials
Please do not copy the content of this site. It is protected by Copyscape.
Copyright © 2006- www.needlework-tips-and-techniques.com All rights reserved