- Home
- Basic embroidery stitches
- Herringbone Stitch
EMBROIDERY STITCHES
Herringbone Stitch: A Step-by-Step Hand Embroidery Tutorial
That woven, plaited effect is just a simple back-and-forth rhythm. Let me show you the tricks that made it finally click.
I remember deciding to add a herringbone border to a crazy quilt seam, thinking it would be a lovely touch. An hour later, I was staring at a pucker-y, tangled mess.
Apparently it's supposed to resemble a fish skeleton, but mine looked more like a spider had had a very bad day.
It looks so complicated! But I'm going to let you in on a little secret: it's all an illusion. That woven, plaited effect (which, fun fact, is named after a herring fish's skeleton!) happens with a simple, relaxing back-and-forth rhythm.
So if you've ever felt intimidated by this stitch, take a deep breath. I'll show you the simple tricks that made it finally "click" for me. Ready to see what I mean?
The Secret to Neat Herringbone — Two Imaginary Lines
Okay, here's the single biggest tip that changed everything for me. Herringbone stitch is just two rows of slanted stitches that overlap in the middle. That's it.
To keep things super neat, especially when you're starting, it's a huge help to work between two parallel lines. You can gently draw them on your fabric with a removable ink pen, or just use the weave of the fabric as your guide.
Let's stitch a row together. I'm using a piece of cotton fabric and some colourful Perle cotton so you can see what I'm doing.
We will begin our embroidery on the left and work towards the right. However, the needle will actually face left as we work, which might take a little getting used to. Once you get the knack you will find it is really simple.
Step 1
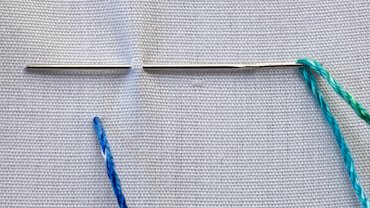
Come up with your needle on the bottom line, over on the left.
Now, look across to the top line. Move your needle slightly to the right, and take a tiny "bite" of fabric on that line, with your needle pointing back towards where you started. The straight stitch you create will actually form on the back of your work.
Pull your thread through and you will have one long slanted stitch on the front of your fabric. See? Not so scary!
Step 2
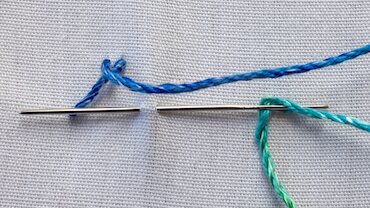
Now for the second half of the magic. Bring your needle down to the bottom line again, a little to the right of where you made your first stitch.
Just like before, take a tiny 'bite' of fabric on that line. The thread will cross over the first stitch... You've officially made a herringbone stitch!
Step 3
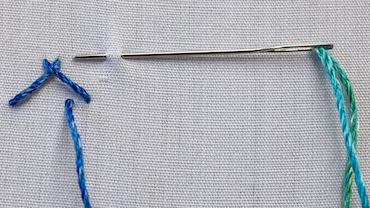
And now... you just repeat what you have done.
- Go up to the top line, take a little bite of fabric (remember to point the needle back towards the beginning).
- Go down to the bottom of the line and do the same movement.
It really is as simple as that!
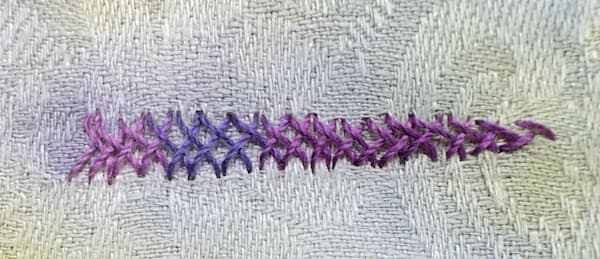
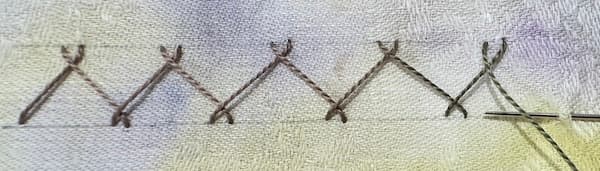
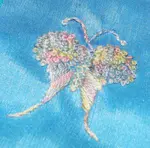
You can even let go of the lines entirely and stitch freehand, like in this example I stitched on fabric I dyed with flower petals.
See? You've done it! That back-and-forth motion becomes so soothing, doesn't it? Now that you have the basic rhythm down, you're ready for the really fun part: playing with it.
Let's Play! Fun Ways to Mix It Up
Now you can start to experiment with the basic stitch to create completely different looks. Think of these as fun experiments, not rules!
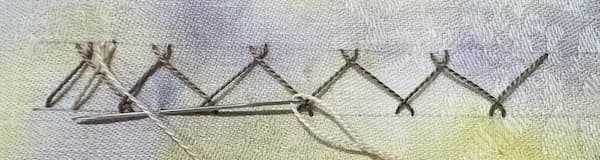
What if we... lace it with a second colour? (Laced Herringbone)
This has to be one of the simplest, most satisfying ways to add a little extra magic to your herringbone row. You're essentially weaving a second thread through your finished stitches without piercing the fabric at all. It's so clever!
Ready to try it?
- First, go ahead and stitch a complete row of your beautiful herringbone stitch in your first colour. All done? Perfect.
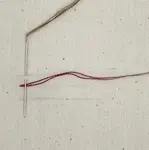
- Now, thread your second colour onto a blunt tapestry needle. (The blunt tip is key here — it helps you glide under the threads without accidentally snagging your fabric or your stitches).
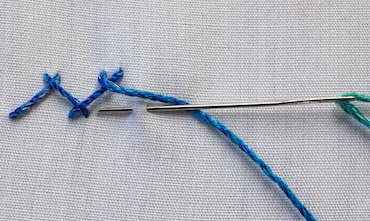
- Bring your needle up from the back, right in the centre of that first tiny horizontal stitch on the far left of your row.
- Gently slide your needle under the first long, diagonal stitch from top to bottom. Remember, don't go through the fabric! You're just weaving.
- Now, move to the next long, diagonal stitch and slide your needle under it from bottom to top.
You've got it! Just keep alternating your direction, weaving your thread up and down through the diagonal stitches all the way along the row. It creates such a lovely, decorative wave with almost zero effort.
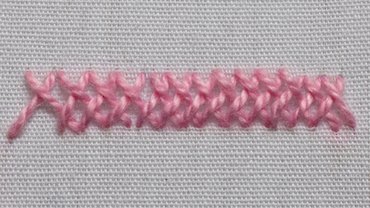
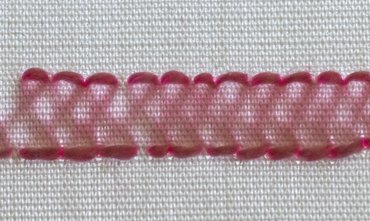
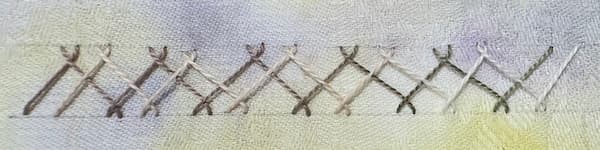
What if we... close the gaps? (Closed Herringbone)
Instead of leaving a little space between your stitches on the top and bottom lines, bring your needle up right next to where it last went down. This creates a beautiful, solid braided line. On sheer fabric, this is known as Shadow Work, because you see a delicate shadow of the stitches from the front!
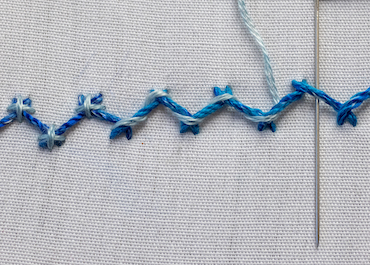
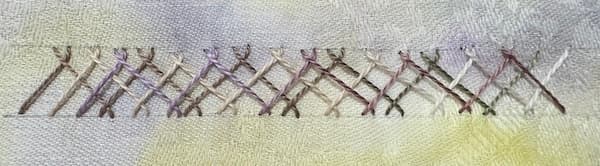
What if we... add another colour? (Double & Triple Herringbone)
This is one of my favourites for adding a pop to a project. Just stitch a second (or even a third!) row of herringbone on top of the first, using a different colour. Just make sure to offset the stitches so they nestle between the first row. It creates such a wonderfully textured effect.
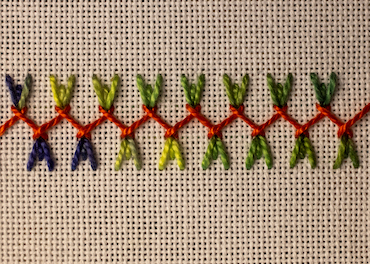
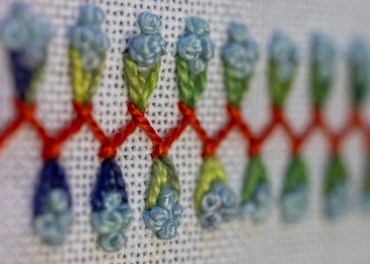
What if we... add some decorations?
Your herringbone row is a perfect base for more creativity. Try adding tiny straight stitches or lazy daisy stitches at the points to look like little leaves. Then pop a French knot in the middle for a flower. Suddenly, your simple border is a blooming vine!
What Will You Stitch First?
And there you have it! From a tangled mess that looked like 'a spider had a very bad day' to a stitch that's beautiful, versatile, and genuinely relaxing to create.
The next time you see an intricate-looking border, you won't think, 'I could never do that.' You'll smile and know the secret is just a simple back-and-forth rhythm.
What will you use your new herringbone skills on first? A quilt seam? The hem of a tea towel? I'd love to see!
Carol
You might like these
French Knot Stitch Tutorial: 4 Easy Steps to Perfect Knots
Embroider a French knot that sits tidy and even, step by step with photos. Plus how to stop the knot pulling through to the back, and tips for needlepoint.
My Secret to Perfect Cretan Stitch | Step-by-Step Tutorial
Tired of messy, wobbly Cretan stitch? Learn my simple secret in this step-by-step tutorial. I even show you my own mistakes to help you succeed!
Chain Stitch Embroidery: Mastering the Basics and Beyond
Whether you're a beginner or an expert, our instructions for chain stitch embroidery will help you create beautiful pieces. Start stitching today
Stay connected between projects
If you’d like occasional updates from my embroidery room, including new patterns, gentle tips, and little things I think you might enjoy, you’re warmly invited to join the Stitchin’ Times newsletter.
About Me - Contact Carol - Privacy Policy - Site Map - Testimonials
Please do not copy the content of this site. It is protected by Copyscape.
Copyright © 2006- www.needlework-tips-and-techniques.com All rights reserved