- Home
- Basic embroidery stitches
- Chain Stitch Embroidery
Chain Stitch Embroidery:
A Versatile and Timeless Technique
Have you ever admired the intricate embroidery on clothing or home decor and wondered how to create those beautiful stitches yourself? Chain stitch embroidery offers an excellent starting point.
Despite its simple appearance, this versatile stitch has been a staple in needlework for centuries, with over 100 variations!
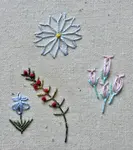
Once you master the basic chain stitch, you can use it for outlining, filling in designs, and even creating stunning curves, like in this eye-catching sun design.

If you're ready to explore the world of chain stitch embroidery, why not start with my free fishy lesson? It includes six different chain stitch variations that will help you add a personal touch to any project.
 Chain stitch garland on a crazy quilt block
Quick Links to help you navigate this page
Basic chain stitch | Whipped chain stitch | Lazy daisy (detached chain)
How to work chain stitch
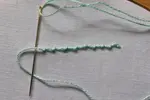
Secure your thread to the back of your work with an away waste knot, and bring the needle through to the right side on the line you want to follow.
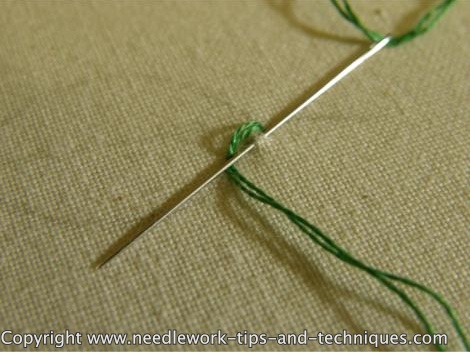
Go back down as close as possible to your starting point and bring the needle back up a short distance along the line of the pattern. Before you pull the needle right through the fabric, make sure that the working thread is underneath the needle.
Then pull the needle through, forming a loop or chain on the surface.
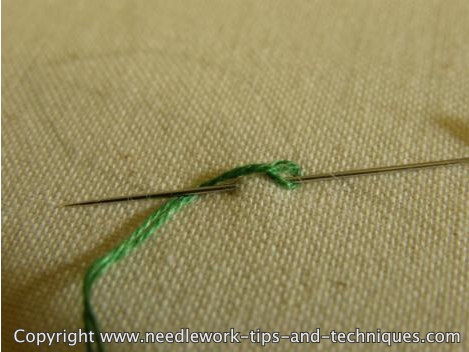
Re-insert the needle, next to where it comes through the fabric, inside the loop of the first chain and again, bring it up further along the line.
Tuck the thread under the needle and pull it through to make the second chain stitch.
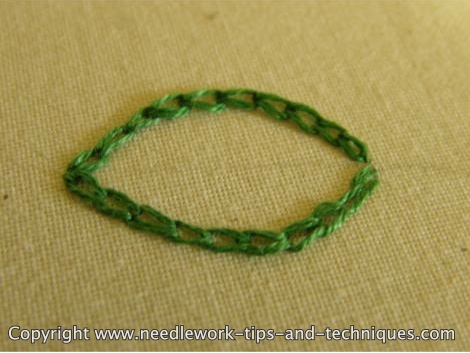
Continue in this manner until the line of chain stitch embroidery is complete.
Whipped chain stitch
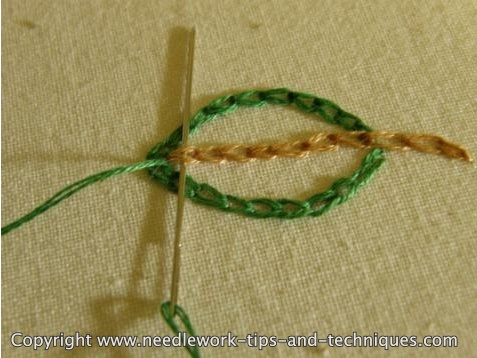
After you have completed the chain, you can whip another thread through each stitch, either with the same colored thread or a contrasting one. This gives a raised line with a little more definition. Let's use it for the vein of our leaf we worked above.
Thread a blunt tapestry needle and secure your thread to the back of any existing stitches or use a waste knot.
Bring the needle to the front of the work at the end of the row of chain stitches. Gently slide the needle underneath the two loops of the first chain.
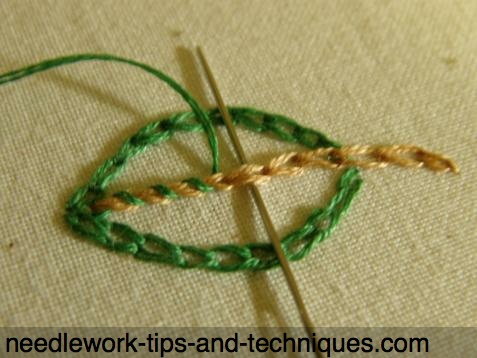
Continue along the row, always sliding the needle underneath from the same side, to form a rope effect.
This whipping thread does not go through the fabric at all, except at the beginning and end of the row.
If we were to use a sharp needle, it could accidentally pierce the fabric, which is why we changed to a tapestry needle.

This is the effect we end up with when we use a contrasting thread.
Other stitches can be whipped in this manner, including blanket and herringbone stitch.
Lazy daisy stitch (or detached chain)
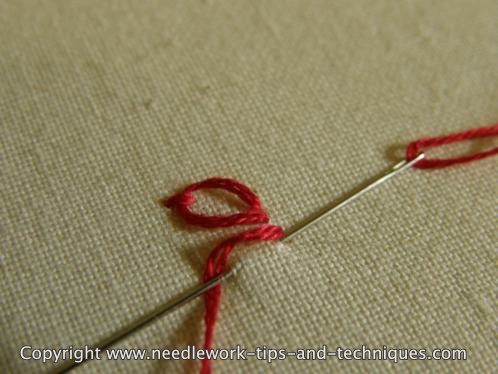
Lazy daisy or detached chain stitch starts in the same manner.
If you mark your fabric to show where these stitches will go then bring the needle out just before the line. Make sure the thread is under the needle before you pull it all the way through, as before.

This time instead of taking the needle down inside the loop, push it through the fabric just outside the chain to tie it down. Then bring the needle back up in position for the next stitch.
Don't pull the thread too tightly or you will end up with a loop that looks like a straight line rather than an oval.
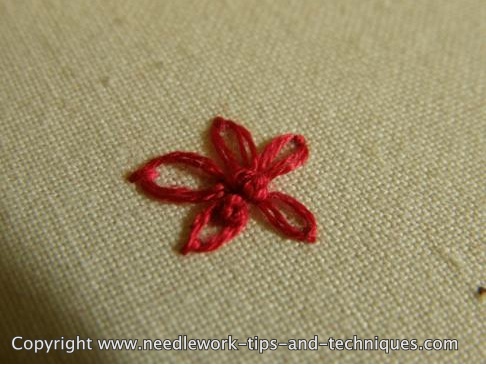
This stitch is often used to create flowers.
When all the detached chain stitches are in place you can fill the centre of the flower with French knots.
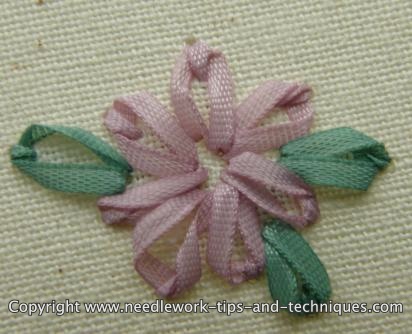
We can also work lazy daisies in silk ribbon. The sample worked here used 2mm wide Offray embroidery ribbon and measures about 1 inch across at its widest point.
Check out the embroidery stitches for flowers page for more ideas for using this versatile stitch.

Check the stitch index for more basic embroidery stitch instructions. I hope these photos and instructions for chain stitch embroidery have helped you.
You might like these
Leaf Embroidery Stitches: 6 Ways to Fill a Leaf
Leaf embroidery stitches — 6 easy ways to fill leaves with step-by-step tips and photos to inspire new techniques.
Tent Stitch Tutorial: How to Do Half Cross, Continental & Basketweave
Learn how to do tent stitch in three variations: half cross, continental, and basketweave. Step-by-step guide with images to perfect your needlepoint technique.
A Beginner’s Guide to the Coral Knot Stitch for Textured Embroidery
Learn how to embroider the coral knot stitch with this easy, step-by-step guide. Perfect for beginners who want to add beautiful, bumpy texture to their work!
Stay connected between projects
If you’d like occasional updates from my embroidery room, including new patterns, gentle tips, and little things I think you might enjoy, you’re warmly invited to join the Stitchin’ Times newsletter.
No pressure. Just a friendly note now and then to keep you inspired.
About Me - Contact Carol - Privacy Policy - Site Map - Testimonials
Please do not copy the content of this site. It is protected by Copyscape.
Copyright © 2006- www.needlework-tips-and-techniques.com All rights reserved