NEEDLE LACE TUTORIAL
Needlelace Daffodil: A 3D Spring Flower
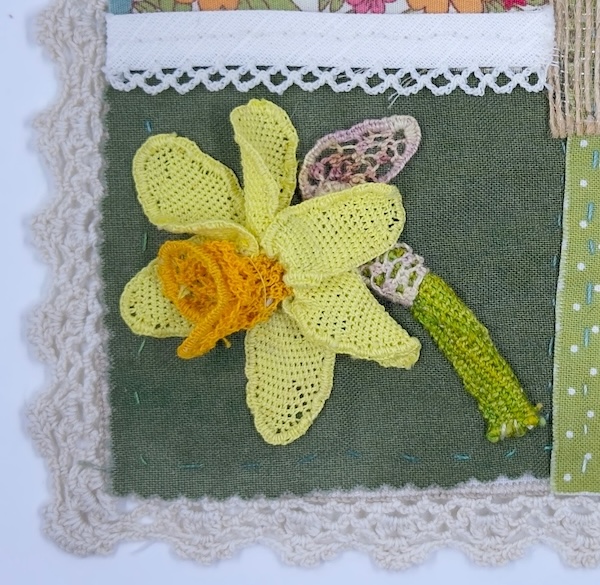
A complete flower made entirely from thread — six petals, a trumpet, a stem and a papery sepal, all stitched with just three needle lace stitches and shaped with florist’s wire
There’s something extraordinary about holding a flower made entirely from thread. It weighs almost nothing, the light passes through it, and every petal has the slightly uneven texture that only handmade lace can have. This daffodil is one of my favourite needle lace projects — it looks far more complex than it actually is.
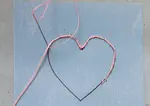
You’ll use three stitches: corded single Brussels for the petals and stem, pea stitch for the trumpet, and double Brussels for the delicate sepal. If you’ve already worked through my needle lace heart tutorial, you know the first two — pea stitch is the only new one, and I’ll walk you through it step by step.
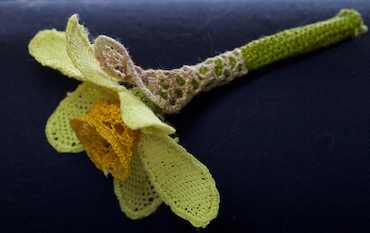
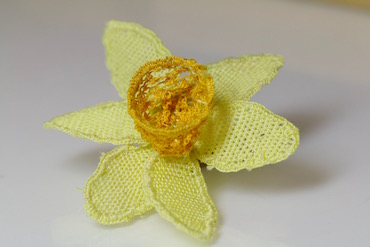
The finished daffodil — petals, trumpet, stem and sepal
By the end of this tutorial you’ll have a complete three-dimensional daffodil that you can display in a small vase, appliqué onto a slow stitching piece, or use as the centrepiece of a stumpwork project. It’s a beautiful thing to make, and a wonderful way to build your needle lace skills.
If you haven’t tried needle lace before, I’d suggest starting with the heart tutorial first — it introduces the foundation stitches and the pad technique in a simpler shape.
What You’ll Need
Materials for Your Daffodil
A short list — the same basic kit as the heart tutorial, plus florist’s wire.
- Tatting thread (DMC Fil à Dentelles, size 80) in yellow, orange, white and green
- Sewing cotton to match your tatting thread
- Sharp embroidery needle and a ballpoint or tapestry needle
- Calico or muslin for the fabric pad
- Paper-covered florist’s wire — white for the trumpet, green for the stem
- Matt sticky-backed plastic
Creating the Outer Petals
Print out the pattern pieces and cut them apart, leaving space around each one (don’t cut on the pattern lines). Attach each piece to a fabric pad with matt sticky-backed plastic — we use matt rather than glossy so reflections don’t distract you while you work.
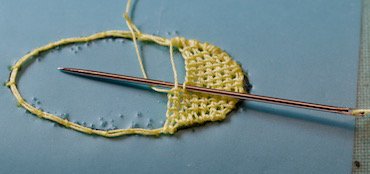
You’ll need six petals for your daffodil. I find I can reuse the same pattern for two or three petals before tracing a fresh one. Couch a doubled length of thread around the drawn shape, and loop one end through the starting loop to make the outline continuous.
Filling the Petals
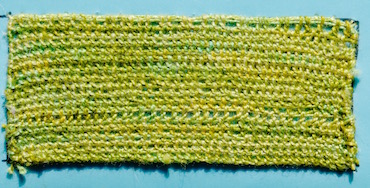
Each petal is worked in corded single Brussels stitch — the same stitch you learned in the heart tutorial.
You can choose whether to make short rows across the petal or longer ones along its length, but keep this consistent for all six. I prefer shorter rows — it makes it much less likely that you’ll run out of thread in the middle of a row.
Finishing the Petal Edge
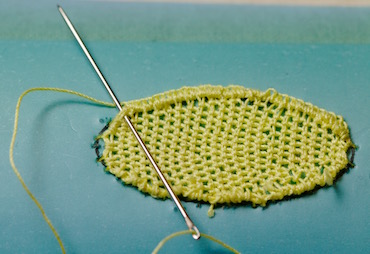
When each petal is complete, work close buttonhole stitches around the edge over the cordonnet.
Turn your work over, snip the couching threads on the back, and gently release the lace from the pad. Use tweezers to remove any remaining couching stitches. Repeat for all six petals.
The Trumpet — Pea Stitch
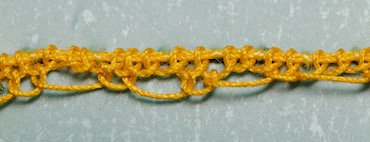
The trumpet uses pea stitch, which creates a lovely open, textured pattern. Using a different stitch here adds variety to the finished flower and gives the trumpet a contrasting texture against the denser petals. It’s built from two alternating rows — once you’ve done a couple of repeats, you’ll have the rhythm.
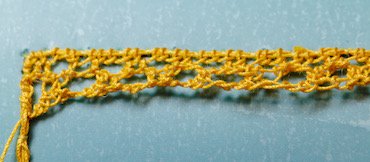
First, work a foundation row of single Brussels stitch (without a cord) across one of the long sides of your rectangle, starting from the left. Try to keep these stitches evenly spaced — they’re the base for everything that follows. Take the thread around the cordonnet, ready for the first pattern row.
Pattern Row 1
Make a detached buttonhole stitch into each of the first two loops of the foundation row, then miss two loops. Repeat this across the whole row.
If you can’t quite fit both stitches at the end, just work one — it won’t show in the finished trumpet. Keep your tension loose but consistent.
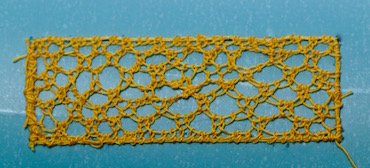
Pattern Row 2
Work back in the opposite direction, making three stitches into each large loop and one stitch into each smaller loop.
Sometimes the row above twists under itself slightly. If this happens, use your finger to gently roll it back so you can clearly see the loops of the previous row.
Completing the Trumpet
Repeat these two rows until the rectangle is full. Try to finish with the second row. Whip the loops of your last row to the cordonnet at the bottom.
You can see in my photo that I went slightly wrong in the centre — but don’t panic if this happens to you. It really won’t show once the trumpet is shaped and attached to the flower.
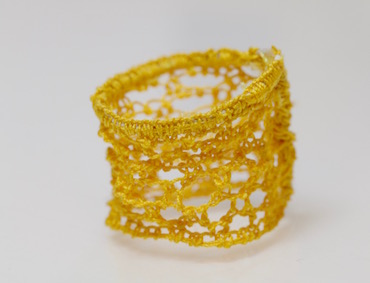
Wiring the Trumpet
The wire gives the trumpet its shape and a slightly ruffled edge, just like a real daffodil. This is the step that transforms a flat rectangle of lace into something three-dimensional.
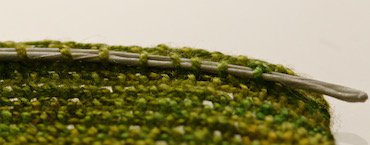
Attaching the Wire
Lay a length of white paper-covered wire on top of the cordonnet along the bottom edge of your rectangle. Couch it in place with sewing cotton.
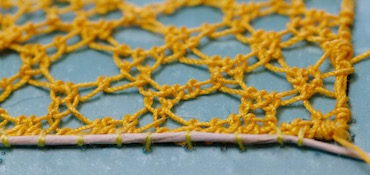
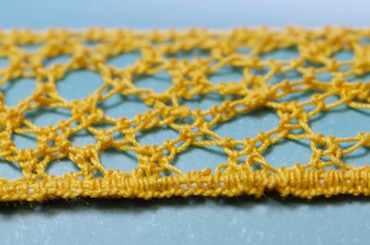
Buttonholing Over the Wire
Work close detached buttonhole stitches over both the cordonnet and the wire together. This locks the wire firmly into the edge and gives you a neat, firm rim you can shape later.
Joining the Seam
Release the lace from the pad and stitch the short sides of the trumpet together to form a tube. The wired edge will become the open, ruffled rim of the trumpet.
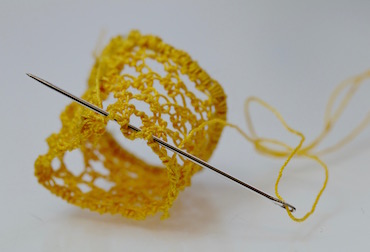
Gathering the Base
Using your tatting thread, work running stitch around the other long edge (the one without wire). Pull tightly to gather this edge closed, then fasten off securely. This gathered end will sit in the centre of your flower.
Constructing the Flower
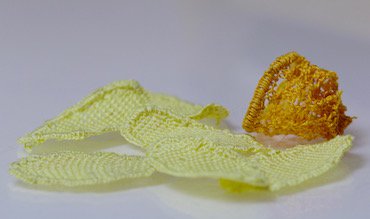
All the Pieces
Lay out your six petals and the trumpet. This is a lovely moment — all those hours of stitching, and now you can see the flower taking shape.
Attaching the Petals
Using the thread you worked the petals in, attach each one to the outside of the trumpet with small stitches. Overlap each petal slightly as you work your way around the flower — real daffodils overlap their petals too, so this looks completely natural.
The Stem
I felt the flower on its own was missing something, so I decided to create a stem with that papery beige sepal that sits just below the bloom on a real daffodil.
Stitching the Stem
The stem is worked in corded single Brussels stitch, taking the rows down the length rather than across the short end. You can use green tatting thread, but I chose a space-dyed silk in soft greens for mine — it gives a more natural, organic look.
There’s no need to buttonhole the edges this time, because we’re going to roll the piece up.
Wiring the Stem
After releasing the lace from the pad, couch a folded length of green wire along one long edge. Leave the loop where the wire is folded sticking out slightly at one end — this will poke through the centre of the flower to anchor the stem. Trim the other ends level with your lace.
We can’t couch the wire while the lace is on the pad, as those stitches will remain in the finished piece.
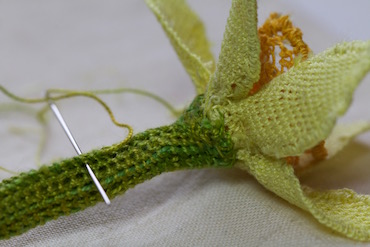
Attaching the Stem
Run a gathering thread around the bottom of the flower, about 1 cm from the centre. Pull the gathering stitches tight to create a small stub below the petals.
Wrap the short end of your stem around this stub and stitch it in place, with the wire loop poking through the centre of the flower. Take a couple of stitches through the wire loop to help secure it. This is a fiddly job, so take your time.
Then roll the rest of the lace around the wire to form the stem, and catch-stitch it in place down the length.
The Sepal
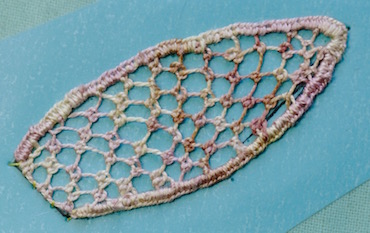
Working the Sepal
Mount the sepal pattern onto your pad and couch the doubled outline in place. You can use beige tatting cotton, but I chose a space-dyed fine cotton in pinky-beige tones for mine.
The sepal is worked in double Brussels stitch, which gives it that lovely airy texture. Buttonhole the sides but leave the flat edge unstitched, then release it from the pad.
Attaching the Sepal
Wrap the sepal around the stem so that the tip sits just underneath the petals. Stitch it in place around the flat base, and take a few stitches up the sepal to keep it wrapped. Leave the rest free — it will curl naturally, just like the real thing.
And there it is — a complete needlelace daffodil, stem and all.
After sitting in my needlework box for some time, my little daffodil’s eventual home was on a piece of slow stitching — and I think it looks rather lovely there, tucked among the fabrics and threads.
The daffodil found its home on a slow stitching piece
Whatever you decide to do with yours — frame it, pin it to a hat, add it to a crazy quilt — you now have the skills to create all sorts of three-dimensional needle lace pieces. Leaves, other flowers, even tiny garments for stumpwork figures. It all starts with the same pad, the same stitches, and the same patient loop-by-loop rhythm.
Your Daffodil is Finished — What Will You Make Next?
You’ve mastered three needle lace stitches, shaped lace with wire, and assembled a three-dimensional flower from scratch. That’s a real achievement — and it opens the door to all sorts of stumpwork and surface embroidery projects.
Needle Lace Heart
New to needle lace, or want to teach the basics to a friend? The heart tutorial introduces corded single and double Brussels stitch in a simple, forgiving shape.
Start with the HeartSlow Stitching
See how this daffodil found its home on a slow stitching piece — and discover a wonderfully relaxing way to use all your stitching skills together.
Explore Slow StitchingYou might like these
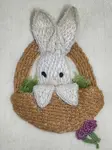
Stumpwork tutorial - bunny in a basket
This cute little bunny in a basket will help you learn the basics of stumpwork embroidery. Step by step instructions and photographs
Stumpwork Embroidery: A Brief History of this Intricate Craft
Learn Stumpwork Embroidery techniques including padding with felt, raised embroidery stitches, adding slips and creating wired needlework petals
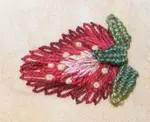
Woven picots: How to Embroider Realistic Petals and Leaves
Learn how to create stunning woven picots with this step-by-step guide! Perfect for adding texture and dimension to your embroidery projects
Stay connected between projects
If you’d like occasional updates from my embroidery room, including new patterns, gentle tips, and little things I think you might enjoy, you’re warmly invited to join the Stitchin’ Times newsletter.
About Me - Contact Carol - Privacy Policy - Site Map - Testimonials
Please do not copy the content of this site. It is protected by Copyscape.
Copyright © 2006- www.needlework-tips-and-techniques.com All rights reserved