- Home
- Hand embroidery for beginners
BEGINNER'S GUIDE
Hand Embroidery for Beginners
Your simple step-by-step path from "where do I start?" to your first stitches
No stress, no fuss — just follow the steps
Starting embroidery is like stepping into a world of creativity, colour, and calming stitches—but where do you begin?
If you've ever stared at an embroidery hoop, wondering which fabric to use or how to get your design onto it, you're in the right place.
This page is your Start Here guide. No stress, no fuss—just a simple path that will take you from "where do I start?" to your first stitches.
Start Here — Follow These Steps
Follow these steps and you'll be stitching in no time:
Gather Your Supplies
Everything you need to get started — needles, thread, fabric and more.
Embroidery supplies →Choose Your Fabric
Pick a beginner-friendly fabric that makes stitching easy and enjoyable.
Best fabric guide →Counted Thread Work?
If your design uses a grid (cross stitch, blackwork), you'll need evenweave fabric.
Aida cloth →Transfer Your Design
Get your pattern onto fabric — iron-on, tracing, or other easy methods.
Transfer methods →Start Stitching!
Learn your first embroidery stitches with clear, beginner-friendly tutorials.
First stitches →Choosing and Preparing Your Fabric
Your choice of fabric can make a big difference in how enjoyable (and easy!) your embroidery experience is — so it's worth picking a beginner-friendly option.
If you want the simple answer (what to buy first, what to avoid and why) start here → Best fabric for hand embroidery.
Are you doing counted-thread embroidery?
If your design is worked by counting holes/threads (like cross stitch or blackwork on a grid), you'll usually want an evenly woven fabric.
Evenweave & Linen
Compare Aida vs evenweave vs linen and learn about fabric counts.
Compare options →Transferring Your Embroidery Design
This part can sound a bit intimidating, but it really isn't. Once you've done it once, you'll wonder what all the fuss was about!
To make it easy, I've put all the options in one place (plus help for the common "why won't it show up?!" moments).
If you specifically want the iron-on method, that has its own page.
Using an Embroidery Hoop
A hoop keeps your fabric steady so your stitches are easier and neater. The key is getting the fabric smooth and snug (without stretching it out of shape).
Here's the full step-by-step guide, including how to avoid puckering → How to use embroidery hoops
Choosing Your Colours and Threads
Picking the right colours brings your project to life. Here's how to get started:
- ✓ Start simple: Two or three shades are enough for beautiful results.
- ✓ Contrast matters: For bold designs, choose colours that stand out against your fabric.
- ✓ Test first: Place small swatches of thread on your fabric to see how they look together.
What's Next?
Now that you've learned the basics, it's time to apply your new skills! Try these beginner-friendly projects to continue building confidence:
Learn Your First Stitches
Now that you have your supplies ready, it's time to start stitching!
Start stitching →Troubleshooting Guide
Struggling with thread tangles or uneven stitches? Easy fixes here.
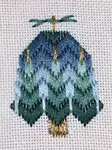
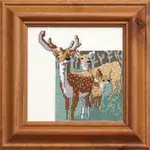
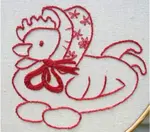
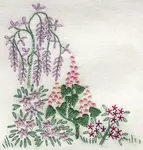
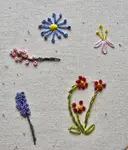
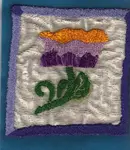
Get tips →Vintage Embroidery Gallery
See how simple stitches create beautiful, practical items for the home.
View gallery →Ready to Create Something Beautiful?
Embroidering is fun, creative, and satisfying. With the tips shared here, you're ready to create beautiful pieces. Gather your materials, try out new stitches, and let your imagination run wild.
Writer's Bio
I'm Carol, and I've been sharing my passion for hand embroidery with beginners since 1992. Over the years, I've taught at major UK needlework shows, local craft shops, private groups and one-to-one sessions. Now it's your turn to learn from the comfort of your own home.
My approach to teaching embroidery is straightforward and encouraging. Whether you're completely new to needlework or returning after a break, I'll guide you through the essentials.
After 30 years of teaching, I've refined techniques perfect for novices—and I'm excited to share them with you.
Feeling nervous? Don't be—embroidery is easier than it looks!
Have Your Say
do you have a question about Embroidery?
This is your spot to ask any embroidery questions that you have. Other visitors to the site will be able to view and hopefully answer your queries.
Or perhaps you have some tips or even an article that you have written and would like to share?
Your contribution will be made into its own page on the site, and other people can comment on your submission.
So join in and use the form below to have your say.
What Other Visitors Have Said
Click below to see contributions from other visitors to this page...
how to launder red work embroidery 
How do I safely launder red work embroidery? I do not know if the red embroidery, which is on white pillow shams, has ever been "set". There are no stains …
what type of embroidery is this?
Many years ago I taught myself to embroider flowers , butterflies, etc. I purchased a book, and if I remember correctly the author's name was Erica Wilson, …
What wool was used for a piece of antique needlework?
I recently purchased an antique (unfinished tapestry that feels like wool threads..I am inspired to finish this piece and possibly embellish it. How can …
Crewel work using Appletons wool
I am looking for some fabric that will support Appletons wool, everyone tells me to use linen twill but as I am new to this I would like to find something …
Does the stamped embroidery design wash out?
This is my first venture into hand embroidery. Counted cross-stitch has always been my game. So, please help!I am taking on a huge tablecloth project …
How to fix an untied knot
I wish I had found this web site before I did the embroidery embellishment on my tunic top.Then I would have known how to start the thread without …
Do I tie a knot while doing stamped embroidery
I embroider pre-stamped pillow cases and dresser scarves.I do not always like the way it looks on the back, with all the knots, it seems so untidy. …
I want to embroider, its just that I am a rank beginner
and am frustrated beyond words in my inability to find projects I want to work with!Just about everything is cross stitch (I live in "Silicon Valley", …
How long should it take me to embroider a piece? Not rated yet
I am a beginner embroiderer and I wonder what my goal should be for any given piece of embroidery...when I look at a new pattern, how can i gauge how long …
Backing for an embroidered lavender bag Not rated yet
I'm quite an amateur at this kind of thing, but was going to hand embroider my grandmother's name on a piece of cottton, (then sew and stuff that to make …
beginner at embroidery has some questions Not rated yet
I've never done embroidery before and am so interested in learning many things I wished I had been taught as a child.I have bought the supplies and …
You might like these
Embroidery Questions Answered: Expert Tips and Advice
Embroidery Questions? Find answers and expert tips on my website. Discover everything you need to know about embroidery techniques, materials, and more.
Vintage Embroidery: A Photo Gallery to Inspire Your Stitching
Love vintage charm? Explore this photo gallery of handmade vintage embroidery to inspire your own projects. See how simple stitches create timeless art.
How do you embroider letters by hand using 3 simple stitches
How do you embroider letters by hand on a crazy quilt block. The tutorial covers how to position your letters and the three stitches used.

Stay connected between projects
If you’d like occasional updates from my embroidery room, including new patterns, gentle tips, and little things I think you might enjoy, you’re warmly invited to join the Stitchin’ Times newsletter.
About Me - Contact Carol - Privacy Policy - Site Map - Testimonials
Please do not copy the content of this site. It is protected by Copyscape.
Copyright © 2006- www.needlework-tips-and-techniques.com All rights reserved