- Home
- Redwork Embroidery
Redwork Embroidery for Beginners
If you’ve ever wanted to try embroidery but felt put off by all the stitches, colours, and supplies, redwork is a wonderfully simple place to begin.
Traditional redwork embroidery uses just one thread colour and a handful of easy stitches to create charming designs with a lovely hand-stitched feel. Because it is so simple, it is ideal for beginners or anyone coming back to embroidery after a break.
You do not need lots of experience or expensive materials to get started. In fact, with one small project, a few basic supplies, and a little patience, you can be making your first stitches today.
Why Redwork Is So Beginner-Friendly
One of the nicest things about redwork is that it removes many of the decisions that can make embroidery feel overwhelming.
You are usually working with:
- one thread colour
- simple outline-based designs
- just a few basic stitches
- inexpensive fabric and tools
That means you can focus on learning how the stitches feel, rather than worrying about complicated colour changes or detailed shading.
For a first project, that is often exactly what makes the difference between feeling unsure and actually getting started.
A Good First Project

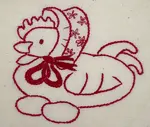
If you would like to try redwork for yourself, I’ve put together a simple Mother Hen pattern that is suitable for beginners.
It is a small design, quick to stitch, and a good way to practise the basics without taking on anything too complicated.
Start here: get the free Mother Hen pattern and beginner instructions
What You'll Need
You only need a few basic supplies to begin:
- a piece of white or cream cotton fabric
- red embroidery floss, such as DMC 321
- a crewel needle, size 8 to 10
- a small embroidery hoop, if you like using one
- small sharp scissors
If you already have similar supplies at home, they will probably do just fine. There is no need to make this complicated.
The Basic Stitches to Know
You do not need a large stitch vocabulary for redwork. For many simple projects, just a few stitches are enough.
This is one of the most useful stitches for redwork and is often used for the main outlines. It creates a smooth, slightly twisted line and is a good stitch to learn first.
Satin stitch is useful for filling small shapes with solid colour, such as a comb, flower petal, or tiny decorative detail.
This simple looped stitch is handy for little floral details and small decorative touches.
French knots can be used for tiny accents such as flower centres or other small features.
For your very first project, you may not even need all four. The important thing is to start with one or two basic stitches and build confidence as you go.


Choosing Fabric
Plain cotton fabric is a good place to start. Muslin, calico, or a smooth quilting cotton all work well for beginner redwork.
Try to choose a fabric that is light enough for you to transfer the design onto easily, but sturdy enough to hold your stitches nicely.
White or cream fabric gives redwork its traditional look, although you can always experiment later once you feel more confident.
A Few Beginner Tips
If you are new to embroidery, here are a few simple things that will help:
- Start with a small design rather than a large one
- Use 2 strands of embroidery floss for neat outlines
- Keep your fabric fairly taut if you are using a hoop
- Do not worry if your first stitches are not perfect
Redwork is one of those techniques that becomes more enjoyable very quickly once you begin. A small, finished piece will teach you far more than reading about embroidery ever can.
A Little Background
Redwork became especially popular in the late nineteenth century, when simple outline embroidery in red thread was used to decorate household linens, quilt blocks, and children’s items.
Its lasting appeal lies in that same simplicity. The designs are clear, the materials are modest, and the finished work has a charming handmade quality that never really goes out of style.
If you are curious about the history, techniques, and traditional uses of redwork, there is plenty more to explore once you have stitched your first project.
Ready to Start?
The easiest way to learn is to begin with a simple pattern and take it one step at a time.
My free Mother Hen redwork pattern includes a beginner-friendly design and basic instructions so you can start stitching straight away.
Get the free Mother Hen pattern and beginner instructions
You might like these
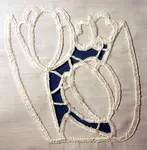
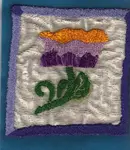
Cutwork Embroidery by Hand: Beginner Tutorial + Free Pattern
Learn hand cutwork embroidery with this beginner tulip pattern. Step-by-step buttonhole stitch tutorial — yes, cutting the fabric is completely safe!
Transferring Embroidery Designs Onto Fabric: 6 Easy Methods
Unsure how to get your pattern onto fabric? Compare the easiest embroidery transfer methods for light, dark, stretchy, or textured fabrics—quick tips included
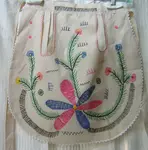
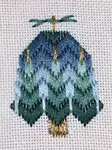
Vintage Embroidery: A Photo Gallery to Inspire Your Stitching
Love vintage charm? Explore this photo gallery of handmade vintage embroidery to inspire your own projects. See how simple stitches create timeless art.


Stay connected between projects
If you’d like occasional updates from my embroidery room, including new patterns, gentle tips, and little things I think you might enjoy, you’re warmly invited to join the Stitchin’ Times newsletter.
About Me - Contact Carol - Privacy Policy - Site Map - Testimonials
Please do not copy the content of this site. It is protected by Copyscape.
Copyright © 2006- www.needlework-tips-and-techniques.com All rights reserved