- Home
- What do I need?
- Embroidery Floss
EMBROIDERY ESSENTIALS
Embroidery Floss: Your Guide to Strands, Threads and Getting Started
How to separate it, how many strands to use, and how to start and finish without knots
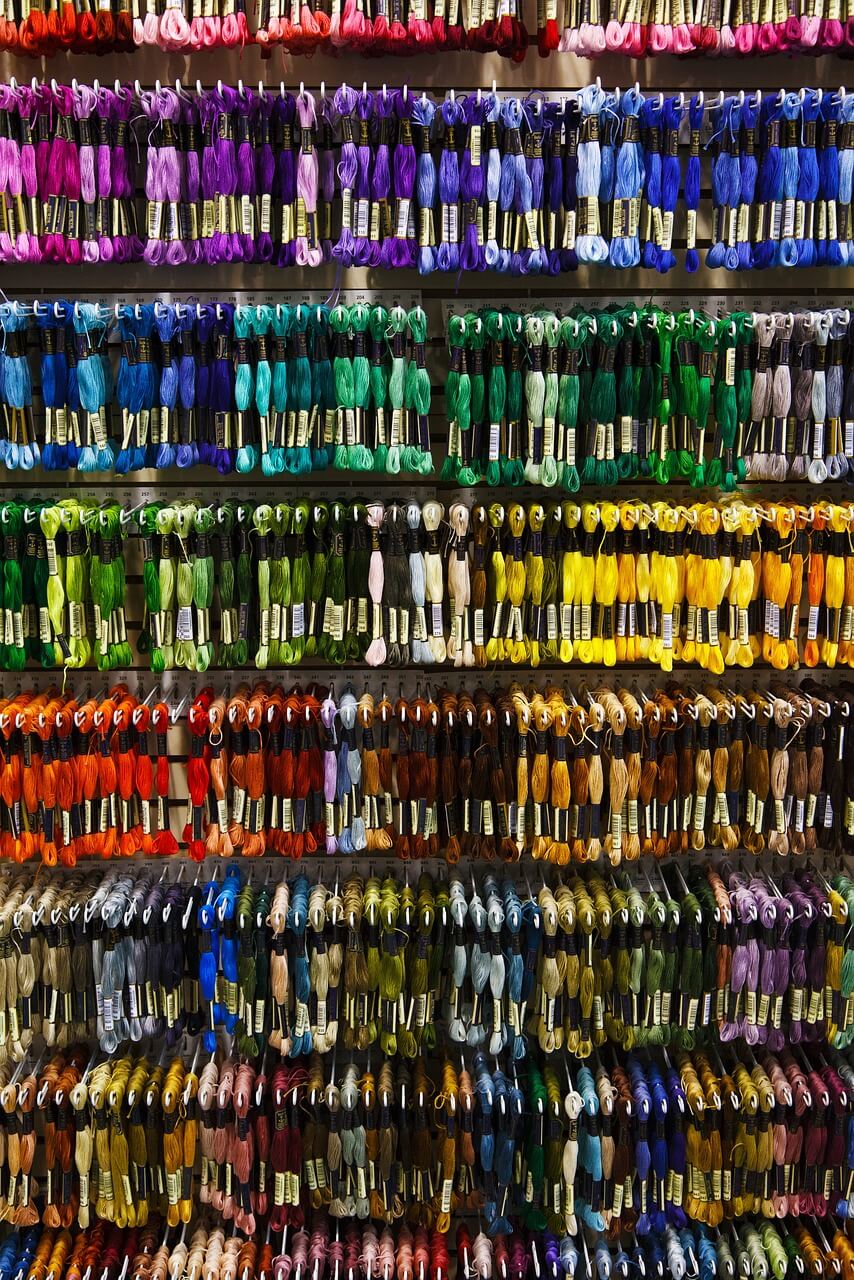
Embroidery floss (also called stranded cotton) is the thread you'll use for most hand embroidery and cross stitch projects. It's made from cotton with a slightly shiny finish, and each length consists of six strands loosely twisted together.
The clever part is that you can separate those strands and use them individually or in combinations, depending on how thick or fine you want your stitching to be. That flexibility is what makes embroidery floss so versatile.
If you're new to working with floss, this page covers the essentials: how to separate the strands without tangling, how many to use for different fabrics, and how to start and finish your thread cleanly.
Separating Strands of Embroidery Floss
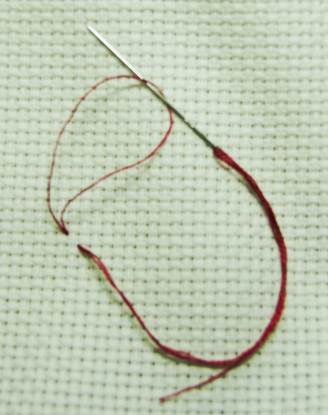
This trips up more beginners than almost anything else. If you just pull two strands out of the six, the whole lot tangles into a knotted mess. The trick is to strip one strand at a time.
Cut your length of floss (more on how long in a moment), hold the top end between your finger and thumb, and pull out one single strand upwards. The remaining strands will bunch up underneath, but they'll fall back into place once the single strand is free. Then pull out a second strand the same way and put them together.
Always strip one at a time, even if you need three or four strands. It takes a few extra seconds but saves you minutes of untangling.
This short video shows you exactly how it's done:
How Long Should Your Thread Be?
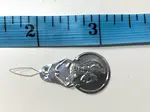
Cut your floss to about 18 inches (roughly the distance from your hand to your elbow). This is long enough to get a decent amount of stitching done, but short enough that the thread won't wear thin or tangle from being pulled through the fabric too many times.
If you're using metallic or rayon thread, go even shorter (12 to 15 inches). These threads fray with friction, and a shorter length keeps them in better condition.
How Many Strands of Embroidery Floss to Use
The number of strands you use depends on your fabric count. Higher count fabrics have smaller holes, so you need fewer strands. Lower counts have bigger holes and need more strands to fill them properly.
This table gives you the recommended strand count for counted thread work. If you're unsure about fabric counts, my Aida cloth guide explains it with a video.
These are guidelines, not rules. If your stitches don't seem to be covering the fabric properly, try adding a strand. If they look bulky or won't pull through easily, try one fewer.
Starting Your Thread
When students ask if they can start with a knot in my embroidery classes, I advise against it. Knots create lumps on the back of the work, can show through to the front on finer fabrics, and may come untied over time. There are better ways.
The loop method (for even numbers of strands)
This is the neatest way to start when you're working with two strands (or any even number).
Take a single strand of floss and fold it in half. Thread the two cut ends through the needle, leaving the folded loop at the other end. Make your first stitch, pulling the needle through the fabric but leaving the loop at the back. Bring the needle to the back again and slip it through the loop. Gently tighten, and you're anchored.
The one drawback: if you make a mistake, you may need to undo all the stitches done with that length of thread to get back to the loop. But for clean, knot-free starts, it's hard to beat.
The middle-start method (for odd numbers of strands)
When the loop method won't work (odd strand counts, or when you want more flexibility), try this instead.
Thread an 18-inch length into your needle, leaving a short tail at the needle end. Start stitching in the middle of your row and push the needle through the fabric, then continue stitching. Leave the remaining loose thread to come back to later. When the first half runs out, fasten off, then rethread the remaining loose end and finish the row in the other direction.
Waste knots
Temporary waste knots are useful when you want a firm anchor while you stitch. Tie a knot at the end of your floss and insert the needle from the front of the fabric, positioning it in the path of the stitches you're about to make. As you stitch, you'll work over the thread tail on the back, securing it underneath your stitches. Once it's secure, snip off the knot from the front.
Away waste knots
An away waste knot works the same way, except you position the knot off to the side rather than in the stitch path. After several stitches, cut off the knot, thread the loose tail into a needle, and tuck it under six or so stitches on the back. Snip the excess close to the stitching.
This gives a very clean back because the thread tail never gets stitched over in a visible area.
Finishing Your Thread
When you run out of thread (or reach the end of a colour area), you need to secure the tail so it doesn't unravel.
Turn your work over and slide the needle under five or six of your existing stitches on the back. Pull the thread through gently, then snip it close to the stitching. The tail is held in place by the stitches above it.
Some stitchers like to weave back through a couple of stitches in the opposite direction for extra security, especially on items that will be washed or handled. That's fine, but don't overdo it. Too much thread on the back creates bulk that can show through to the front.
Twisting, Tangling, and What to Do About It
If your thread keeps twisting as you stitch, you're not doing anything wrong. Every stitch adds a slight twist to the thread, and after a dozen or so stitches, it builds up enough to cause problems.
The simplest fix: let the needle dangle. Every few stitches, drop your needle and let it hang freely below your work. The thread will untwist on its own. Make this a habit and you'll barely notice the problem.
Other things that help:
If your thread is knotting on itself rather than just twisting, it usually means your thread is too long, or you're pulling it through too quickly. Slow down and let the thread fall naturally as you pull.
Don't Economise on Embroidery Floss
Investing in quality embroidery floss from reputable brands makes a real difference. Cheap threads can fade after washing, bleed colour onto your fabric, or have uneven thickness that shows in your finished work.
The brands most embroiderers trust are DMC, Anchor, Madeira, and Susan Bates. All are colourfast and consistent in quality.
Each brand uses its own colour numbering system, so a colour that's number 321 in DMC won't be 321 in Anchor. If you need to substitute one brand for another, use a thread conversion chart to find the closest match.
Many embroiderers (myself included) prefer to stick with one brand for an entire project. This keeps the colour shading consistent, since even "equivalent" shades between brands can look slightly different side by side. The only time I switch is when my preferred brand doesn't make the shade I need.
Storing Your Floss
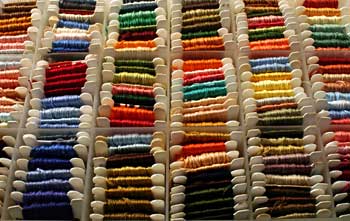
Once you start collecting embroidery floss, it multiplies fast. A tangle of loose skeins in a bag is a recipe for frustration (and duplicate purchases when you can't find the shade you already own).
Most stitchers wind their floss onto bobbins or cards and store them in a thread organiser box, sorted by number. It takes a little time to set up, but it saves hours of rummaging later.
I've written a full guide on organising your embroidery floss with storage ideas and tips for keeping your collection under control.
Other Thread Options
Embroidery floss is versatile, but it's not the right choice for every technique. Here's when to reach for something else:
Pearl (Perlé) Cotton
A non-divisible, lustrous thread that comes in four thicknesses. Essential for Hardanger and beautiful for surface embroidery where you want a smooth, rounded line.
Linen Thread
Strong and robust. Used for pulled work, needle lace, and stumpwork, where the thread needs to withstand tension without breaking.
Rayon and Silk
For a high-gloss, luminous finish. Rayon and silk threads can be slippery to work with, but the sheen they produce is stunning.
Metallic Thread
Adds sparkle and shimmer to your stitching. Needs a little patience, but the results are worth it. See my beginner's guide to metallic thread.
Crewel Wool
A fine wool thread that gives a matte, textured finish. Traditional for crewelwork and Jacobean embroidery.
Needlepoint Fibres
A wide range of specialty threads for canvas work, from overdyed cottons to textured novelty threads. See my needlepoint fibres guide.
You've Got the Thread. Now What?
With the right floss, the right length, and a clean start, you're ready to make your first stitches. If you need help choosing the rest of your supplies, or want to learn your first embroidery stitches, these guides will get you going.
Ask a question about threads and fibres
There is a vast array of threads available to stitch with nowadays. If you have any questions on how to use them, please use the form below.
What Other Visitors Have Asked
Click below to see contributions from other visitors to this page...
Thread terminology 
I'm following counted cross stitch instructions, but am confused by some terms:
one is easy - "use one strand folded double" is in essence, two strands …
Purchase all floss for cross stitch project?
I am starting a cross-stitch pattern purchased online. I have done cross-stitch kits only. The new pattern gives the chart with floss colors and numbers …
Vintage Anchor embroidery floss
I'm looking for a conversion chart that will convert the old Anchor floss numbers (pre-1960) to the current sytem.
I have been unable to find any …
What is a hank of embroidery thread
I am a beginner at this cross stitch. I am stumped at the very first pass.
What is a hank? There are colors on in the Hank 1 and Hank 2 chart. The …
Knotting and restarting thread
How do I knot my thread and then restart with a new thread?
Anchor silks - Old numbers to current ones
I have a lot of old Anchor silks which I want to be able to convert to DMC silk numbers. Is there any way of finding a conversion chart for this. I understand …
putting floss onto LR cards
I feel silly, but in order to get started, I must ask. I bought my floss (for cross stitch), bought a pack of cards, and I have had a nightmare with the …
Carrying thread across the back
I am beginner and wonder if it is possible/good practice to carry the yarn behind your work if there are small gaps between two areas to be worked with …
How do I separate my strands?
I have just begun cross-stitching again and the directions are not very clear.
All the directions say are "separate the strands." Does that mean separate …
Twisting Thread
Is there an easy way to keep threads from twisting while stitching?
It is the reason that I can actually see an "x" on my projects and they don't look …
threading the needle and satin stitch 
Is there an easy way to thread the needle? I use the "needle threaders" with the wire but after several uses the wire breaks. I also have trouble with …
You might like these
Embroidery thread conversion chart - DMC to Anchor floss
Download this DMC to Anchor conversion chart and find the right match fast. Thread numbers aren't the same across brands, plus tips when no exact match exists.
How to Use & Tighten Embroidery Hoops (Step-by-Step Photos)
How tight should an embroidery hoop be? Learn to get drum-tight tension without puckers. Step-by-step photos show hooping, tightening, and fixing loose fabric
How to Thread a Needle (Plus Threaders That Do It for You)
Struggling to thread a needle? The method that works every time, plus fixes for fraying thread, tiny eyes and metallics. Includes a guide to needle threaders.


Stay connected between projects
If you’d like occasional updates from my embroidery room, including new patterns, gentle tips, and little things I think you might enjoy, you’re warmly invited to join the Stitchin’ Times newsletter.
About Me - Contact Carol - Privacy Policy - Site Map - Testimonials
Please do not copy the content of this site. It is protected by Copyscape.
Copyright © 2006- www.needlework-tips-and-techniques.com All rights reserved