How to Use Iron-On Embroidery Transfers (Even the Old, Scary Ones!)
Ever stare at a lovely, blank piece of fabric with a little knot of dread in your stomach?
You’ve got the perfect design, maybe it’s a vintage iron-on transfer you found, and you have no idea if it’ll still work. Should you trace it instead? What if it smudges? Will it ever wash out?
And that fabric was expensive! You definitely don’t want to waste it.
Deep breath. You’re in the right place.
All you want is a crisp, clear design so you can get to the fun part: the actual stitching. This little dilemma is exactly why I’ve put together this guide. We’re going to walk through it step-by-step, so you can feel confident and get that beautiful pattern onto your fabric, frustration-free.
Now, let’s look at the different flavours of iron-on transfers. This is where some stitchers get stuck, worried about choosing the wrong type or wondering if they can make their own.
Good news: it’s simple. The table below compares the main methods - from pre-printed designs to DIY transfer pens and pencils - so you can pick what fits your fabric and tools.
Want bold lines or barely-there guides? Permanent or washable? You’ll find the right option here.
Compare Iron On Transfer Methods
Method
How it works
Tools
Fabrics
Heat / time*
Reuse?
Pros / Cons
Pre-printed iron-on sheet
Commercial design printed with heat-transfer ink; lines transfer to fabric.
Dry iron (no steam), hard surface
Cotton & linen (light–medium weight)
Med heat, 10–15s
2–5 times
Fast & crisp; – lines may be permanent, follow product notes.
Heat-transfer pen
Draw the design on plain paper, then iron to transfer.
Transfer pen, dry iron
Cotton & linen
Med heat, 8–12s
1–3 times
DIY any design; – lines can be bold if pressed too long.
Heat-transfer pencil
Trace design (firm pressure), then iron to transfer lighter lines.
Transfer pencil, dry iron
Cotton & linen
Med heat, 8–12s
1–2 times
Softer guide lines; – tracing needs a steady hand.
Printable transfer paper
Print design on special paper; iron prints a film onto fabric.
Inkjet/laser printer, iron
T-shirts, tote bags
As per brand
N/A
Photo/colour designs; – film isn’t ideal for hand embroidery.
*Always test on a scrap and follow the product’s instructions; settings vary by brand, fabric and iron.
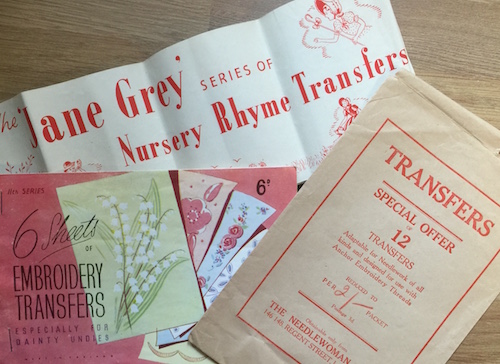
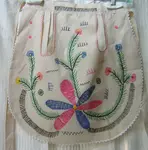
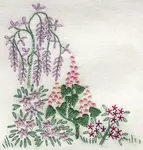
My first iron-on transfers (a little nostalgia)
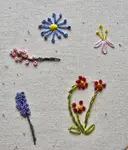
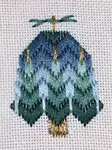
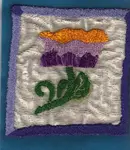
Back in the 1970s, needlework magazines often gave away blue or silver inked
iron-on transfers. I remember sunny afternoons with my grandmother, paging through
her vast stash—baskets of flowers, crinoline ladies, bows, baby birds and teddies,
ready to press and stitch. Those sessions taught me to test on a scrap, use medium
heat, and press in short bursts for clean lines. It’s still how I work today.
From my grandmother’s collection of iron-on transfers.
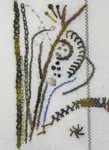
Washable & Air-Erasable Pens
These pens are often a stitcher’s go-to tool for tracing. They’re simple, direct, and work beautifully on light-coloured fabrics. They come in two main personalities: one that vanishes with air and one that washes out with water. But each has a quirk you need to know about!
This method shines on: light-coloured, smooth fabrics for designs you plan to stitch up quickly. It’s not the best choice for: projects that will take weeks (the lines might fade too soon!) or for marking on dark fabric.
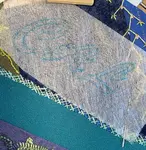
I also used it for sketching out my intitials on wash away fabric before embroidering them onto my crazy quilt block.
What You'll Need
The shortest list of all—just your pen!
An air-erasable pen (which fades on its own after a day or two) or a water-erasable pen (which stays put until you rinse it out).
How to Use Them
Always test on a scrap first! This is non-negotiable. Check how long the mark lasts and how easily it disappears.
Trace your design lightly onto the fabric. There's no need to press hard; a gentle touch is all you need.
Stitch away! Follow your lovely, clear lines.
Remove the marks according to the pen's instructions—either by waiting for them to vanish or by giving your finished piece a gentle rinse in cool water.
A Crucial Tip (Seriously, This is the Important Bit!)
Water-erasable pen marks can become permanent if you iron them. Heat will set the ink, and it may never come out. Always rinse out your lines before you do your final press. Don't let all your beautiful work be spoiled at the very last step!
Other ways to transfer designs (no iron required)
A quick history note: When counted-thread embroidery surged in the 1980s, iron-on sheets got harder to find, so many stitchers went back to older marking techniques. Most of them are still useful today, just test on a scrap first.
Lightbox / window tracing — Best for: sheer or even-weave fabrics. Tools: washable fabric pen/pencil. Pros: very fine lines. Cons: slower; needs good light.
Prick & pounce — Best for: dark/opaque fabrics and curves. Tools: pricked pattern, pounce powder, soft brush. Pros: crisp outlines after you “paint in” the dots. Cons: a bit messy; small learning curve.
Tissue paper tacking — Best for: textured fabrics where pens won’t show. Tools: thin tissue, running stitch through the lines. Pros: very accurate. Cons: remove tacking after—fiddly for dense designs.
Dressmaker’s tracing paper — Best for: light to mid-weight fabrics. Tools: fabric-safe tracing paper + wheel. Pros: quick. Cons: can smudge; washability varies—always test.
Wash-away stabiliser — Best for: intricate motifs. Tools: stick-on, water-soluble stabiliser (print, stick, stitch, rinse). Pros: zero marking on the fabric. Cons: adds stiffness while stitching; extra cost.
Chalk/ceramic pencils — Best for: dark fabrics. Pros: brushes off. Cons: can fade while handling; needs a light touch.
Already using transfer pens/pencils that you iron on? That’s an iron-on method—see the table above for heat/time tips.
So, Which Method is Best?
Phew, that’s a lot of ways to get a design onto fabric! So, which one is the absolute best? The truth is, there isn’t one. The 'best' method is simply the one that feels the most fun and least scary for you and your current project.
Don't feel like you need to master all of them. Just pick the one that made you think, "Hey, I could do that!" Grab a scrap of fabric, give it a go, and see what happens.
Remember, transferring the design is just the little bridge to get you to the fun part, the stitching. The goal is to cross it with a smile, not a sigh. You’ve got this!
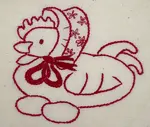
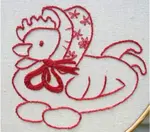
Learn this simple technique with a mother hen design, the first of my free redwork embroidery patterns using simple stitches and a single thread colour.
Discover a variety of free hand embroidery designs and lessons. Learn techniques like blackwork, cross-stitch, and hardanger with detailed patterns & tutorials
Choose from cross stitch or embroidery - let your creativity shine through & create beautiful items to last a lifetime! No matter which you choose, have fun
Unsure how to get your pattern onto fabric? Compare the easiest embroidery transfer methods for light, dark, stretchy, or textured fabrics—quick tips included
Love vintage charm? Explore this photo gallery of handmade vintage embroidery to inspire your own projects. See how simple stitches create timeless art.
Embroidery Questions? Find answers and expert tips on my website. Discover everything you need to know about embroidery techniques, materials, and more.
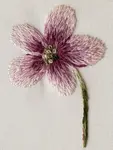
Learn thread painting with this beginner's guide. Leaen the secrets to smooth shading and create a beautiful embroidered flower with our step-by-step tutorial.
Choose the best fabric for your embroidery project—cotton, linen, blends, and more. Includes a simple checklist and advice for textured or stretchy fabrics
Start hand embroidery the easy way. Follow a simple beginner path—what to buy, best fabric, how to transfer designs, hoop setup, and what to stitch next.
This stem stitch tutorial covers the basic stitch, raised stem and portuguese knotted stem. Videos explain how to work the stitches.
Stay connected between projects
If you’d like occasional updates from my embroidery room, including new patterns, gentle tips, and little things I think you might enjoy, you’re warmly invited to join the Stitchin’ Times newsletter.