- Home
- What do I need?
- How to Thread a Needle
ESSENTIAL SKILL
How to Thread a Needle: Tips, Tricks and Threaders That Help
Simple tips and tools that take the frustration out of threading — so you can get on with stitching.
Have you ever struggled with how to thread a needle?
You're not the only one!
I'll be honest — as I've got older, my eyesight isn't what it used to be. Threading a needle used to be something I did without thinking. Now? It takes longer, my hands aren't quite as steady, and there are days when that tiny eye feels like it's deliberately dodging the thread.
I've stitched for decades, and this is the one thing that still catches me out. Not the counting, not the tension — just getting the thread through the needle in the first place!
If that sounds familiar, you're in very good company. Thank goodness for needle threaders.
Threading a needle can be a real pain, especially if you have vision or hand dexterity issues. And it doesn't get easier with time — if anything, it gets more frustrating because you know you can do everything else just fine.
Luckily, there's a handy tool that can make this task a breeze — the needle threader. This small device can make all the difference in simplifying the threading process.
Before we look at needle threaders, there are some things we need to consider first about how to thread a needle.
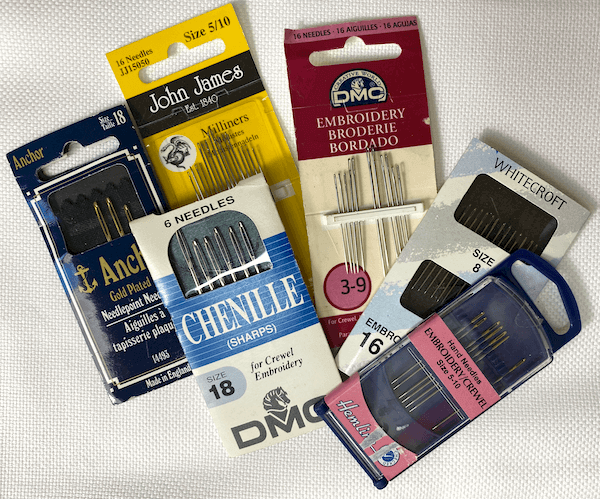
Choosing the Right Needle Size
With embroidery needles, one size does not fit all.
Different fabrics require different needle sizes to ensure the best results. So, how do you make sure you are using the most appropriate needle? Let's look closer.
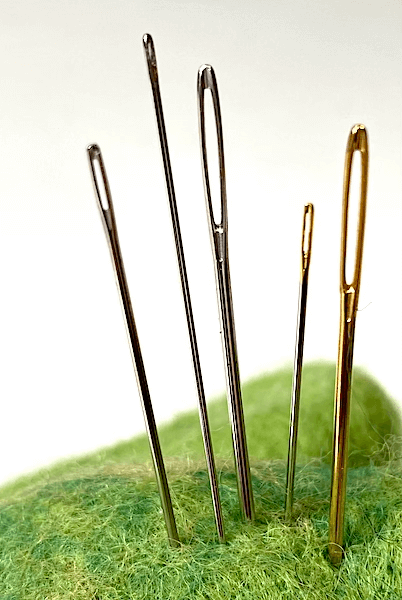
Consider the fabric
The first step is to consider the fabric you'll be stitching on. Fabrics vary in thickness and density, and the needle you choose should match these characteristics.
- For lightweight fabrics like silk or organza, opt for a finer needle size, such as 9 or 10.
- For medium-weight fabrics like cotton or linen, a size 11 or 12 needle will work well.
- And for heavier fabrics like denim or canvas, go for a larger needle size, such as 14 or 16.
Consider the thread
The thread you'll be using also influences the needle size — and this is one I learned the hard way. I once spent a frustrating half hour trying to thread pearl cotton through a size 10 crewel needle. The thread kept bunching up at the eye and I couldn't work out why, until I realised the needle was simply too fine for that weight of thread.
As a general rule, thicker threads like pearl cotton or tapestry wool need a larger needle to accommodate their bulk, while finer threads like silk or embroidery floss work best with smaller needle sizes.
But what if you want to use multiple strands of thread? In that case, you need to consider the combined thickness of all the strands together when choosing your needle. Two strands of floss will slip through easily, but try six strands through the same needle and you'll be fighting it the whole way.
Test and Adjust
I always stitch a few test crosses in a corner before I commit to a whole project. It only takes a minute and it's saved me from unpicking more times than I can count.
What you're feeling for is how easily the needle slips through the fabric, whether it leaves a hole that the thread won't fill, and whether you need to push harder than feels comfortable. If any of those things are off, swap the needle before you go any further — it's much easier to change now than twenty stitches in.
The End of the Thread
While it may seem like a minor detail, the condition of your thread can have a significant impact on your threading process.
Trying to push thread with a frayed, unruly end through the eye of a needle is frustrating, time-consuming and can lead to unnecessary stress.
What can you do to make it easier?
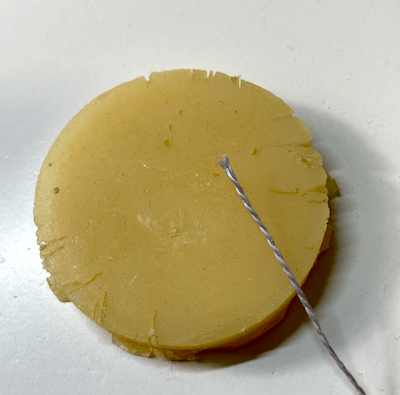
Trim the end — Before starting a new thread, take a moment to trim the end with sharp scissors. This will remove any frayed or uneven parts, leaving you with a clean and manageable end.
Use a Thread Conditioner — If you're working with a delicate or prone-to-fraying thread, consider using a thread conditioner. These products, such as beeswax or thread gloss, help to strengthen the thread and prevent fraying. Run the thread through the conditioner a few times, and you'll have a smoother, more resilient end.
Introducing the Needle Threader
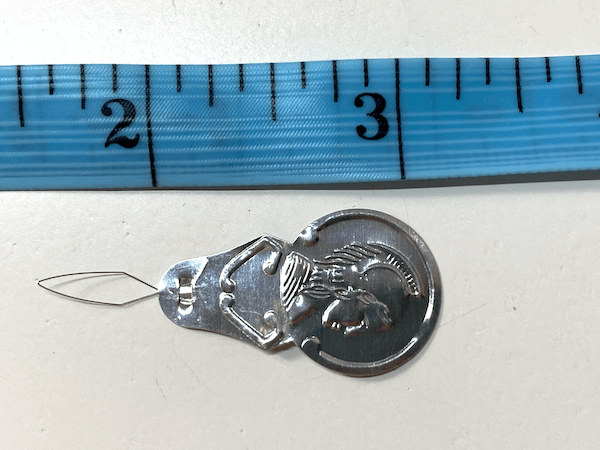
A basic needle threader is a nifty little tool that comprises a thin wire loop attached to a handle.
It's incredibly easy to use.
Just insert the wire loop through the eye of the needle, then place the end of the thread through the loop. With a gentle pull, voila! The thread effortlessly passes through the eye, saving you time and energy.
How to thread a needle using a wire needle threader
Insert the Wire Loop
Hold the needle threader by its handle, with the wire loop facing upward. Insert the wire loop through the eye of the needle, ensuring that it goes all the way through.
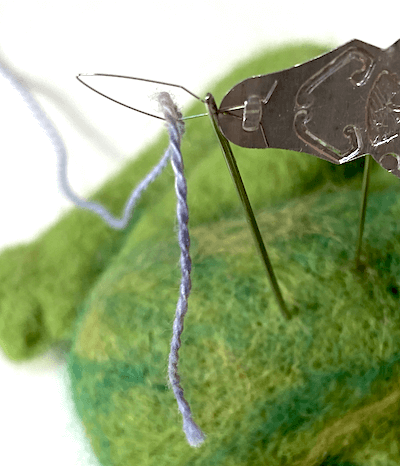
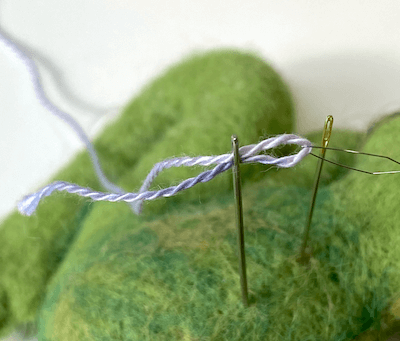
Thread and Pull Through
Pass the end of your thread through the wire loop, leaving a tail hanging out. Then carefully pull the needle threader back through the eye of the needle, bringing the thread with it. Voila! Your needle is now threaded and ready to go.
Using a basic wire loop needle threader takes the frustration out of learning how to thread a needle. It's a simple yet effective tool that can save you time and spare you from squinting and straining your eyes.
But wait, there's more! In the next section, we'll explore other types of needle threader that take threading to a whole new level of convenience and efficiency.
Threading Troubleshooter
Even with a threader, things don't always go smoothly. I've run into every one of these problems over the years — here's what actually works.
Thread keeps fraying — Snip the end at a sharp angle with your best scissors — blunt cuts make it worse. If it's still fluffy, run it across beeswax or thread conditioner and pinch to flatten the fibres. For really stubborn threads, try licking the end (yes, it works!) or use a tiny dab of clear nail varnish and let it dry for a few seconds.
Metallic thread won't behave — Metallics are notorious! Keep your lengths short — no longer than 12 inches — because the longer the thread, the more it twists and shreds. Use a thread conditioner (not beeswax, which can dull the shine), and try going up one needle size to reduce friction through the eye. If you're using a wire threader, be extra gentle — metallics can bend the wire.
Needle eye is too tiny — First, check you're using the right needle for your thread. If the eye feels impossibly small, try a different needle type — a chenille needle has a larger eye than a crewel, for example. Still stuck? An automatic needle threader handles tiny eyes far better than a wire loop. And sometimes the simplest fix is just turning the needle around — one side of the eye is often slightly smoother than the other.
Multiple strands won't go through together — When you're using 2–6 strands of embroidery floss, strip them out individually first, then recombine — this stops them bunching and twisting. Fold the group over the wire loop of your threader rather than trying to push all the ends through at once. If the strands keep separating, a quick pass through thread conditioner will help them cling together.
Wire threader keeps bending or breaking — Those little wire loop threaders are cheap for a reason — they're not built to last forever. If the wire bends, don't try to straighten it (it'll snap). Keep a few spares in your sewing box. For a longer-lasting option, look at the automatic or mechanical threaders in the next section — they're sturdier and worth the investment if you thread needles frequently.
Other Types of Needle Threader
I've tried most of these over the years, and honestly, I keep coming back to the basic wire loop for everyday stitching. But the automatic threader has been a real lifesaver on days when my hands aren't cooperating — and the one with the built-in LED light is brilliant for evening stitching when the overhead light just isn't enough.
Some of these come with handy extras too, like built-in thread cutters or little storage compartments for needles. Here are the main types you'll come across.
Automatic Needle Threader
This type has a built-in mechanism that automatically pushes the thread through the needle's eye with just a press of a button. Perfect for those who struggle with manual dexterity or have limited vision.
Threader with LED Light
These threaders come with a built-in LED light that illuminates the needle, making it easier to thread even in dim lighting conditions. Say goodbye to squinting and straining your eyes!
Threader with Thread Cutter
This type combines the functionality of a needle threader with a thread cutter. It has a built-in blade that allows you to trim your thread before it's threaded through the needle. A convenient two-in-one tool!
Self-Threading Needles
While not technically a threader, these needles have a small opening at the top that allows you to slip the thread into it, eliminating the need for threading through the eye. A great alternative for those who find traditional threading challenging.
Time to Get Your Own Needle Threader?
So, next time you struggle with how to thread a needle, reach for a needle threader and enjoy a stress-free stitching session.
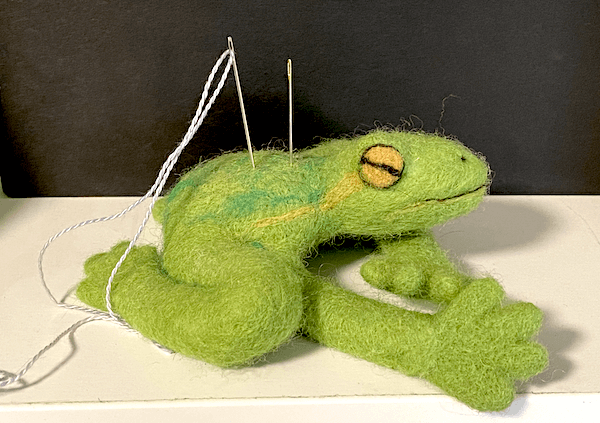
Oh, and in case you were wondering, my needle-felted frog helped me out for the photos of using the needle threader by holding the needle still. Without this help, I would have required three hands!
For more on needle felting click this link.
You might like these
The Ultimate Embroidery and Cross Stitch Planner For You
Stay focused with the Embroidery and Cross Stitch Planner - Keep your ideas and notes at your fingertips - A must-have for embroiderers keen to get organised
Embroidery Floss Guide: Strands, Threads & How to Use Them
Your complete guide to embroidery floss: how to separate strands, how many to use for each fabric, plus DMC, Anchor and alternative thread options.
How to Use & Tighten Embroidery Hoops (Step-by-Step Photos)
How tight should an embroidery hoop be? Learn to get drum-tight tension without puckers. Step-by-step photos show hooping, tightening, and fixing loose fabric


Stay connected between projects
If you’d like occasional updates from my embroidery room, including new patterns, gentle tips, and little things I think you might enjoy, you’re warmly invited to join the Stitchin’ Times newsletter.
About Me - Contact Carol - Privacy Policy - Site Map - Testimonials
Please do not copy the content of this site. It is protected by Copyscape.
Copyright © 2006- www.needlework-tips-and-techniques.com All rights reserved