- Home
- Intro to blackwork
- Free Blackwork Coaster Pattern
FREE BLACKWORK COURSE · LESSON ONE
Free Blackwork Coaster Pattern
Printable chart (PDF) with step-by-step Holbein stitch tutorial
Looking for a quick, satisfying stitch? Download this free blackwork coaster pattern and start today.
The printable PDF includes a clear chart, stitch key, and fabric sizes. Follow the step‑by‑step tutorial below to work the motif in double running (Holbein) for a neat, almost reversible finish.
Pattern Details
What You'll Need
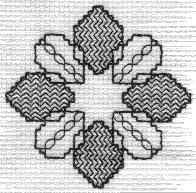
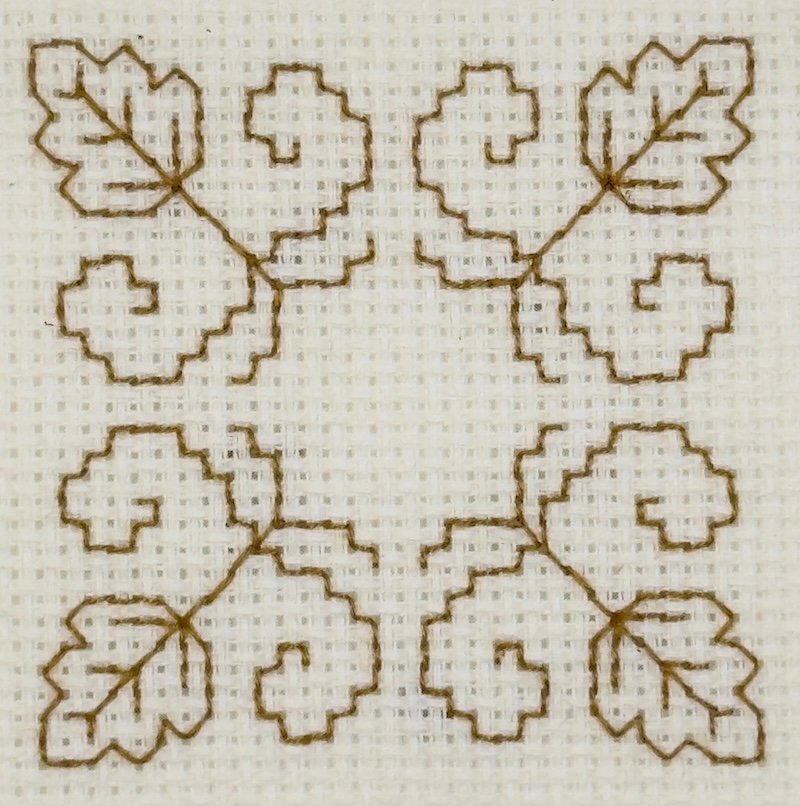
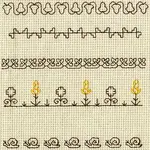
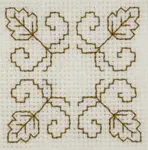
The Printable Pattern
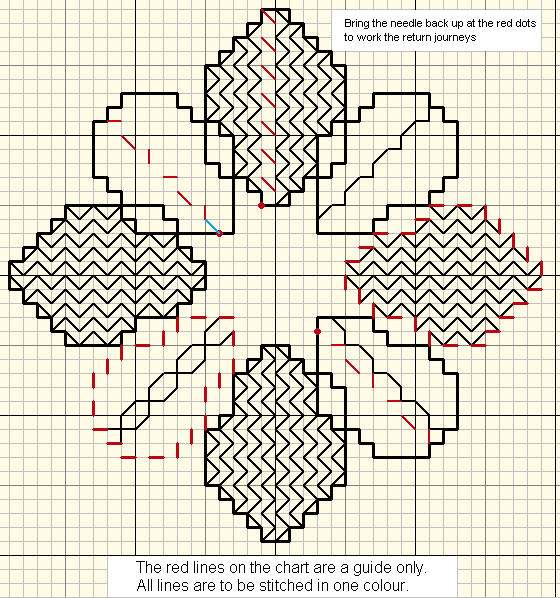
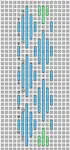
The chart from your free PDF download
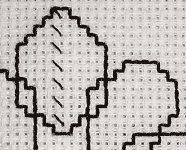
Step 1 — Outlines
After downloading the pattern, you may want to print it out so you can take it somewhere comfortable to stitch.
Take 2 strands of cotton/floss and thread your needle. I have made a quick video showing an easy way to separate the strands.
We will start with the outlines.
Looking at the chart, can you see there are two different shapes of petal? We will start with the one that has the zigzag fill inside it, on the right-hand side of your blackwork pattern.
I outlined it in a dashed red line. Each red line represents a running stitch. Work your way around the petal stitching all the red lines then when you arrive back at the beginning again, reverse direction and go around again, filling in the gaps to create a solid outline.
If you run out of thread, use the stitching you have already done to secure the end. Attach the new length of thread to this as well.
Next work the outline of the other petal shape. I have designed this chart so you do not have to count across long distances. If you turn it around so that the diagonal petal with the red dashed outline is at the top, it will enable you to just run your thread under a few outline stitches ready to start again.
Continue turning the chart and stitching the outlines until they are all in place.
Your First Fill Pattern
Work each red line as a running stitch down the length of the petal
Now we will move on to the first fill pattern. This is a super simple one of just one outward and one return journey. Again we will stitch it in double running stitch. Not all of my free blackwork charts use fill patterns, some are motifs without a fill.
Making sure your chart is the right way up (so you can read the words) attach a single strand of thread to the outside edge of the first petal, where the diagonal red line slants down to the right.
Work each red line as a running stitch down the length of the petal. Remember to leave space for the return diagonals.
When you reach the other end of the petal, towards the centre of the design, bring the needle back up at the red dot and continue back up to the top of the petal, filling in the gaps as we did with the outlines.
Continue to fill this petal in the same way, moving across towards the sides of the petal, to first fill one side, then the other with the pattern.
The Second Fill Pattern
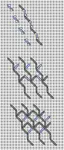
The pattern in the alternate petals is easy, but a little more involved. I have split it into four steps on your chart to make it easier to follow.

The four stages of the second fill pattern
Again with the chart the right way up (so that the petal with the single red dashed line is at the top left) attach a single strand of thread to the outside edge at the position of the red horizontal line.
Carefully following the printed pattern, as the stitches change directions, work across the petal in a running stitch. At the centre, bring the needle back up at the red dot and work the first return stitch (coloured blue on the pattern). Continue across the petal filling in the gaps to get the result shown in the top right petal on the chart.
Repeat this procedure following the red lines in the bottom left petal on the chart, turn at the red dot and complete the pattern on the way back.
Finishing Your Blackwork Coasters
Before You Start (Prep)
Rinse or lightly mist, lay face down on a fluffy towel, and press with a warm iron under a pressing cloth to avoid crushing your stitches.
Because we used double running stitch (Holbein), the back is neat. All you should need to do is weave thread tails under existing stitching and trim them, as long thread carries may show through.
Lay your coaster on top of your work and draw a pencil line around the outside onto the back of your fabric. Cut, then run a thin line of Fray Check along your cut edge and leave to dry. Trim to fit if necessary.
Option A — Acrylic Coasters (Back Is Visible)
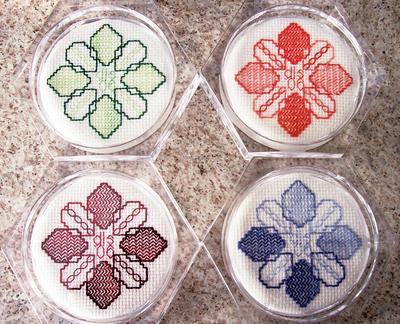
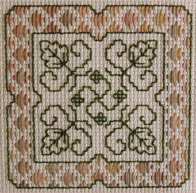
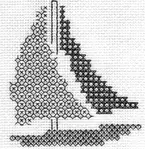
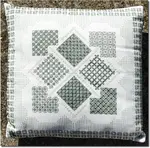
A visitor to the site, LuAnne, shared her gorgeous multi-coloured blackwork coasters
Best if you want to show off the neat, almost-reversible back. This method has the advantage of covering your stitching for protection.
You'll need: Your stitched piece, a coaster frame with insert cavity, and optionally lightweight fusible interfacing or vellum as a liner.
Method: If you prefer to hide thread tails slightly or brighten the design, cut a liner (lightweight interfacing, or vellum) to the same size. Place it behind the stitching. A couple of tiny dots of acid-free tape in the corners keep layers aligned if the interfacing is not iron-on.
Wipe the inside of the coaster to make sure there is no dust or lint trapped. Assemble by turning the coaster upside down, slipping in the stitched piece and then pushing in the plastic backing. All done!
Option B — Felt-Backed Fabric Coasters
Great when you don't have coaster hardware or want a hand-finished look.
You'll need: Wool felt sheet (1–2 mm), fusible web (e.g., HeatnBond Lite) or fabric glue, and optionally perle cotton for a decorative blanket stitch edge.
Steps: Decide on the size of your finished coasters, leaving as much empty fabric around the stitching as you like. Cut your fabric to size ensuring the design is centred.
Apply fusible web to the back of your work, following the manufacturer's instructions. Use a pressing cloth if desired. Peel off the paper backing once cool.
Lay the felt backing on your work surface and lay the work on top, face up. Fuse them together, using a pressing cloth to protect your stitching.
Decorate the edge with blanket stitch if desired. You can either use a matching or contrast colour perle thread.
Variation: You could use self-adhesive cork instead of the wool backing.
Continue Learning
You might like these
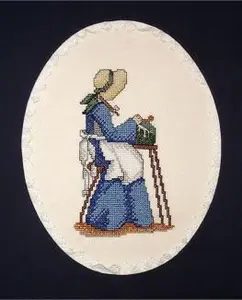
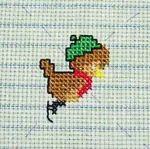
The creative inspiration behind a blackwork angel design
What gives you creative inspiration. Share your story and read how Maria was inspired to combine her love of needlework and painting.
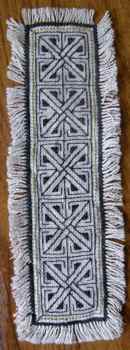
Make a bookmark with a Celtic embroidery pattern
A treat for lovers of Celtic embroidery. This little free blackwork bookmark is quick and easy to make as a gift, or for yourself
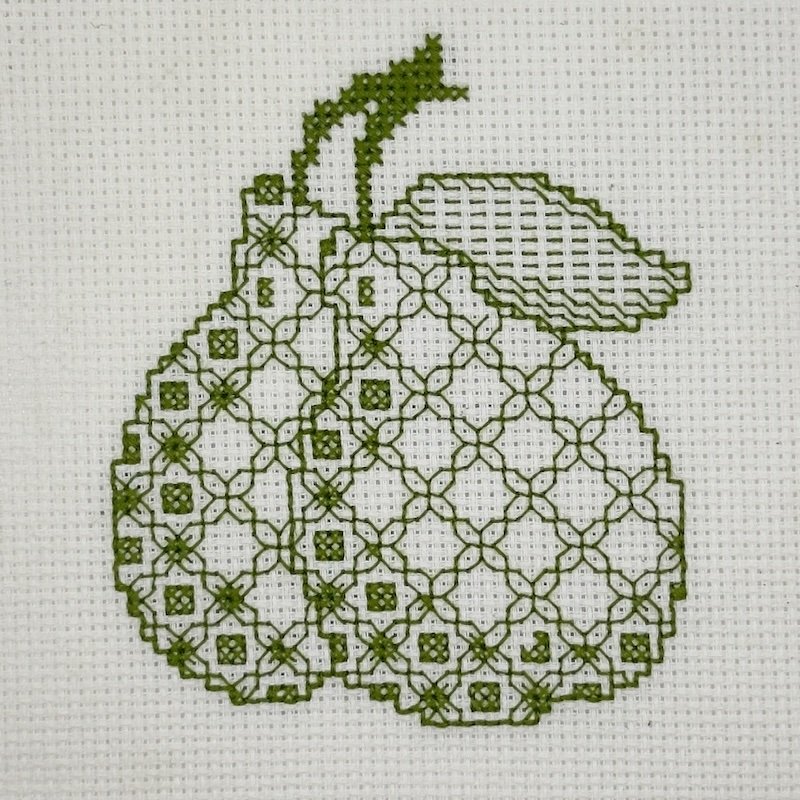
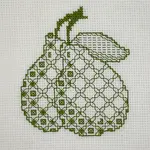
Blackwork Shading Tutorial: 2 Techniques + Free Pear Pattern
Master blackwork shading with this free pear tutorial! Learn 2 techniques for adding depth and dimension to your embroidery — step-by-step with photos.


Stay connected between projects
If you’d like occasional updates from my embroidery room, including new patterns, gentle tips, and little things I think you might enjoy, you’re warmly invited to join the Stitchin’ Times newsletter.
About Me - Contact Carol - Privacy Policy - Site Map - Testimonials
Please do not copy the content of this site. It is protected by Copyscape.
Copyright © 2006- www.needlework-tips-and-techniques.com All rights reserved