- Home
- Cross Stitch
- Reversible Cross Stitch
How to Do Reversible Cross Stitch (Step-by-Step with Photos)
Is it possible to work reversible cross stitch?
I was first asked about this at a blackwork class I ran, which is often worked reversibly. However, I hadn't tried doing the same thing when doing cross stitch so it took a while to come up with a technique that gave the desired results.
Before I started my experimentation I wanted to know the reason behind the question...
Why do you want to make your work reversible?
Here were some of the answers...
- So that when you stitch towels or tablecloths etc. they look good whichever side is visible.
- So when someone turns your work over to look at the back they are surprised!
- For the challenge!
- So that Christmas decorations can twirl on the tree and still look good
I couldn't argue with any of these, so I set to and came up with a solution.
Can all cross stitch designs be stitched this way?
I found that this technique is best suited for designs with simple blocks of colour or checked/plaid type patterns. You might find it tricky to stitch more complex or realistic designs that use lots of different colour changes.
The method I am going to explain here is easy, and it gives you crosses on both sides of the work resulting in that all-important tidy back to your cross stitch project.
How to work reversible cross stitch
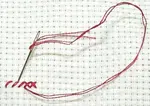
I chose to work with a variation of the continental method of working cross stitch; i.e. working a row of the first "legs" of the stitches and crossing them on the way back. This is demonstrated on my learn cross stitch page.
The difference is that I missed out alternate stitches as shown in the first photo, below. Here you can see the first row being crossed on the way back along it.

The trick with moving on to the second row was keeping that first stitch diagonal on the back. In fact I worried so much about this that I ended up working the underneath legs in the wrong direction!

I'm happy that the back of the work in this next photo shows crosses and not the usual vertical stitches throughout. However, you can see them where the colour change will happen.
Of course, there are also the inevitable fastening offs of the lengths of thread which spoil the appearance somewhat.

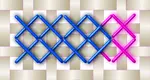
I continued filling in the lemon-coloured stitches, ensuring I crossed them correctly. Then I decided to show the chessboard construction in the top section.

The completed square doesn't look too bad on the front, does it?

But how about the all important 'reversible' back?

Apart from messing up the checkerboard effect when fastening off, particularly when changing direction to add a stitch I missed in the top corner of the lemon area, I think that area would have worked well.
The solid areas look good both back and front. But if I try this again, I will work on disguising the joins where one colour changes to another in a vertical row.
A way around the issue?
I have now worked out a way to eliminate the empty vertical lines.
When you take your first stitch, which will create the anchoring loop, work it over the top of an existing cross stitch. (Be careful to make sure the stitch lies in the same direction as the top stitch so as to keep things looking even and tidy.) Then your next stitch will be in the gap of the previous layer as normal.
This technique has a lot of potential and can be a fun process. Enjoy!
Do let me know if you try it out.
You might like these
Cross Stitch vs Embroidery: Choosing the Right Needlework Technique
Choose from cross stitch or embroidery - let your creativity shine through & create beautiful items to last a lifetime! No matter which you choose, have fun
How to Work Fractional Stitches in Cross Stitch (With Diagrams & Tips)
Learn how and where to use fractional stitches in your cross stitch. Half cross stitch, 3/4 and 1/4 stitches can help add detail to a design
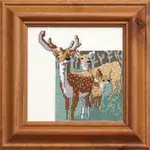
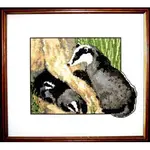
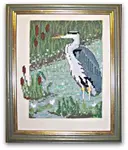
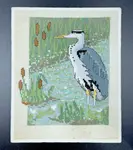
Bring the Beauty of Nature into Your Home with Wildlife Cross Stitch
Wildlife cross stitch patterns to download. Choose from a family of badgers, red foxes, fallow deer or a heron


Stay connected between projects
If you’d like occasional updates from my embroidery room, including new patterns, gentle tips, and little things I think you might enjoy, you’re warmly invited to join the Stitchin’ Times newsletter.
About Me - Contact Carol - Privacy Policy - Site Map - Testimonials
Please do not copy the content of this site. It is protected by Copyscape.
Copyright © 2006- www.needlework-tips-and-techniques.com All rights reserved