- Home
- Cross Stitch
- Cross Stitch Calculator
🧮
FREE TOOL
Easy Cross Stitch Calculator (No Maths Required)
Find out exactly how big your design will stitch up — on any fabric count
Compare sizes on different fabrics, check over-1 vs over-2, and work out how much to cut — no maths required.
📐 Instant Results
🧵 Any Fabric Count
📏 Inches & cm
🆓 100% Free
Use the Calculator →
Just enter your stitch count and fabric — results appear instantly
When my daughter Becky was 15 and learning cross stitch, I forgot to tell her one crucial thing: always leave extra fabric around the design. She only realised after she'd stitched a fair bit that the design wouldn't fit. In tears she threw her hoop across the room and it collided with my shin bone. Ouch! That Lavender and Lace design was never restarted. Can you blame her? So here's my "save your sanity" tool.
📋 QUICK START
What You Need (Just 4 Clicks)
- ✓ Design stitch count — width × height (from your pattern info)
- ✓ Fabric count — threads per inch or cm (e.g. 14-count Aida, 28-count evenweave)
- ✓ Over 1 or over 2 — you choose this in the calculator
- ✓ Read the results — instant, in both inches and cm
That's it. No formulas. No panic.
Not sure which fabric count to use? Our aida cloth guide explains the different counts and which suits your project best.
🧮 CALCULATOR
Cross Stitch Size Calculator
Now you know your finished size, here are your next steps:
- ✓ How much fabric to cut — always add extra for finishing (see the reminder below)
- ✓ Washing your finished piece — how to clean it safely before framing
- ✓ Framing cross stitch — display your work so it lasts
✦ ✦ ✦
📖 STEP BY STEP
How to Use the Calculator
Enter the Stitch Count
Look on your chart for something like "Design size: 115 stitches wide × 296 stitches high." If your pattern doesn't give it, count the grid blocks (often 10 × 10) across and down, then multiply by 10.
Enter Your Fabric Count
This is the threads per inch (or cm) — for example 14-count Aida, 16-count Aida, 28-count evenweave, or 32-count linen. Select whether you're measuring in inches or cm.
Choose Over 1 or Over 2
Over 1 = one stitch covers one fabric thread (common on Aida). Over 2 = one stitch covers two threads (common on linen and evenweave).
Read the Results
Two boxes appear showing your finished design size in both inches and cm. Done!
✦ ✦ ✦
💡 GOOD TO KNOW
Quick Tip for Evenweave & Linen
If you stitch over 2 threads, your "effective" stitches per inch is half. So you can treat these as equivalent:
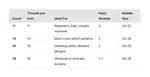
- ✓ 28-count over 2 → same as 14-count Aida
- ✓ 32-count over 2 → same as 16-count Aida
- ✓ 36-count over 2 → same as 18-count Aida
This is the one that catches people out, so it's worth double-checking before you cut the fabric!
✦ ✦ ✦
🧪 SANITY CHECK
A Worked Example
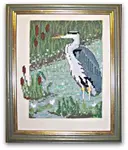
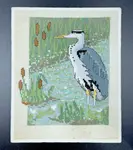
Let's use my art deco lady, Pearl, which is 115 × 296 stitches.
On 14-count Aida
Finished size: 8.2″ × 21.1″
(20.8 × 53.7 cm)
On 18-count Aida
Same design, smaller result — more threads per inch means a more compact finish.
If your result is wildly different from what you expected, it usually means the stitch count was read wrong (easy to do), or the fabric count doesn't match how you're stitching — especially the "over 2" setting.
⚠️ IMPORTANT
Before You Cut Your Fabric!
The calculator shows the size of the stitched area only. You still need extra fabric around it for finishing.
- ✓ Cards & small gifts: add at least 1 inch (2.5 cm) on each side
- ✓ Framed pieces: add at least 3 inches (7.5 cm) on each side for mounting, wraparound and framing
If you're between sizes, go bigger. Nobody has ever complained about having "too much spare fabric"... but plenty, like Becky, have cried over too little!
❓ FAQ
Common Questions (Quick Answers)
Why is my finished size slightly different from what I expected?
Normal reasons: stitch tension, washing, framing stretch, and whether you've rounded up or down when cutting fabric. A small difference is nothing to worry about.
I want it to fit a specific frame — can this help?
Yes! Use the calculator to test different fabric counts until the stitched size is comfortably smaller than your frame opening — after allowing for margins and finishing. Our framing cross stitch guide covers how much margin to leave.
🧵 KEEP GOING
Keep Stitching (Without the Hoop-Flinging)
Save this page somewhere you'll actually find it again (not in the 4,000-link bookmark graveyard). And if you want to go deeper on fabric choices, these will help next:
You might like these
Instant Download Cross Stitch Graph Paper (11 & 14 Count)
Ready to design your own cross stitch? Get our instant download graph paper pack with 11 and 14 count grids. An easy, low-cost way to start!
Framing Cross Stitch at Home: Step-by-Step with Photos
How to frame cross stitch yourself: step-by-step photos for stretching, mounting and framing. Plus when to use glass and when to wash first.
Cross Stitch vs Embroidery: Choosing the Right Needlework Technique
Choose from cross stitch or embroidery - let your creativity shine through & create beautiful items to last a lifetime! No matter which you choose, have fun


Stay connected between projects
If you’d like occasional updates from my embroidery room, including new patterns, gentle tips, and little things I think you might enjoy, you’re warmly invited to join the Stitchin’ Times newsletter.
About Me - Contact Carol - Privacy Policy - Site Map - Testimonials
Please do not copy the content of this site. It is protected by Copyscape.
Copyright © 2006- www.needlework-tips-and-techniques.com All rights reserved