- Home
- Hand embroidery for beginners
- Transferring Embroidery Designs Onto Fabric
Transferring embroidery designs onto fabric
Transferring your design onto fabric is one of those steps that sounds mysterious… until you’ve done it once. Then you realise it’s just choosing a method that matches your fabric and the tools you have.
This guide will help you pick the easiest option and avoid the common “why won’t it show up?!” moments.
Quick decision guide (pick your method)
Use this as a simple starting point:
- Light fabric → lightbox / window tracing
- Dark fabric? → transfer paper or prick and pounce
- Textured fabric? → tissue paper tacking
- Stretchy fabric? → water-soluble stabiliser
- Want to reuse a pattern quickly? → iron-on transfer method
Not sure? Start with the easiest: window tracing on light cotton
1. Lightbox or Window Tracing Method (Best for Light Fabrics)
Sometimes the simplest tricks are the best! This wonderfully low-tech method uses a bright light source—either a dedicated lightbox or just a sunny window—to turn your design into a traceable outline, right through your fabric. It’s like magic, but with science.
This method shines on: sheer or light-coloured, even-weave fabrics that you can see light through.
It’s not the best choice for: heavy, dark, or opaque fabrics that block the light.
The Simplest Toolkit of All
You barely need anything for this one!
- A bright light source, like a lightbox or a good old-fashioned window on a bright day.
- A washable or erasable fabric pen with a fine tip.
- Your printed pattern and some low-tack tape.
- Putting your fabric in a hoop or frame first can help keep it taut and stable, but it's optional.
How to Trace Like a Pro
- Set up your tracing station: First, tape your paper pattern onto your lightbox or window. Then, carefully position your fabric over the pattern, making sure it’s smooth and square, and tape it in place.
- Gently trace your lines: With your fabric pen, use light, short strokes to trace the design. This helps prevent the ink from bleeding. Nice and steady does it. If you're using a hoop, you can rotate it as you go to get the most comfortable angle.
- Check your work: Every so often, it’s a good idea to step back and check that everything looks aligned. This is the easiest time to fix any little wobbles before you get too far.
A Few Bright Ideas (Handy Tips!)
- Always test your pen on a scrap first! Check that the ink disappears completely when you wash it and that it doesn't leave behind a faint "ghost line."
- If your fabric is a little too thick to see through clearly, try going over the lines on your paper pattern with a thick black marker. This will make them much easier to see.
- Avoid tracing in a hot, sunny window. The heat can sometimes cause the pen ink to fade as you're working or even set it permanently! A bright, but not baking, window is best.
2. Dressmaker's Tracing Paper (Great for Dark Fabrics)
Remember that messy carbon paper that typists used to take a copy of a document? This is the fabric-friendly version! It’s a fantastic way to get a clean, crisp outline onto smooth fabrics without any heat or pricking involved.
This method shines on: most light-to-medium weight woven fabrics like cotton and linen.
It’s not the best choice for: very textured fabrics where the lines can get bumpy, or on knits where the fabric stretches.
What to Grab
You only need a few simple things for this technique:
- Dressmaker’s tracing paper that’s marked as fabric-safe (this is important!). It often comes in a pack with multiple colours.
- Something to trace with: a tracing wheel works great, but a blunt stylus or even an empty ballpoint pen will do the job perfectly.
- Your design printed on paper, plus tape or clips to hold it steady.
- A firm surface to work on, like a table or a cutting mat.
How It's Done: The Tracing Process
- Make your 'fabric sandwich': Lay your fabric down right-side up. On top of that, place the tracing paper with the coloured side facing down onto the fabric. Finally, place your paper pattern on the very top. Use tape or clips to keep all three layers from shifting.
- Time to trace: Using your tracing wheel or stylus, run it along the lines of your design with a steady, light pressure. No need to press too hard! You're just transferring the colourful chalk or wax onto the fabric below.
- Take a little peek: Before you go too far, carefully lift a corner of your pattern and the tracing paper to make sure the lines are showing up clearly. If they're too faint, just apply a little more pressure.
- The final reveal: Once you've traced the whole design, carefully unclip your stack to reveal your transferred outline. Try not to handle it too much to avoid smudging the lines.
- A quick touch-up (optional): If you find any spots are a bit faint, you can reinforce them with a fine, washable fabric pen.
A Few Handy Tips
- Always, always test on a scrap first! Different brands and colours have different levels of washability, so you want to be sure your lines will disappear when you want them to.
- This might sound odd, but you'll often get the best results using a light-coloured paper on light fabric. Dark paper on dark fabric can be hard to see.
- Chalky lines can rub away with handling, so try to stitch over your design soon after transferring it.
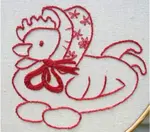
4. Prick and Pounce (traditional method for dark fabrics)
Ready to try a transfer method that feels a bit like magic? Prick and pounce is a wonderfully old-school technique that’s perfect for getting designs onto tricky fabrics where pens or iron-ons just won’t behave—like dark velvets, thick wool, or other materials that laugh in the face of modern tools.
This method shines on: dark or opaque fabrics, and for creating lovely, flowing curves.
It’s not the best choice for: very fluffy fabrics (the dots get lost) or super stretchy materials.
Let's Gather Your Tools
This might look like a long list, but it’s all very simple stuff!
- Your design printed on plain paper
- Something to prick the holes with: a needle held firmly in a pin-vice (it’s just a handle that grips the needle for you) or a fine craft awl
- A soft surface to work on, like a piece of felt or thick card
- Pounce powder: This can be special crafting chalk or charcoal, and you’ll want a light colour for dark fabrics and a dark one for light fabrics.
- Something to apply the powder with: a soft pounce pad or even a small, fluffy make-up brush will do the trick.
- A way to make the design permanent: A fine brush with dilute fabric paint or ink, or a fine-tipped fabric pen.
- Tape or a low-tack spray adhesive to keep your pattern from wiggling around.
How to Do It: Let's Pounce!
- Create your ‘stencil’: Place your paper pattern on the soft felt pad. Carefully prick holes along the lines of your design, spacing them about 1–2 mm apart (a little closer on tight curves). Don’t worry about perfection here; you’re just making a path for the powder.
- Position your pattern: Tape your newly pricked pattern onto your fabric exactly where you want your beautiful design to be.
- Time to pounce! Dip your pounce pad or brush into the powder, tap off any excess, and then gently tap or dab the powder over the holes. The secret is to tap, not rub—rubbing will just create a big, cloudy mess.
- The big reveal: Carefully lift away your paper pattern. Ta-da! You should see a perfect dotted outline of your design waiting for you on the fabric.
- Connect the dots: To make the design last while you stitch, carefully trace over the dotted lines with your fabric pen or a fine brush dipped in paint. (Choose a washable pen if you want the lines to disappear completely later!)
- A gentle clean-up: Once your paint or ink is dry, you can gently shake or brush away any leftover powder. Now you’re ready to stitch!
A Few Handy Tips
- Always do a tiny test on a scrap first! This helps you check that your powder colour shows up well and that your final painted line behaves on the fabric.
- Think opposites: use a contrasting powder (white on dark, dark on light) so the dots are easy to see.
- Try to keep your hands clear of the dots until you’ve traced over them to avoid smudging your lovely outline.
5. Tissue Paper Tacking (great for textured fabrics)
Here’s a wonderfully clever method for those fabrics that are a bit diva-ish—think napped velvet, bumpy wool, or anything where a pen mark would just get lost. By tacking through tissue paper, you create a perfect stitched guideline that sits right on top of your fabric.
This method shines on: textured fabrics that are tricky to mark directly.
It’s not the best choice for: designs with lots of dense fill stitching (as removing all the little basting threads afterwards can be a bit tedious).
What You'll Need
No fancy tools are needed for this one!
- Thin tissue paper or tracing paper with your design traced onto it.
- A fine needle and basting thread in a colour that contrasts with your fabric.
- A small pair of scissors or tweezers for the final clean-up.
- Tape or a few basting stitches to hold the tissue paper in place.
How It's Done: The Tacking Technique
- Position your pattern: Place the tissue paper with your design right where you want it on your fabric. A little bit of tape on the edges will keep it from slipping.
- Stitch your guide: Using your contrasting thread, make a simple running stitch (tacking stitch) directly over the design lines, going through both the tissue paper and the fabric.
- The satisfying tear-away: Once your outline is fully stitched, it’s time for the fun part! Carefully tear away the tissue paper. The paper will rip neatly along the perforations made by your stitches, leaving your thread outline behind.
- Stitch your design: Now, just stitch your embroidery as planned, following the tacked guidelines. You can remove the basting threads as you go or pull them out with tweezers at the very end.
A Few Handy Tips
- When tacking around tight curves, use shorter, more even stitches to keep the line accurate and smooth.
- To avoid accidentally pulling out your guide stitches, always tear the paper towards the stitch line, not away from it.
- This technique is a lifesaver when you need ultra-precise placement on a tricky fabric that won’t take ink well.
6. Iron-On Transfer Pens or Pencils (Best for Reusable Patterns)
Perfect for: reusable patterns and quick projects
How it works: trace onto transfer paper with a transfer pencil/pen, then iron it onto fabric.
Because temperature and timing matter, I’ve put the full step-by-step guide here.
Watch out for: some iron-on lines may be permanent — perfect for outlines, not ideal if you want the transfer completely gone.
Quick Tips for Success (no stress edition)
Choose the method that best suits your fabric, and keep the following in mind:
- Test first on a scrap or corner.
- Take your time—rushing leads to mistakes
- Keep your design secure while tracing
- Check visibility in your normal lighting (a line that looks fine in daylight may disappear at night).
- Keep your transfer lines light — let the stitches do the talking.
Troubleshooting (common problems)
“My lines disappeared!”
Try a stronger colour tool, or switch to stabiliser if the fabric is textured.
“My design transferred but it’s smudging.”
That usually means the tool isn’t fully washable/erasable, or the fabric finish is reacting. Next time: lighter pressure + test first.
“My design is skewed.”
Fold your fabric lightly to find centre lines (or mark a few guide points) before transferring.
Helpful next links
- Best fabric choices
- Supplies checklist
- Iron-on method (full tutorial)
- Using hoops
You might like these
How to Thread Paint for Beginners: A Step-by-Step Guide to Get Started
Learn thread painting with this beginner's guide. Leaen the secrets to smooth shading and create a beautiful embroidered flower with our step-by-step tutorial.
How to Do Colcha Embroidery: A Fun Guide to a Historic Stitch
Want to try a new craft? Colcha embroidery is a fun, historic technique with "no carved in stone rules." Learn to "paint with yarn" today!
Cross Stitch vs Embroidery: Choosing the Right Needlework Technique
Choose from cross stitch or embroidery - let your creativity shine through & create beautiful items to last a lifetime! No matter which you choose, have fun


Stay connected between projects
If you’d like occasional updates from my embroidery room, including new patterns, gentle tips, and little things I think you might enjoy, you’re warmly invited to join the Stitchin’ Times newsletter.
About Me - Contact Carol - Privacy Policy - Site Map - Testimonials
Please do not copy the content of this site. It is protected by Copyscape.
Copyright © 2006- www.needlework-tips-and-techniques.com All rights reserved