- Home
- Needlepoint
- Rhodes Stitch
NEEDLEPOINT STITCH GUIDE
Rhodes Stitch: Heart, Diamond & Square Variations
Add stunning texture and dimension to your needlework with this versatile raised stitch
Why You'll Love Rhodes Stitch
Found in both needlepoint and counted thread embroidery, Rhodes stitch adds texture and a three-dimensional effect to your needlework that really catches the eye.
It's wonderfully versatile — you can work it over 4, 6, 8, 10 or 12 canvas threads and in a variety of shapes. The stitch forms a raised bump in the centre where the threads cross over each other, creating that characteristic 3D look.
If you're using multiple Rhodes stitches in one project, it's important to begin each one from the same starting place so that the top stitch lays at the same angle throughout the work. This way the light will catch all the stitches in the same way.
Quick Reference
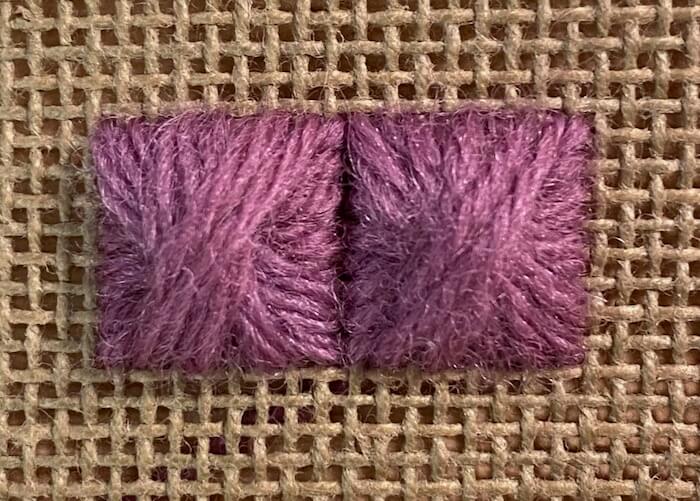
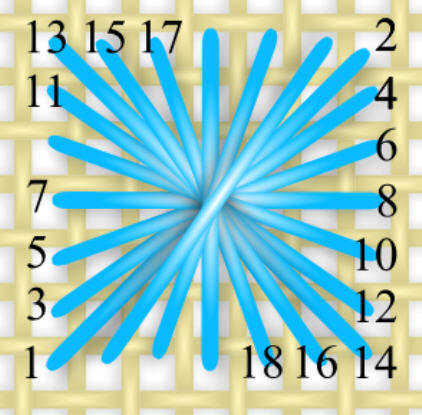
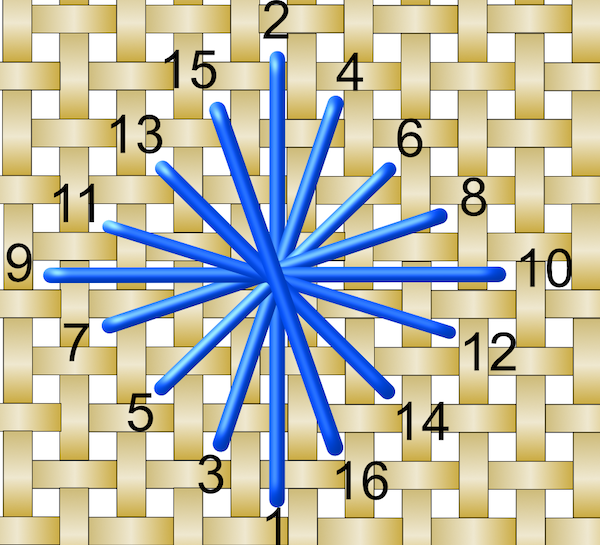
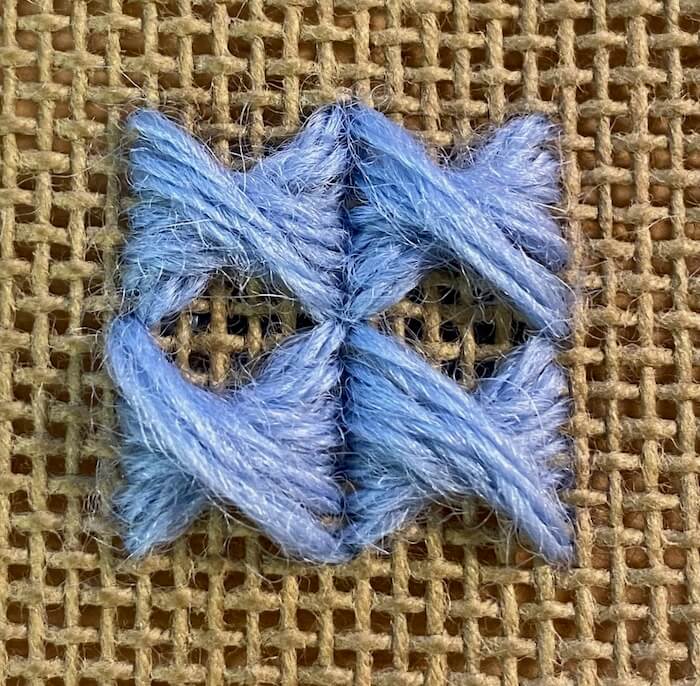
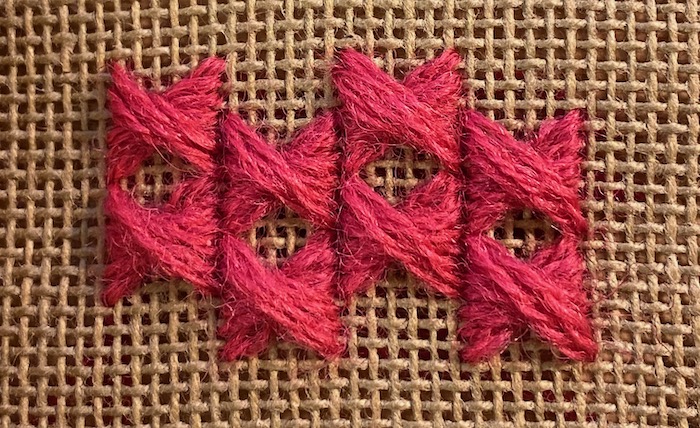
Square Rhodes Stitch
The diagram shows how to complete the basic square Rhodes stitch, worked over six threads.
When you finish the stitch numbered 17–18, just continue in the same manner until you reach the end.
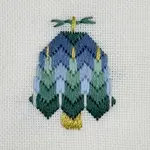
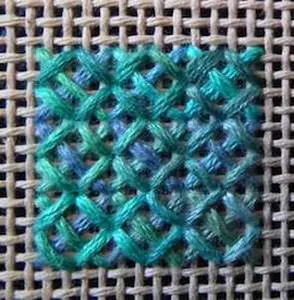
The square Rhodes stitches in the photo at the top of the page were worked over eight canvas threads.
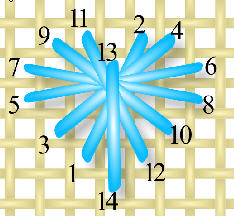
Rhodes Heart Stitch
By using different holes around the outside of the stitch, you can produce various shaped Rhodes. The heart is especially attractive.
Always start with the stitch numbered 1–2 so that the last stitch will be vertical when working the hearts.
The photograph shows small Rhodes hearts in a border where the stitches 5–6 and 7–8 touch. You could vary this by dropping the position of each alternate Rhodes heart stitch.
The hearts in the photo were worked over 6 threads as per the diagram.
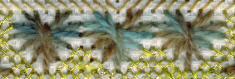
A row of Rhodes hearts worked as a border
Diamond Rhodes Stitch
The stitch can also be worked in a diamond shape. In the photo below the first vertical stitch covers eight canvas threads and then each subsequent stitch uses a hole diagonal to the previous one.
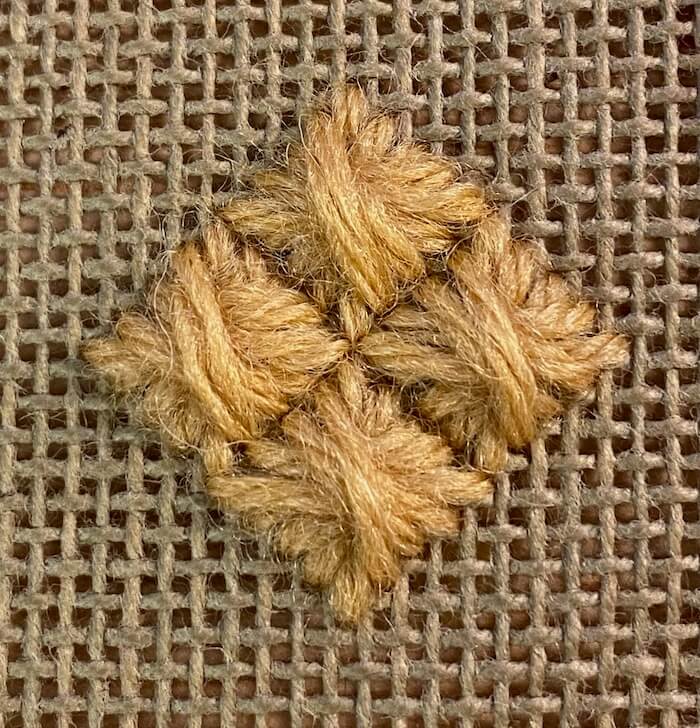
Diamond Rhodes stitch worked over 8 canvas threads
The diagram shows the stitch sequence for the diamond variation. Each stitch radiates from the centre, using diagonal holes around the outside edge.
The two photos below show Rhodes diamonds as used in my downloadable Textures To Dye For pattern called Hope.
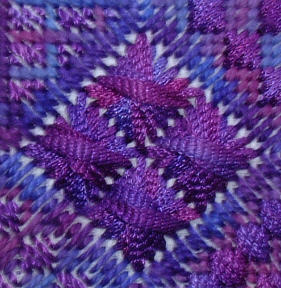
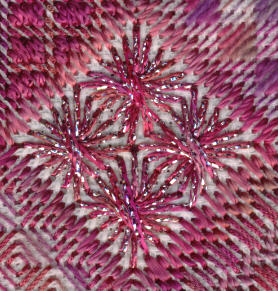
The purple piece uses a rayon ribbon to give a solid, chunky appearance, whereas the pink version uses a fine metallic thread to add sparkle to the design.
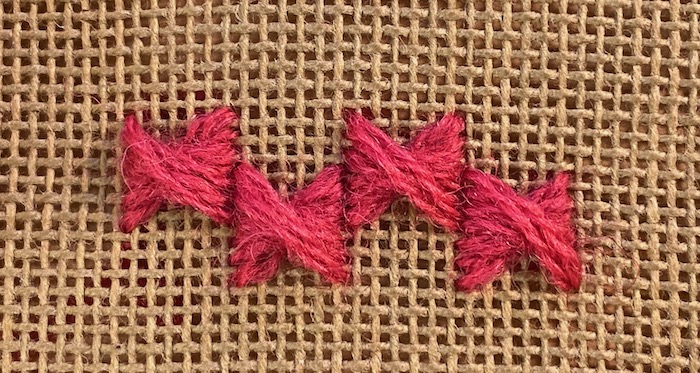
Half Rhodes Stitch
You can work just half of the stitch, side by side, to produce a result like little bow ties. I used Danish tapestry wool for this example.
Half Rhodes stitches — like little bow ties
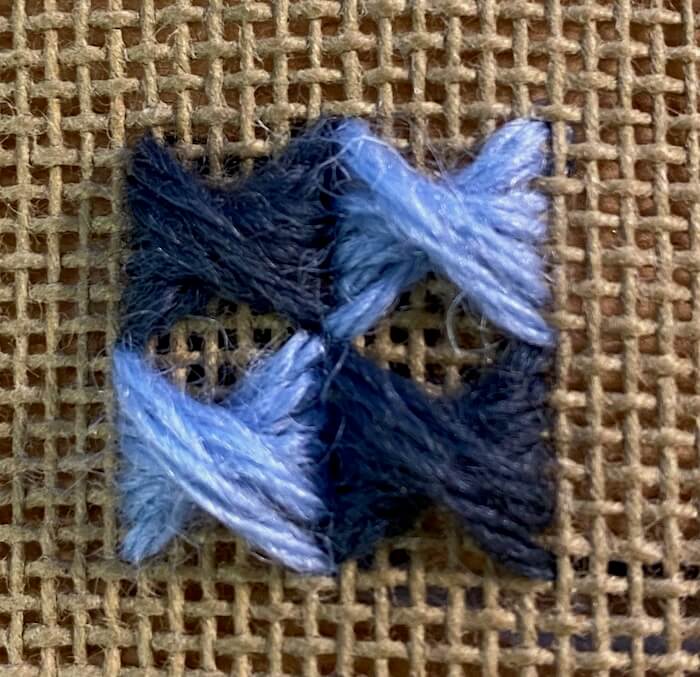
Two-Colour Checkerboard
Worked in alternate colours you can create a checkerboard pattern. Start by working the first half of each square in one colour...
First colour laid down in a checkerboard arrangement
Then choose to work the second half in the opposite colour, to complete each square Rhodes block.
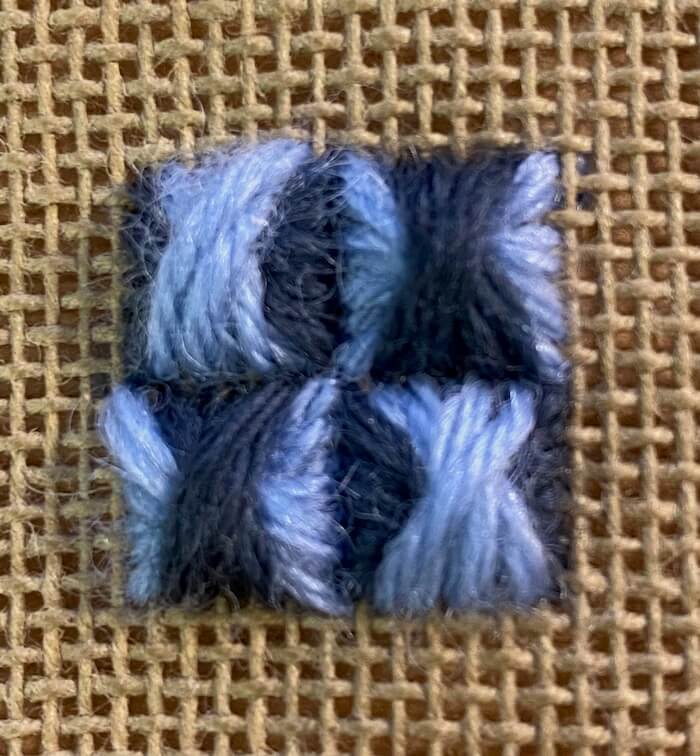
Completed two-colour checkerboard effect
Staggered Half Rhodes
If you alternately stagger your starting point for each half Rhodes stitch you'll get the effect shown below.
Staggered half Rhodes stitches
Stitching multiple rows in this manner will result in small diamond-shaped gaps between each.
Two rows showing the diamond-shaped gaps
Filling the Gaps
These diamond-shaped gaps can be filled with an upright cross stitch. In the example below I used two strands of crewel wool in red and Danish tapestry wool in dark green on single thread canvas. This makes an attractive overall pattern when repeated.
You could also choose to work tent stitch in the gaps, or even attach a bead.
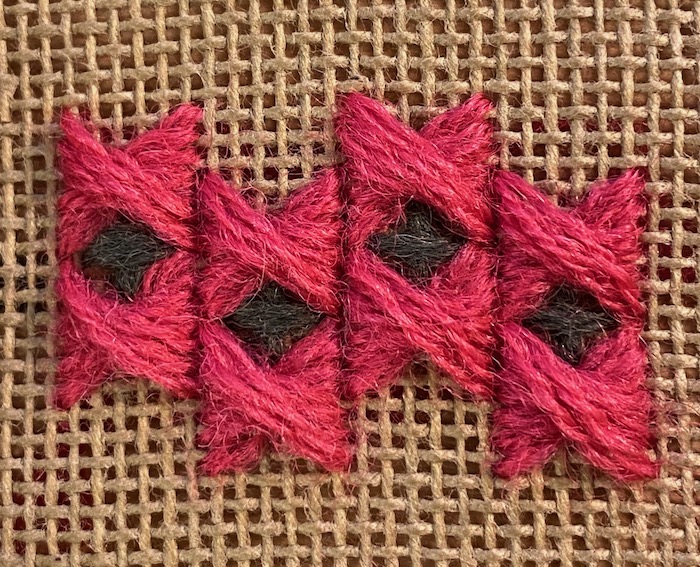
Gaps filled with upright cross stitch for a rich overall pattern
Ready to Try More Stitches?
I hope this introduction has helped you see the versatility of the Rhodes stitch. Whether you choose the classic square, the charming heart, the elegant diamond, or the creative half stitch variations, Rhodes stitch will add wonderful texture and dimension to your needlework.
Every variation opens up new creative possibilities.
You might like these
Needlepoint Fibers - How Thread Choice Transforms Texture
Needlepoint fibers compared — see how rayon, cotton, metallic and over-dyed threads completely transform the same design. Real workshop examples with photos.
Scotch Stitch Needlepoint Guide: Step-by-Step Tutorial
Learn how to work the Scotch Stitch with our step-by-step needlepoint tutorial, including variations like Alternating and Chequer Stitch
What is a laying tool and how do I use one?
Instructions for using a laying tool (or trolley needle) to produce embroidery stitches that lay neatly side by side


Stay connected between projects
If you’d like occasional updates from my embroidery room, including new patterns, gentle tips, and little things I think you might enjoy, you’re warmly invited to join the Stitchin’ Times newsletter.
About Me - Contact Carol - Privacy Policy - Site Map - Testimonials
Please do not copy the content of this site. It is protected by Copyscape.
Copyright © 2006- www.needlework-tips-and-techniques.com All rights reserved