- Home
- Needlepoint
- Free Printable Plastic Canvas Patterns
FREE PATTERN
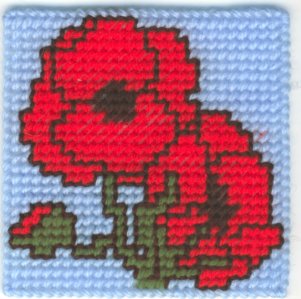
Free Plastic Canvas Poppy Coaster Pattern
A printable chart, materials list and beginner-friendly tent stitch instructions.
Let's start our free printable plastic canvas patterns section with a poppy design. This coaster is easy to stitch using tent stitch and could be tackled by a beginner to the craft of needlepoint.
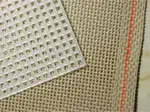
This form of canvas is moulded rather than woven and can be cut into shaped pieces for three dimensional items, such as tissue boxes or dollhouse furniture without risk of fraying.
You do not need to sew pieces together for this design, just stitch over the edge and use it as a coaster under your hot drinks to protect your table top.
What Do I Need?
- 1 square 7 count plastic canvas with 26 × 26 holes
- Blue, red, green and black yarn
- Size 18 tapestry needle
- Needle threader (optional)
Getting Started
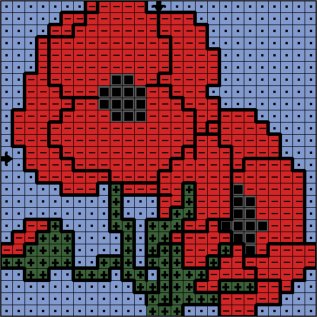
The first of our free printable plastic canvas patterns is worked from the chart above.
Having large holes the canvas is ideal for children or the visually impaired, but of course it can be enjoyed by anyone.
The squares and circles save time as you do not need to cut the shape before you can stitch. But for economy you can buy the larger sheets, in a number of colours and cut to shape yourself.
The craft mesh is also available in a 10 count size which will result in smaller finished pieces.
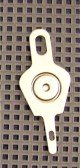
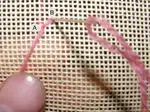
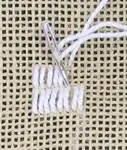
Threading the Needle
Threading wool into your tapestry needle can be tricky so you may like to use a needle threader.
To use the type shown in the photograph, push the smallest end of the threader through the eye of the needle. Poke the yarn through the hole in the end of the threader, then pull it back firmly, leaving the yarn threaded through the needle ready to use.
If you don't have a threader you can use a piece of folded paper for the same purpose. Cut it narrow enough to fit through the eye of the needle and sandwich the end of the yarn between the fold. Pass the paper through the needle and the yarn will go too.
Start Stitching
Blue Background First
Thread the needle with the blue yarn and stitch the first 7 stitches in the top left hand corner of the chart using one of the three types of tent stitch.
Work in Colour Blocks
Change direction and work the 5 blue stitches underneath. Continue in this way until your blue thread runs out, following the blue squares on the chart. Work in blocks of colour rather than row by row.
Add the Poppies
Change to red yarn and start working on the poppies themselves. Then fill in the green and black areas following the chart.
Outline & Finish
When all the tent stitches are in place, thread up with black yarn and outline using back stitch (optional). To complete your coaster work an overcast stitch in blue over the edge.
Ready to Stitch Your Poppy Coaster?
This little project is a great introduction to plastic canvas work. The 7-count mesh makes it easy to see where your stitches go, and the poppy design is cheerful and satisfying to complete. Why not make a set?
You might like these
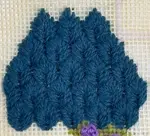
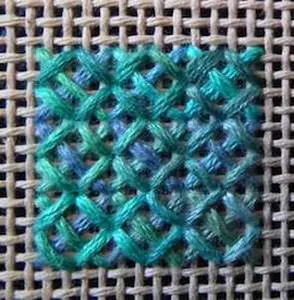
How to needlepoint velvet stitch to create a fur texture
Learn how to needlepoint with this guide to velvet stitch. Great for creating a fur-like texture for animals or can be used for needlepoint rugs
Needlepoint Leaf Stitch: 3 Easy Variations with Diagrams
Learn the needlepoint leaf stitch and 3 beautiful variations with step-by-step diagrams. A beginner-friendly stitch that adds texture and detail to your canvas
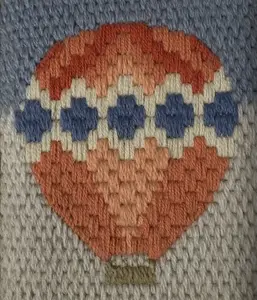
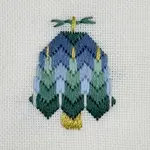
Bargello Needlepoint for Beginners: Stitches, Patterns + Colour
Learn Bargello needlepoint with this beginner guide. Step-by-step stitching, colour theory tips, and 3 design types explained. Includes a free bell pattern!


Stay connected between projects
If you’d like occasional updates from my embroidery room, including new patterns, gentle tips, and little things I think you might enjoy, you’re warmly invited to join the Stitchin’ Times newsletter.
About Me - Contact Carol - Privacy Policy - Site Map - Testimonials
Please do not copy the content of this site. It is protected by Copyscape.
Copyright © 2006- www.needlework-tips-and-techniques.com All rights reserved