- Home
- Sewing Room Ideas
How to Create a Small Sewing Space You Love (Even if It's Messy)
I often hear people say, “I’m not really a crafty person…”
If you’ve ever said that while scrolling past picture-perfect sewing rooms, you’re not alone. I felt the same way for years.
The truth is, you don’t need a “crafty” label to set aside a small sewing space for making things. You just need to give yourself permission to be a little bit messy.
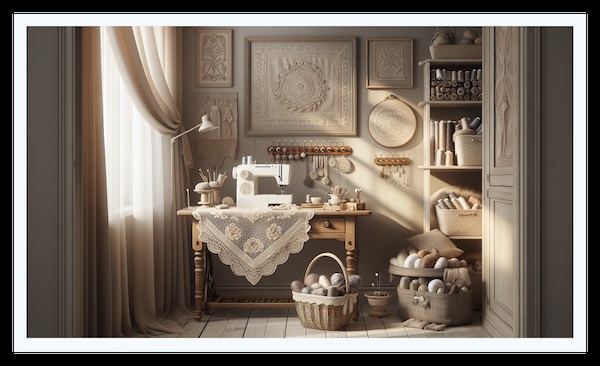 We've all seen this picture, right? The perfect room, the perfect light... the perfect way to feel like your own space will never be good enough. Let's agree to ignore this from now on, shall we?
Start with a simple “draft” space
For years, my main craft area was the dining table.
Most days it was covered in post, a forgotten mug of tea, and a mending pile that had been waiting far too long.
How could that person, the one who couldn't even keep a table clear, possibly have one of those magazine-worthy craft rooms? The thought alone was exhausting.
What I eventually learned is that the best sewing spaces aren’t the ones that photograph well. They’re the ones you actually use, tangled thread and all.
Starting Where You Are, With What You Have
I never set out to “design a sewing room”. I just kept nudging a few things around until one small corner finally felt like it fit the way I actually sew.
I started with a wobbly three-cube IKEA unit shoved in a corner of my bedroom. It wasn't pretty. But it was mine.
A "draft space" isn't a commitment. It's an experiment. It's asking:
- "I wonder if this corner by the window could work... even with the laundry basket standing guard?"
- "What if I just... claimed half the dining table? For good?"
- "Could that awkward space under the stairs become my secret nook?"
The goal is to find one small spot where creativity feels possible, not performative. My breakthrough? I finished three small projects in my "messy" corner while still dreaming of the "perfect" setup. The dream was holding me back, but the reality was moving me forward.
It made me realise there’s usually at least one small, imperfect corner that’s quietly waiting to be claimed.
Claiming a Small Corner for Sewing
You might think you need a whole room. An official, sign-on-the-door "Sewing Room." I certainly did.
For months, I’d walk through my house playing a game of "if only." If only we didn't need a guest room... If only the kids' toys didn't live in that alcove...
But here's the thing about "if only". It's a thief. It steals the perfectly good right now.
My "Aha!" Moment (Next to the Laundry)
The day everything changed was when I stared at that awkward, oddly-angled corner in my bedroom. The lighting was, let's be honest, a bit gloomy. Its main roommate was the laundry basket.
But it was available. And I’ve learned that available almost always beats perfect.
I dragged that IKEA unit over, and just like that, I had a surface. It wasn’t the grand cutting table I’d imagined, but it was a start, and it felt, in a quiet way, like planting a small flag.
Your Space Is Already Waiting for You
It can be helpful to look around your home with fresh eyes, setting aside the “proper” use of each space and simply noticing any small pockets of opportunity.
- That spot by the kitchen window where the morning light is lovely.
- The dining room corner that only gets used for birthdays and Christmas.
- Even that tall cupboard where you could take the doors off and pop a small desk inside.
The magic isn't in finding the perfect space. It's in claiming an imperfect one and making it yours. A small lamp, a comfy cushion, a pegboard on the wall... it all follows naturally once you've started.
Perhaps there’s a small corner, however imperfect, that might quietly become your place to sew?
 My trusty pegboard. This was one of the first things I added to my little corner. It cost next to nothing, but it made me feel like a proper creator, finding a home for all my bits and bobs. It’s proof that small changes can make a huge difference.
Your Space is Trying to Talk to You
Once my corner was claimed, I immediately tried to force it into submission. I bought matching tins. I labelled things. I arranged my thread spools in a perfect rainbow, just like the pictures online.
It lasted about a week.
Then I noticed something fascinating. My favourite scissors didn't want to live in the pretty pot. They wanted to be on the windowsill. My most-used threads always ended up in a coffee mug by my elbow. My tape measure preferred to live draped over my chair.
My space was trying to tell me how it wanted to be organized. Instead of fighting it, I started listening.
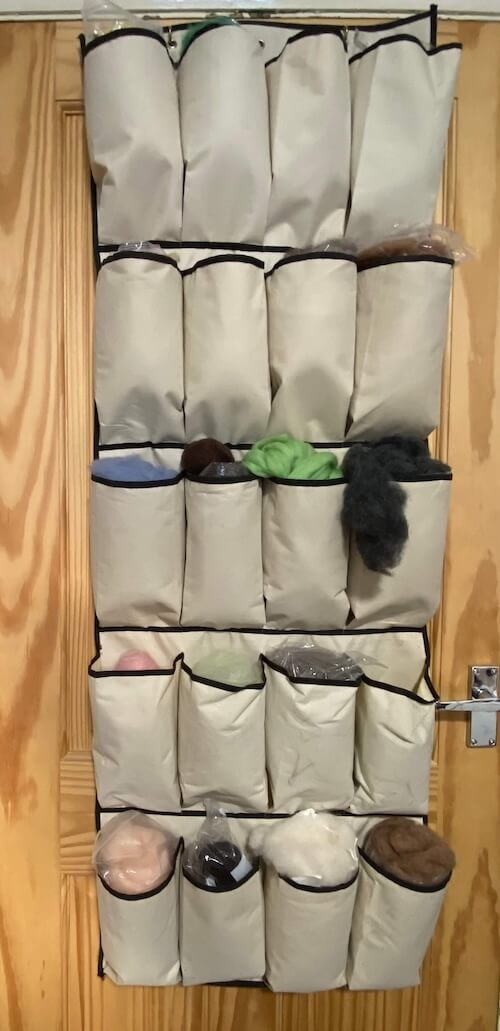 Who knew a shoe holder was the perfect home for my felting wool? Not me, until I got tired of it rolling off the shelf! Your space will give you these little hints if you listen.
How an Old Toolbox Changed My Sewing Corner
The real breakthrough came when I nicked my husband's old plastic toolbox. It wasn't stylish, but it worked. The little compartments were perfect for needles and notions, I could see everything at a glance, and it was portable.
I had been trying to create a space that looked right. My habits were showing me how to create a space that felt right.
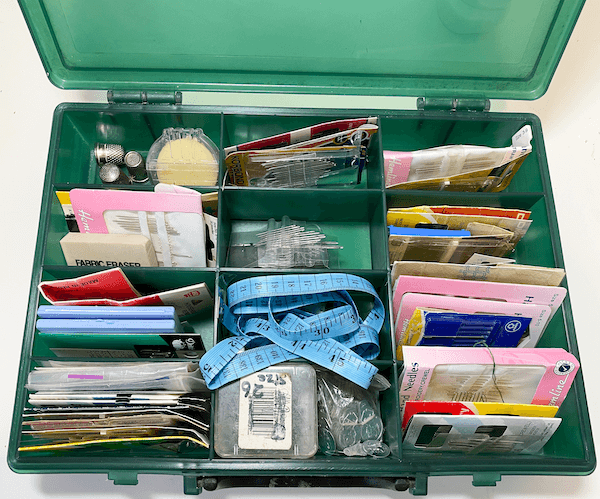 The famous toolbox! Not the prettiest thing, but honestly one of the most useful items in my entire sewing corner. Everything has its place, and I can see it all at a glance. Function over fuss, always.
What My Own Habits Started To Show Me
You might like to spend a few days simply making, without worrying too much about tidying as you go.
Your space is already showing you its natural flow. All you have to do is pay attention.
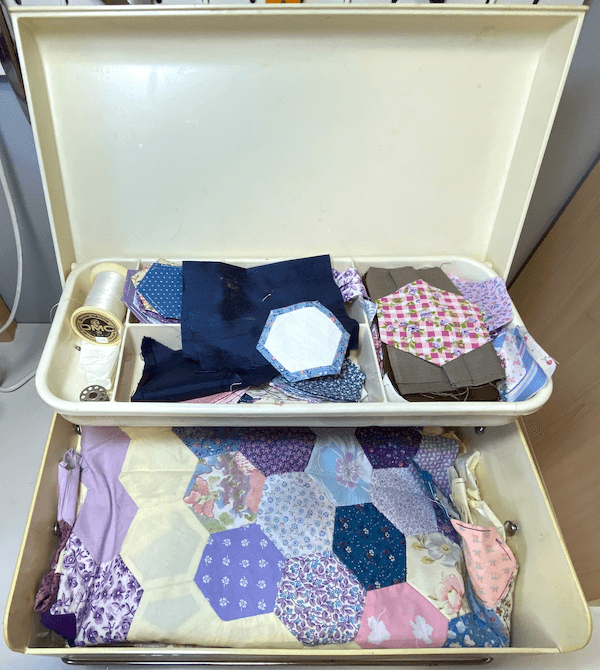 My current quilt project lives in this old baby box. It's a sweet reminder of one season of life holding the creations of the next. The best storage solutions are often the ones with a story.
Settling Into a Space That Feels Like Home
About three months into my bedroom corner experiment, the magic happened. I sat down to hem my daughter's dress and realised I hadn't spent a single minute hunting for anything.
My hands just... knew where to go. Scissors from the windowsill. Tape measure from its hook. Pins from the magnetic dish right by the machine. Everything I needed was exactly where I needed it to be, without a conscious thought.
The space had finally disappeared. All that was left was the flow of creating. It was the most peaceful, productive feeling.
From Chaos to Calm: The One-Minute Reset
That feeling wasn’t an accident. Over time, I noticed three small habits making all the difference: I kept my most-used tools out and ready, I let things live where I naturally reached for them, and I gave the space a tiny one-minute tidy at the end of each session.
In the end, it wasn’t about having a perfectly tidy corner at all. It was about having a little space that stopped getting in the way, so the making could quietly take centre stage.
Somewhere in your home, there’s probably a small, imperfect corner waiting to become yours. Once it’s claimed and your tools have found their little homes, something lovely happens—you can stop thinking about the space, and simply lose yourself in the quiet joy of making.
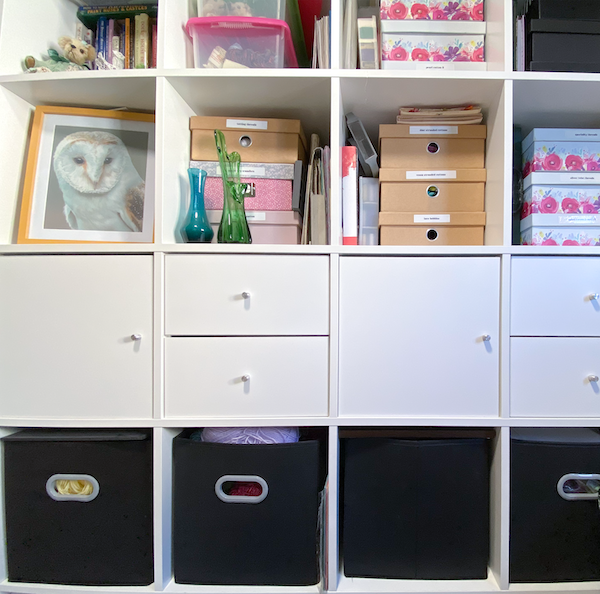 And here it is today. My corner has grown from that first wobbly unit into this. It's not always this tidy, but it's always ready for me. Your space can grow with you, too. Start small and see where it takes you!
Stay connected between projects
If you’d like occasional updates from my embroidery room, including new patterns, gentle tips, and little things I think you might enjoy, you’re warmly invited to join the Stitchin’ Times newsletter.
