- Home
- What do I need?
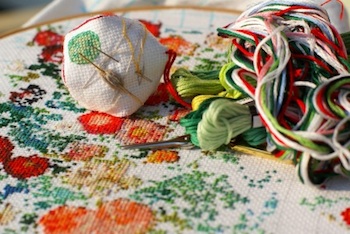
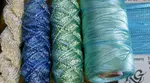
- Organizing Embroidery Floss
KEEPING IT TIDY
Organizing Embroidery Floss
Storage ideas to stop your thread collection becoming a tangled mess
Organizing embroidery floss can be tackled in various ways. The best system for you depends on how many skeins you have, how much you want to spend, how many projects you have on the go at once, and how many different types of thread you keep at hand.
When you're ready to begin a new project, the first step is finding (or buying) the threads you need. If you're not organised, it can take longer to search through your stash than it would to go and buy new skeins. And don't you find that new skeins have much more appeal than the tangled remnants at the bottom of the box?
Getting organised also prevents duplicate purchases. When I finally sorted out my own collection, I found I had eight skeins of electric blue. Eight!
Think It Through First
Don't go running to the store for the latest gadget or system before taking the time to consider your needs. Ask yourself:
Sort by number or colour?
If you're a cross stitcher, you'll probably want to store threads in manufacturer's number order. For freestyle embroidery, keeping similar colours together (regardless of number) might make more sense. And if you do Hardanger, sorting by thickness could be the most practical approach.
There's no single right answer. Pick whatever makes it easiest for you to find the thread you need, quickly.
Storage Systems for Embroidery Floss
You don't need to make a big investment to get organised. Some of the best solutions are surprisingly affordable, especially if you don't mind a bit of DIY. Here are the most popular options.
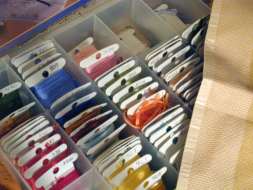
Small drawer units
My local needlework shop stores their floss in wall units with transparent-fronted drawers. You might not have room for that at home, but a quick trip to a DIY store will turn up small drawer units designed for storing nails and screws that work just as well.
Use cardboard dividers to keep different colours in each drawer separate, and add neat labels with the colour numbers so threads are easy to find.
The one drawback: if you don't have the full collection when you set up the system, you'll need to decide whether to leave gaps for missing numbers or reorganise later when your stock grows.
Bobbin boxes
This is one of the most popular systems. You wind your floss onto numbered plastic bobbins and store them in transparent plastic organiser boxes with dividers inside. You can see the colour range without opening the box, and it's simple to slot new threads in where they belong.
Cardboard bobbins are also available (and you can write the thread number on them), but they tend to get worn and scruffy over time and need replacing.
When you remove a bobbin for a project, pop a placeholder card in its place so you know which colours are out and which project they're with.
Browse bobbin boxes and floss organisers on Amazon (affiliate link)
Project cards (Loran system)
The Loran Cross Stitch Project Cards are one of my favourite systems for getting organised.
Rectangles of stiff card have evenly-spaced holes punched down the right-hand side. Each hole holds a skein of thread.
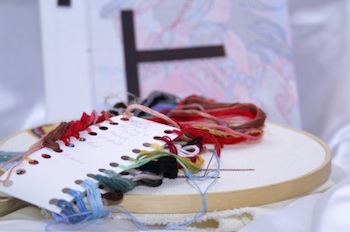
To attach the floss, first cut the skein into your ideal stitching length. Fold the bundle in half, push the folded end through the hole to form a loop, pass the cut ends through the loop, and pull firmly.
Write the colour number beside each hole as you go, including all the colours in the range. You can add any you're missing later.
The left-hand side of the cards have smaller holes so you can place them in a binder. Remove the amount of floss you need for your project and attach it to a smaller card, leaving the bulk of the thread in the original binder.
It's simple to remove just one length with the eye of your needle. Return any unused thread to the binder at the end of a project.
Browse Loran Project Cards on Amazon (affiliate link)
Floss-a-way bags
Another popular method is floss-a-way bags. Each small bag holds one colour, and you can store full skeins and leftover strands in the same bag. Store the bags in boxes or baskets in either number or colour order.
My friend Angie keeps all her blues in one basket and the greens in another. It works beautifully and looks lovely too.
The bags also work well for project storage. Thread the required bags onto a ring to carry around with you. Write the numbers on the bags with a permanent marker and you're set to go.
Browse floss-a-way bags on Amazon (affiliate link)
DMC Stitch Bow holders
If you'd rather not wind thread onto bobbins, the DMC Stitch Bow system is worth a look. The whole skein fits onto a plastic holder without any winding, making it quick and convenient to set up. The holders store neatly in their own storage case.
Browse Stitch Bow holders on Amazon (affiliate link)
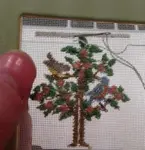
Organising Thread for Individual Projects
Your main storage system keeps your full collection organised. But when you start a project, you'll want the threads for that project kept together and separate from the rest.
Small ziplock bags
Cut the threads you need, label the bag with the project name, and keep it with your pattern and fabric. Simple, cheap, and portable.
Project cards
The Loran system (described above) is designed for exactly this. A smaller card holds just the threads for one project, with colour numbers written alongside.
Floss-a-way rings
Thread your colour bags onto a ring. Everything travels together and you can flip through the bags to find the shade you need.
Whichever method you use, always note which colours are out of your main storage and which project they're with. There's nothing more frustrating than hunting for a thread that's sitting in a project bag you've forgotten about.
Ready to Organise Everything Else?
Thread storage is just the start. If you're on an organising roll, my wider guide covers tips and ideas for keeping your entire needlework stash tidy.
You might like these
Embroidery needles - which ones do you need for what job?
With so many different needlework techniques to choose from on this site, how do you know which embroidery needles you need? Let me help...
Aida Cloth Guide: Compare 11, 14, 16 & 18 Count (With Chart)
Which Aida count is right for you? Compare 11, 14, 16 and 18 count with a video guide, stitch chart, and needle and floss recommendations for each.
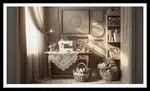
Small Sewing Space Tips for Embroidery Lovers
Make a small sewing space work in a busy home with clever storage, compact surfaces and details that let stitchers and makers create without clearing tables.

You might like these
Aida Cloth Guide: Compare 11, 14, 16 & 18 Count (With Chart)
Which Aida count is right for you? Compare 11, 14, 16 and 18 count with a video guide, stitch chart, and needle and floss recommendations for each.
Organize your stash - tips and ideas for your needlework supplies
Do you have trouble finding your needlework supplies? Ever bought the same thread twice? Learn how to organize your stash
Embroidery needles - which ones do you need for what job?
With so many different needlework techniques to choose from on this site, how do you know which embroidery needles you need? Let me help...
Stay connected between projects
If you’d like occasional updates from my embroidery room, including new patterns, gentle tips, and little things I think you might enjoy, you’re warmly invited to join the Stitchin’ Times newsletter.
About Me - Contact Carol - Privacy Policy - Site Map - Testimonials
Please do not copy the content of this site. It is protected by Copyscape.
Copyright © 2006- www.needlework-tips-and-techniques.com All rights reserved