Yes, You Can Embroider!
Ten calm minutes. A hoop in your lap.
A stitch that finally makes sense.
If you're overwhelmed by all the stitches — or frustrated when instructions skip steps — you're in the right place. Your first stitches are allowed to look a bit wonky.
Start with one small win today
Not sure where to begin? Pick one of these — each is designed to help you finish something small before you tackle bigger projects.
Helpful starting points
If a diagram has ever made you feel lost, it's not you — I show the missing steps, plus simple fixes for tension, counting slips, and thread tangles.
- ✓ Simple supplies I reach for most (hoop, floss, needles, small scissors)
- ✓ Troubleshooting tips for when things go wrong
- ✓ Finishing techniques to make your work look polished
- ✓ Free patterns to practise with
Pick the path that fits you right now
You don't have to choose "your style" today. Start with what calls to you.
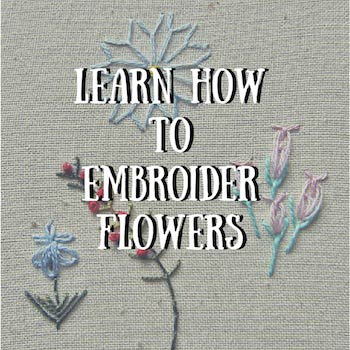
Path A: Start from scratch
Simple line and fill stitches, tiny projects, colour recipes, and calm practice.
Path B: Cross stitcher ready for more?
Try blackwork next. It's counted-thread friendly and incredibly relaxing.
Path C: Love white-on-white texture
Hardanger embroidery and other whitework, with a "no-wasted-linen" start.
Or dive straight into a technique
Counted thread, free embroidery, mixed-media and more — take your pick.
Ready to stitch something beautiful?
Downloadable patterns with my detailed, step-by-step instructions included.
For fellow makers
There's something quietly magical about stitching a design into being — the hush as thread slips through linen, the moment a bead catches the light, and how a finished piece ends up feeling like a little mirror of you.
This space is my cozy corner for fellow makers: a place to trade tips, share triumphs, and get gentle help when a tangle or wonky stitch shows up.
Got a stitch or technique you're wrestling with? → Ask a question
Curious about the history behind your favourite technique? → Explore the history of embroidery
I'd love to hear from you
Whether you're just starting or returning after a break — you're welcome here.
I reply personally
Stay connected between projects
If you’d like occasional updates from my embroidery room, including new patterns, gentle tips, and little things I think you might enjoy, you’re warmly invited to join the Stitchin’ Times newsletter.
About Me - Contact Carol - Privacy Policy - Site Map - Testimonials
Please do not copy the content of this site. It is protected by Copyscape.
Copyright © 2006- www.needlework-tips-and-techniques.com All rights reserved