Learn how to hemstitch by hand
Hemstitching, an age-old craft, is making a big comeback lately.
This step-by-step guide will help you pick the right fabric and learn hemstitching techniques, so you can confidently give it a try.
Hemstitching isn't just for grandmothers and antique linens anymore; it's now a popular DIY hobby and creative outlet.
In our fast-paced, tech-driven world, many people are finding joy in slowing down to learn hemstitching. It's all about the simplicity of a needle and thread, and creating something beautiful with your own hands.
People are craving a return to the tangible, the tactile, and the handmade.

Whether it's a vintage handkerchief passed down through generations or a modern tablecloth for a special gathering, hemstitching adds a touch of sophistication and artistry to any piece.
What will you need?
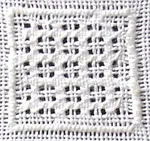
Hemstitching is all about grouping threads together to create bead-like openings and a neat edge.
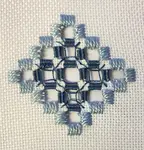
Want to make your hem fancier? You can pull out a few threads and decorate the remaining ones with needleweaving and other decorative stitches. This technique is called drawn thread work. Explore this technique.
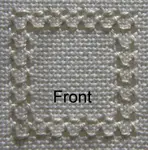
For Danish hemstitch, it's best to use a thread that matches the fabric color so the holes stand out more than the stitches.
Also, choose a thread that's similar in thickness to the fabric threads. You don't want something too thick! In the example shown, 28 count evenweave fabric and no. 8 pearl cotton were used.
Folding the hem
Decide where you want the hem in relation to your design. Count out the required distance from the outside edge of your embroidery. Fold the fabric along this line using a technique called scoring.
How to Score Fabric
Place the fabric face down on a table. Use the blunt end of your tapestry needle in the channel between two fabric threads where you want to score.
Keep firm pressure with the needle hand and gently pull the fabric with the other hand. The needle will mark a straight line. If you mark the wrong place, you can easily remove it by pressing the fabric flat again.
After scoring, finger press the fold in the fabric.
Decide how deep you want your hem (usually six to ten threads). Here, we'll use eight. Score another line eight threads outside the first.

Count another seven threads (or one less than the depth of the hem) and withdraw the eighth thread.
The easiest way is to snip the thread in the center and gently tease it out with the needle until you can grab it. Then pull gently but firmly to remove it. This drawn thread gives you a straight line to guide your scissors as you cut off the excess fabric.
Fold and finger press the scored lines from the outside in to create the hem. Turn your work clockwise and repeat on the other sides.
Folding corners
To avoid bulk, remove a small piece of fabric in the corners. Lay the work face up on the table. Unfold the left-hand corner and carefully cut off the marked piece (using the diagram above).
Refold the cut edge first. Turn clockwise and repeat. Each corner will "chase" the rest around the piece of work. You can tack the hems in place if you wish.
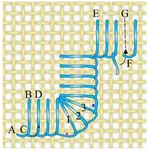
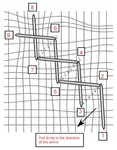
Working the hemstitch
Hold the hem horizontally with your thumb on the hem. Lay the end of your thread in the hem's fold.
Working from left to right, take a small backstitch through just the hem to anchor the thread.
Pick up two threads from the work and pull gently. Then pick up two threads from the folded hem to the right of the first stitch.
Move on to the next two threads in the work, pull gently, then pick up two threads in the hem. Note: the stitch in the body of the work goes from right to left, even though we're working the row in the opposite direction! Continue towards the corner.


Compensating for the corner
As you get close to a corner, count ahead and check if the number of fabric threads left is even.
If not, take a compensating stitch by working one bundle over three threads at this point.
Try not to leave this compensating stitch until you're right in the corner, as it will be more likely to show.

Neatening the corners
When you reach the corner, take the needle through the hem to the point of the corner, then overcast with tiny stitches back around to bring you back into position to work the next side, as in the diagram above. This will help prevent distorted, misshapen corners.
I will soon cover other edge treatments for your hemstitch projects, further expanding your knowledge and skills in hemstitching. Stay tuned.

You might like these
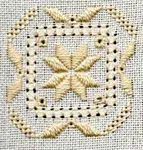
Free Hardanger Bookmark Pattern – Lesson 3 Tutorial
Download this free Hardanger bookmark pattern from Lesson 3 of our beginner course. Learn buttonhole stitch, Kloster blocks and doves eyes step-by-step.
Free Hardanger Christmas Card Pattern – Downloadable PDF
Download this free Hardanger Christmas card pattern with step-by-step instructions. Add handmade elegance to your holiday cards this year!
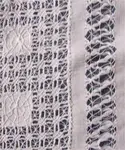
Whitework embroidery an introduction to the different techniques
Whitework embroidery includes many different techniques - reticella, richelieu, cutwork, broderie anglaise, schwalm, hedebo, needlelace and hardanger
You might like these
A beginner guide to hardanger embroidery - overcast bars & doves eyes
Part 2 of the free beginner guide to hardanger embroidery. Learn to stitch Kloster blocks, wrapped bars, and dove’s eyes with step-by-step instructions
Learn Hardanger Needlework | Step-by-Step Beginner Lesson 1
Start your Hardanger needlework course today. Free patterns and detailed instructions in this beginner-friendly lesson. Part 1 of a series of 6 lessons.
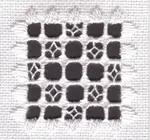
Pulled thread embroidery - all about this whitework technique
Learn about pulled thread embroidery, an exciting form of whitework embroidery where the threads are pulled to form a pretty lacy effect


Stay connected between projects
If you’d like occasional updates from my embroidery room, including new patterns, gentle tips, and little things I think you might enjoy, you’re warmly invited to join the Stitchin’ Times newsletter.
About Me - Contact Carol - Privacy Policy - Site Map - Testimonials
Please do not copy the content of this site. It is protected by Copyscape.
Copyright © 2006- www.needlework-tips-and-techniques.com All rights reserved