LESSON 1 OF 6
Free Hardanger Needlework Course — Lesson One
Kloster blocks, cutting threads, needleweaving, and square filets — all in your first project
Welcome to lesson one of the Hardanger needlework course. We'll stitch together step by step, so you can learn this beautiful Norwegian needlework with confidence.
Traditionally, Hardanger is stitched in white thread on white fabric. But if you're starting out, try using coloured threads instead. It's much easier to see your stitches, and gives your work a pretty, modern twist.
What You'll Need
You can find the right supplies in the embroidery needles and hoops sections.
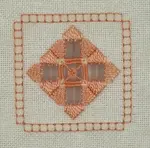
The Pattern for This Lesson
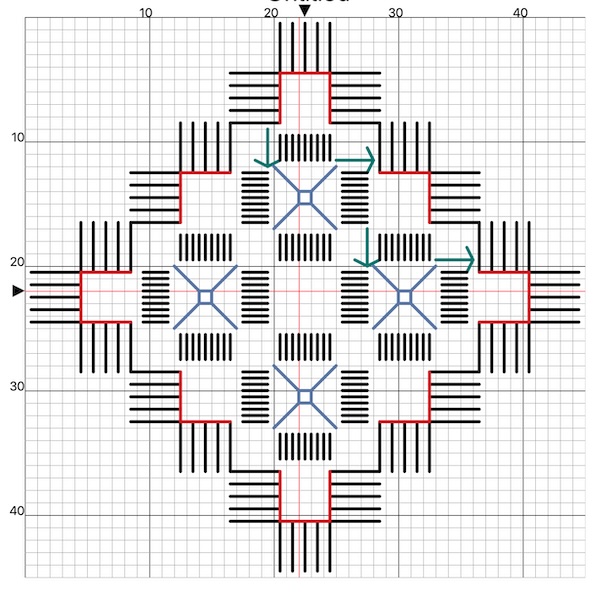
My Hardanger charts use a grid where each line represents one fabric thread. Some designers use a scale where one line equals two threads, so always check before starting a new pattern.
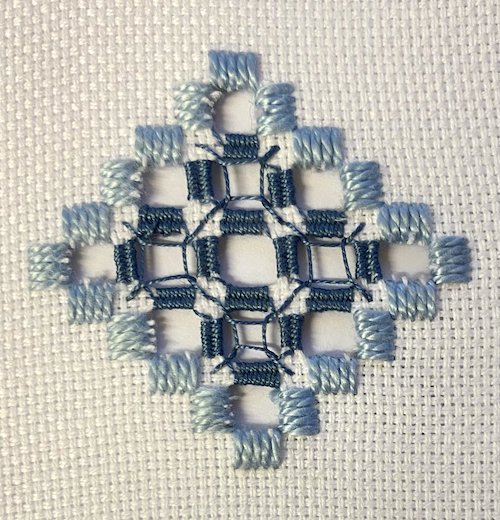
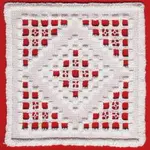
How to Stitch Kloster Blocks
Start by finding the centre of your fabric. Fold it in half both ways and gently crease it.
Thread your needle with the thicker No. 5 thread. Yes, you'll use a knot this time! Use an away waste knot — pop your needle in from the front corner of your fabric and leave the knot on top. You'll snip it off later.
Count 18 threads up from the centre. Bring your needle up at position 1 on the chart.
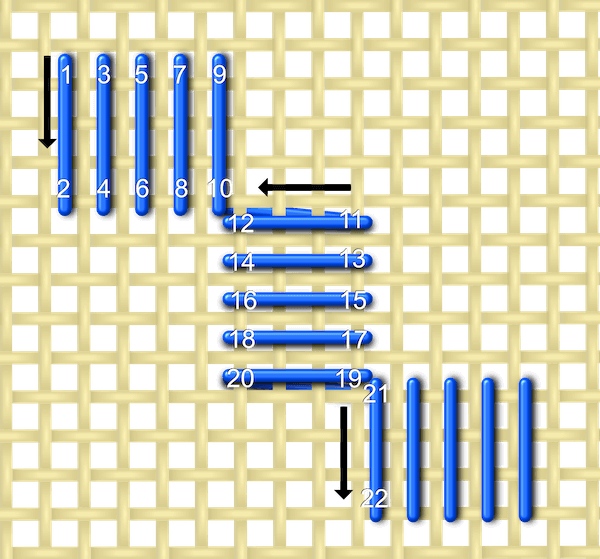
Work your first Kloster block. Each satin stitch covers 4 fabric threads.
Follow the Numbers
Follow the numbers on the chart carefully. This keeps the thread distribution even on the front and back. If you skip a number or take a shortcut, your stitches might not hold when it's time to cut.
Once the first block is done, continue to block two at a right angle. Reuse hole 10 for stitch 11–12, and hole 20 for the next corner. This prevents messy diagonal threads across open spaces.
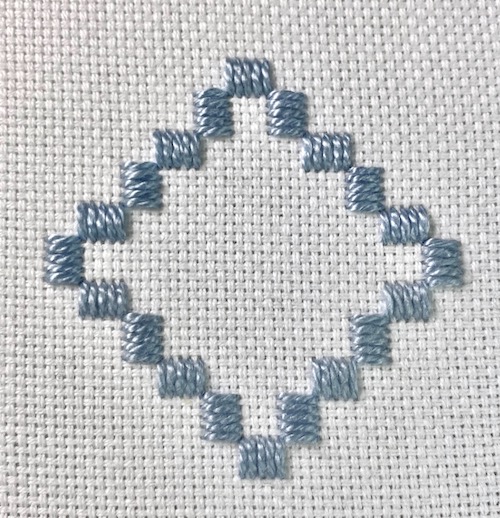
Continue stitching around until the diamond is complete. Now go back and snip off that waste knot. Check that your stitches secured the thread underneath.
Running Out of Thread?
Try to finish a full block before changing lengths. Mixed thread can show a difference in sheen. To end a thread, weave under 3 Kloster blocks, turn, and weave back, skipping the first stitch.
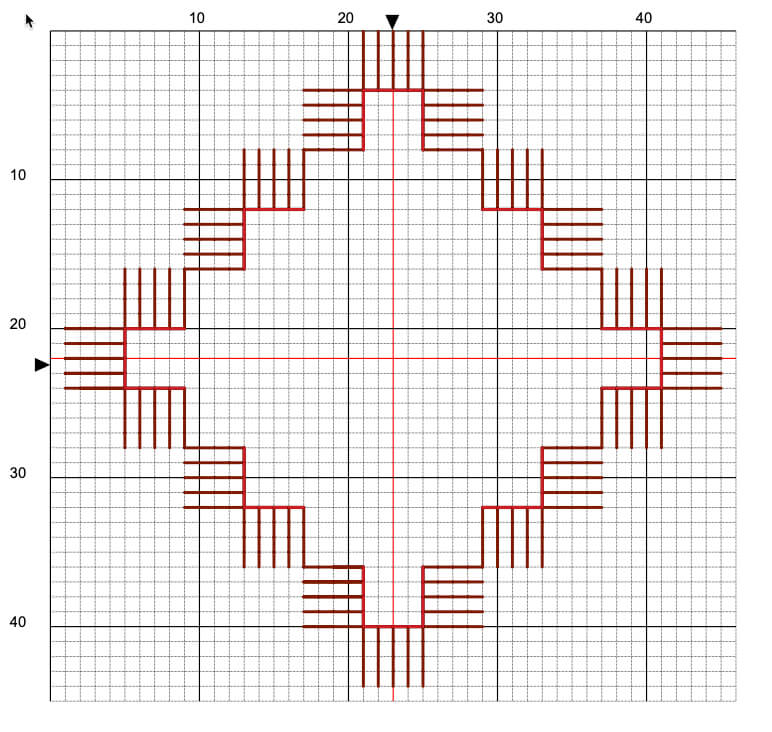
Cutting the Threads
Take a deep breath. This is where it gets exciting!
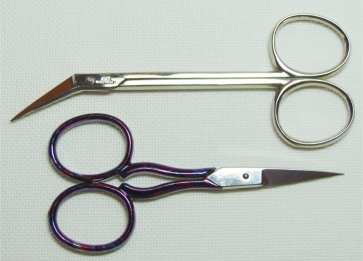
You'll need very sharp, pointed embroidery scissors. Avoid using large dressmaker shears or dull scissors — they won't give you the control you need.
Look at the cutting chart below. The red lines show exactly where to cut — always along the edge where stitches go down into the fabric. Never cut parallel to the stitches.
Count carefully. Count again. Then snip all four threads at once.
Cut an Extra Thread by Mistake?
Don't panic! You can reweave a new thread from the edge of the fabric. It takes time, but it works. This happens to everyone — it doesn't mean you've ruined your piece.
Use tweezers or your fingers to gently remove the cut threads. You'll be left with a grid of empty spaces. If you see tiny tufts of fabric, don't worry — these will shrink back under the Kloster blocks when you wash the piece.
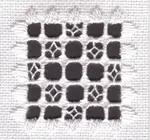
Needleweaving
Time to switch to the finer pearl cotton No. 8. You'll use this for all the needleweaving and the decorative square filets.
Start by anchoring your thread under a Kloster block — no need for a knot here.
Each open space has 4 threads in place. Weave over two, under two, and repeat until the bar is full. Don't overcrowd the stitches — try to use the same number of stitches on each bar for a consistent look.
Using Oslo Fabric?
Look closely. Each "thread" is actually two fine side-by-side threads woven in the same manner. Treat them as one thread.
Many Hardanger patterns use needleweaving, but some use wrapped bars instead — we'll cover those in Lesson 2.
Work the bars in a diagonal direction, starting with those marked by green arrows on the chart (from top left). Then turn the work and stitch a second diagonal row in the opposite direction. Continue until you've worked all the remaining bars.
Square Filet
This is the final step in this project! The square filet is a small, lacy stitch that adds lovely detail to the open spaces.
You'll stitch four buttonhole stitches — one into each corner of the square. On the fourth stitch, wrap it over the thread that's already there to keep everything even. If buttonhole stitch is new to you, a quick look at the blanket stitch page will get you up to speed — it's the same basic movement.
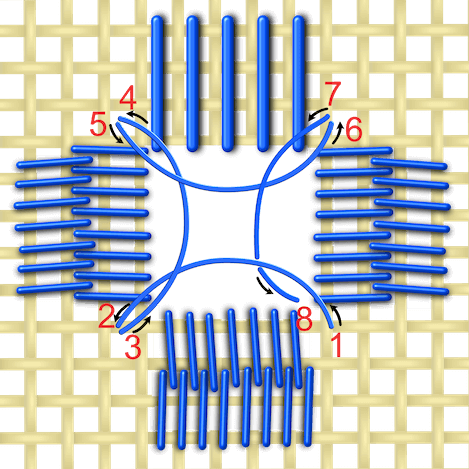
Anchor your thread between square filets by running it under nearby Kloster blocks.
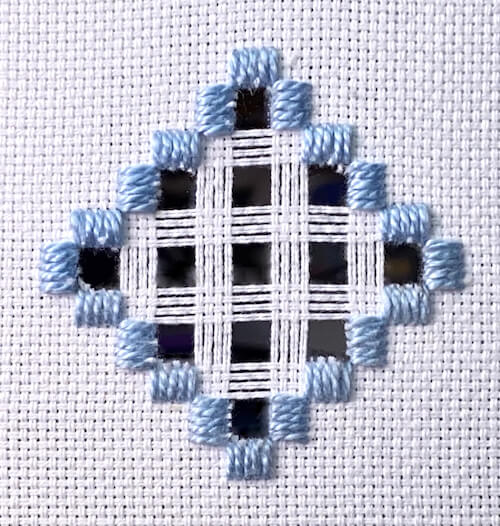
You Did It!
Take a look at your finished piece. In this lesson you stitched:
That's a huge first win — and just the beginning!
Ready for more Hardanger?
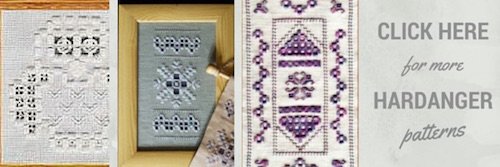
You might like these
How to Hemstitch by Hand: Step-by-Step Embroidery Tutorial
Learn hemstitch embroidery with this easy tutorial. Master fabric scoring, hem folding, and Danish hemstitch technique with clear diagrams.
Hardanger Stitches: Spider's Web & Four-Sided Stitch
Learn Hardanger stitches with this free tutorial. Step-by-step instructions for spider's web, four-sided stitch border, and decorative Kloster blocks.
Hardanger Embroidery for Beginners: Free Step-by-Step Guide
New to Hardanger? Learn wrapped bars, dove's eyes, and fancy Kloster blocks with clear step-by-step instructions and a free downloadable chart.

Stay connected between projects
If you’d like occasional updates from my embroidery room, including new patterns, gentle tips, and little things I think you might enjoy, you’re warmly invited to join the Stitchin’ Times newsletter.
About Me - Contact Carol - Privacy Policy - Site Map - Testimonials
Please do not copy the content of this site. It is protected by Copyscape.
Copyright © 2006- www.needlework-tips-and-techniques.com All rights reserved