- Home
- Needle Felting
- Needle felting tutorial
Needle Felting for Beginners: A Step-by-Step Tutorial
Let's start this needle felting tutorial with a photo of sheep's wool I found during a countryside walk. After carrying it in my pocket the wool fibers began to felt on their own, due to warmth and friction.
However to use it to make wool sculptures it needs to be cleaned and soaked then air-dried.
If you're eager to start, you can buy processed wool online or get a starter kit.
You will create friction by repeatedly stabbing the wool with specialized felting needles. This tangles the fibers together without requiring any moisture.
Please note that the detailed instructions below do not cover the wet felting technique.
 Raw sheep's wool collected on a country walk
Needle felting safety first
Let's list some safety precautions before we go any further. Protecting ourselves when working with extremely sharp needles is crucial while indulging in this fabulous craft.
- Use a mat to shield your work surface and prevent injuries to your fingers.
- Wear protective gloves to add an extra layer of safety and enhance your grip.
- Keep felting needles out of the reach of children and pets to avoid accidents.
By following these precautions, you can enjoy your needle felting and keep safe.
3D needle felting tutorial
 The basic 3D shapes for needle felting
Have you ever wondered how sheep's wool can transform into a 3D sculpture?
The following needle felting instructions will get you started.
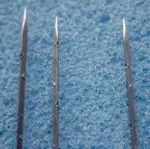
You'll need basic needle felting supplies which include different types of felting needles, wool, a felting mat or foam block and your protective gloves or finger guards, if you use them.
The basic shapes for sculptures are a ball, an egg, and a cylinder. The cylinder has a fuzzy section that helps attach it to other shapes.
Forming a ball
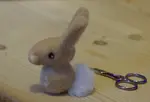
For safety reasons, I've inserted my needle into a wooden handle. Poking your finger can be painful! So please, take care.
To begin, grab a thin strip of core wool and choose a coarse needle.

Roll a thin strip of core wool into a ball on your working surface.
Tuck in the sides to create a sphere shape, and don't worry about perfection.
The initial rolling is just to get a rough resemblance of the shape you want to achieve.

The next photo shows the wool fiber ready to felt.
Your ball will be soft and squidgy at this point.

Use the notched section of the needle and keep stabbing and turning the ball to make it rounded.
Aim for a firm yet flexible sphere.
Avoid altering the angle while the needle is in the wool to prevent breakage.
You can also shape the wool in your palms and then lay it on your surface and stab again.
The felting process takes time; my ball took 10 minutes to create.
Avoid making it too hard as you will need to join it to other shapes for your sculpture. You can add more wool if your ball turns out smaller than you intended.

Creating egg shapes

Egg shapes serve as the foundation for many sculptures.
Roll the wool strip, eliminating air, and poke the needle towards the center at each end. Compact the shape by stabbing in the desired direction.
Needle felting cylinders
Cylinders are perfect for legs, necks, and tails when needle felting animals.
Make the wool strip slightly wider than desired as it will shrink. Shape an elongated egg with tapered ends. Leave one or both ends unfinished for easy joining.
Flat shapes
When needle felting animals, some parts like ears and tongues require a flat felt piece. To achieve this, lay a thin layer of wool on the mat and work on one side before flipping it over to work on the other.
Quick Tip: Using cookie cutters can help you create your desired shapes.
Be cautious when peeling them off as they tend to stick. If you want your animal's ear to have a curl, you can do so while attaching it to the head.
Try it out!
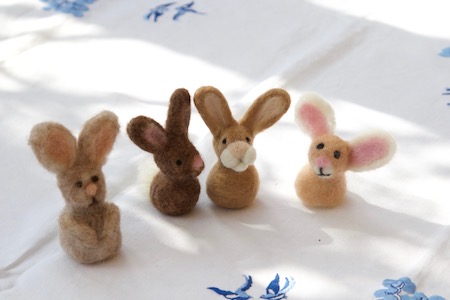
In this adorable bunny tutorial, I'll show you how to connect different sections seamlessly. Check out the photo to see how each of my students added their own personal touch to their bunny.
Lastly, you'll cover your creation with roving wool or "tops" in the perfect shades.
Taking it further
Now that you've become a pro and made some awesome 3D shapes, it's time to take things to the next level.
By adding wire armatures to your sculptures, you can pose your animals or characters in different positions! You can make their legs bend or their heads tilt, bringing a whole new level of realism and playfulness to your projects.
And don't forget about adding those little details that make your creations truly come to life, like lifelike eyes, intricate fur patterns, and detailed facial expressions.
So go ahead and let your imagination run wild and enjoy the satisfaction of creating something truly one-of-a-kind.
You might like these
What is Needle Felting? A Fun, Low-Cost Guide for Beginners
New to needle felting? Learn the basic tools, what wool to use, and how to "paint with wool." A fun, low-cost way to make 2D and 3D art.
Needle Felted Bunny Tutorial — Step-by-Step for Beginners
Create a cute needle-felted bunny with this step-by-step beginner tutorial. Includes materials list, clear photos, ear & muzzle techniques, and finishing tips.
Stay connected between projects
If you’d like occasional updates from my embroidery room, including new patterns, gentle tips, and little things I think you might enjoy, you’re warmly invited to join the Stitchin’ Times newsletter.
About Me - Contact Carol - Privacy Policy - Site Map - Testimonials
Please do not copy the content of this site. It is protected by Copyscape.
Copyright © 2006- www.needlework-tips-and-techniques.com All rights reserved