- Home
- Needle Felting
- Needle felted bunny
Needle Felted Bunny: Step-by-Step for Beginners
Turn simple wool shapes into a cute little bunny — with clear photos for every step
Materials and equipment
- Cream or white core wool
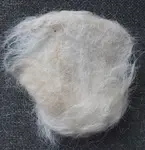
- "Fur" colour and pink or flesh wool fibre
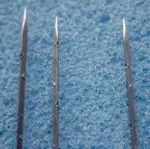
- Coarse and fine felting needles
- Felting surface
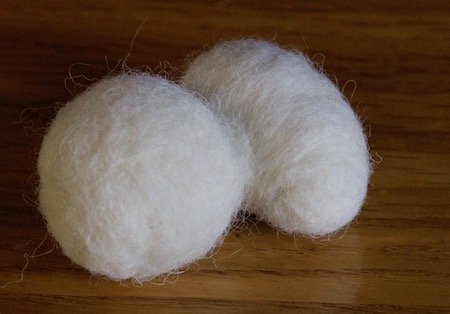
The shapes required
As per the previous tutorial you will need to felt the following shapes from the core wool, roughly the size stated:
- Ball for body (10cm circumference)
- Egg for head (9cm around middle, 12cm end to end)
- Ball for tail (6cm circumference)
- 2 tiny balls for cheeks
- 2 flat shapes for ears (approx. 6cm long, without the fluffy bits)
- 1 flat triangle for nose
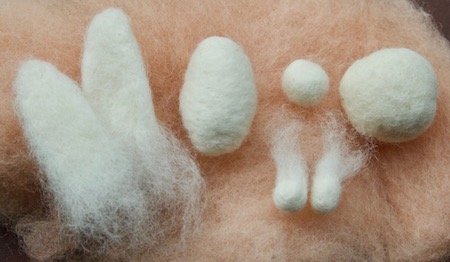
From left to right — Ears, head, tail and cheeks, body
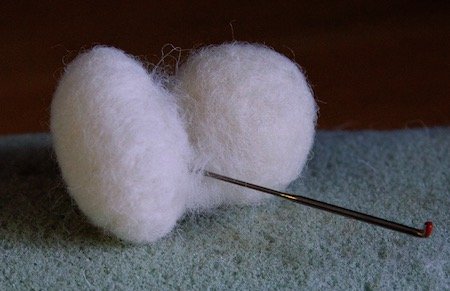
Adding the needle felted head to body
We will begin by adding the head to the body.
Take a wisp of core wool and stab the centre of it a few times to the underneath of the egg. Position it nearer to one end than the other, so that the nose will stick out in front of the body and the back of the head will be in line with the back of the body.
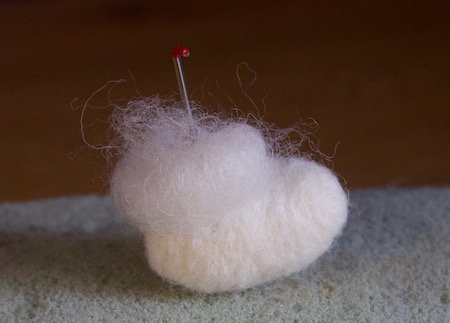
Add a wisp of wool underneath the head
Taking your coarse needle, stab from the head right through to the body, and vice versa, multiple times to secure the two shapes together. The photograph shows two needles to better explain the process, but you would only use one for this.
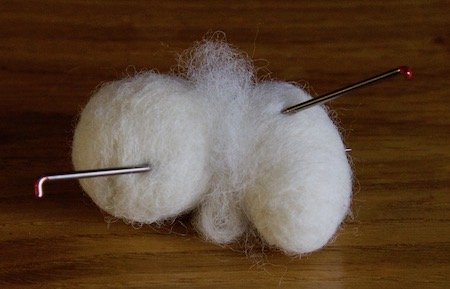
Secure through both shapes
Work your way around the join, securing the "fluff" to both the head and body, forming a tidy neck for your needle felted bunny.
You are aiming to end up with a single shape that cannot be separated when you attempt to gently pull the head from the body.
Tidy up the neck and continue to secure
Head and body attached
Making the needle felted bunny ears
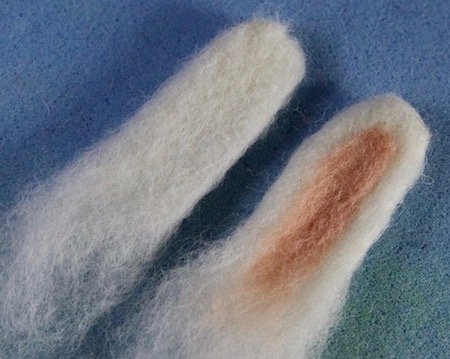
Take two similar sized and shaped pieces of core wool and lay them on your felting surface. This will help to ensure your ears are a similar size when finished.
Use your needle to stab a rough shape of the ear into the wool on both pieces. Do not worry about outlining the bottom of the ears — we will leave those loose to help attach them to the head later.
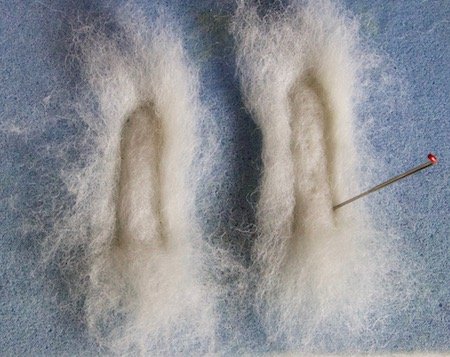
Create the shape of your ears by outlining with the needle
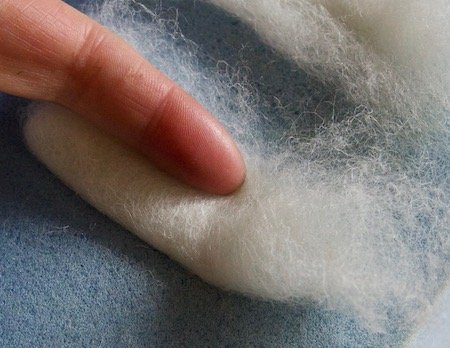
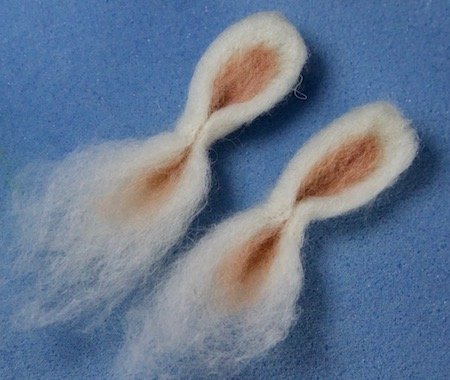
Using the side of your finger, gently roll or fold the fluffy edges of the ears over to the middle of the shape you outlined, starting with the top. Don't push too far or you will lift the ear off the foam.
Stab the ears gently, trying to keep the needle at a 45 degree angle so as not to stab them too securely into the foam. Once you have the loose fluff attached in place, gently ease the ears off the foam. Then work on the back of the ear to continue felting.
Roll over the loose fluff into the ear and stab into place
Taking wisps of pink or peach wool, add the colour to the inside of the ear, again using a 45 degree angle, to avoid pushing the colour right through to the back of the ear.
Add coloured wool for the centre of the ears
To complete your ears, pinch the bottom of the felted area together and secure with your needle, to give them some shape.
The completed ears, pinched together and secured at the base
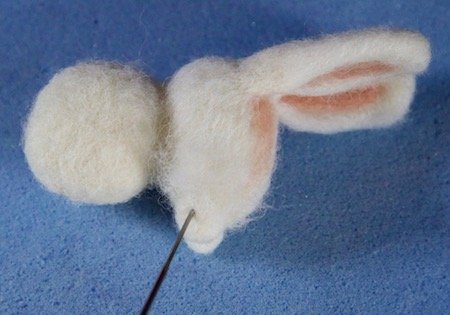
Attaching the ears and muzzle
Take the fluffy part at the base of the ears and spread it out so it forms a sort of "skirt". Position your first ear on the side of the head and, using your coarse needle, stab the base into the head.
Go right around the ear, close to the base, then using the finer needle attach the frilly skirt to the head and down over the neck onto the body if it goes that far. It will be covered with your fur colour so don't worry if the inside ear colour shows on the head.
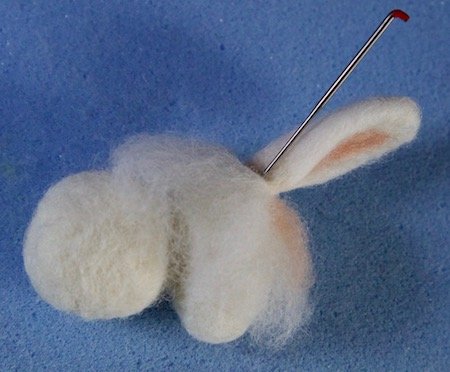
Stabbing the ears onto the head
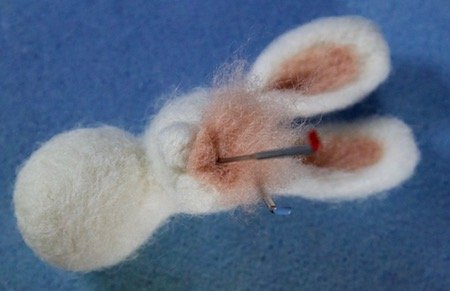
Attach the second ear in the same manner. Try not to have too much of the frill in between the two ears — instead push any loose fluff towards the front and back of the head.
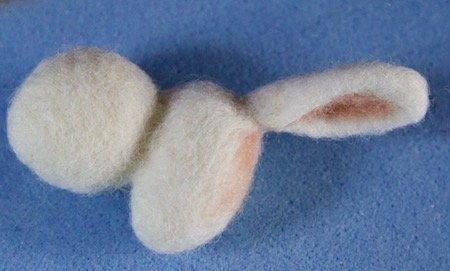
The ear is now attached
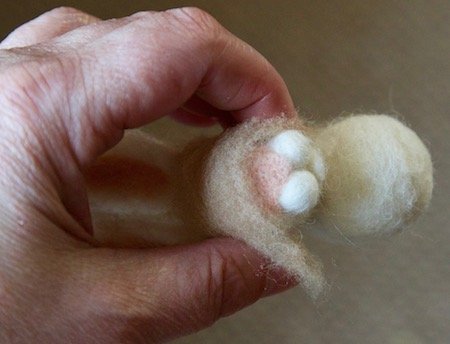
Start the muzzle by taking the two tiny ball shapes you made. If they have loose tufts that is great; if not, lay a thin piece of wool around them gathering the ends to form the tufts.
Position them at the front of the head, towards the bottom, touching each other in the centre. Attach them as we did the ears.
Attaching the cheeks for the muzzle
Take a small wisp of your inner ear colour, and fold it into a tiny triangle for the nose. Gently stab it on your foam, before attaching it between the two cheeks — pointed end to the front of the muzzle, and the fuzzy end on the top of the nose.
Attaching the nose to the muzzle and head
Don't worry about the colour showing on the head — it will all be covered with "fur" soon.
I also added a triangle of white under the cheeks for the lower jaw. This is optional.
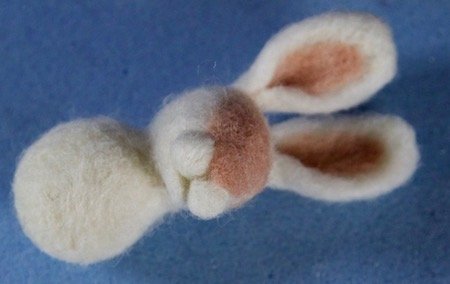
The nose secured to the head
Giving our needle felted bunny some fur
You can use short or long fibre wool for the top coat of your needle felted bunny. In the photographs I am using a batting of short fibres.
Take a small piece and lay it over the white core wool. Using a fine needle, tack it down by taking gentle stabs all over. Don't push the needle in a long way — just use the notches at the very tip to avoid making big holes over the surface.
Adding fur to our bunny
Continue adding more fur to the bunny by slightly overlapping each piece until the entire body, head and ears are covered with a thin layer.
If there are any areas where the white shows through you can touch them up with an extra wisp of coloured wool. I left the chest and muzzle cream on my rabbit.
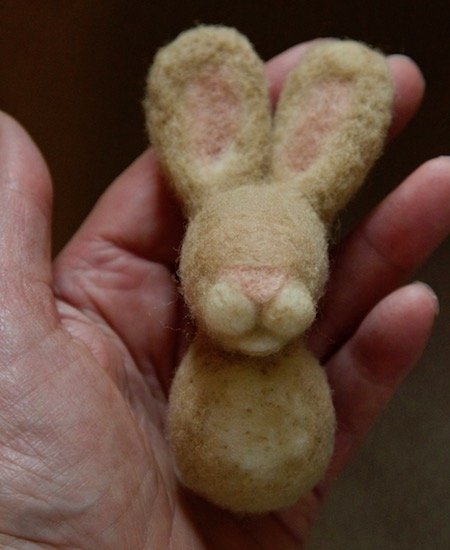
Our bunny now has his fur
The eyes
Needle felted animals can have various types of eyes. You can use tiny black beads, teddy bear eyes, or make them out of wool.
Dyed jet black wool can be a little harsh, so you may prefer to use a natural black (which is really a very dark brown).
Take a tiny wisp and roll it into a ball between your palms. Create a second eye the same size before placing them in position on the sides of the rabbit's head. Using the fine needle, tack them in place with small pokes. If any fibres try to escape around the edges, twist your needle around them to "corral" them into place.
Add an even tinier wisp of white to create the highlight in the eyes.
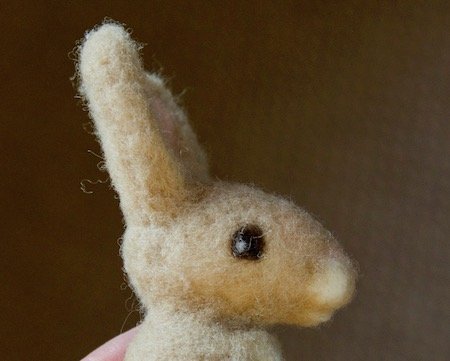
That little highlight brings the bunny's eye to life
The tail
Attach the tail ball to the back of the bunny, as we have done before.
To create long fur on your tail you will need to use a fibre such as Merino. For mine I chose a Merino mixed with silk, which had a shiny appearance.
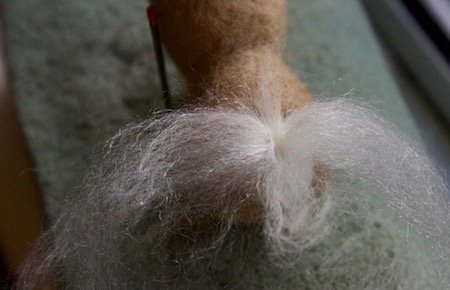
Adding the tail
Pull a length of wool from the roving and lay it across the tail. Tack it down across the centre, at right angles to the way the fibres are laying. To secure it even more, take a few fibres and lay them at right angles and poke in the same place as before. Fold the ends of the attached fibres together so they stick straight up in the air.
Work across the whole tail in this way, until you have covered the entire core wool. Take a pair of scissors and trim the fibres to the length required.
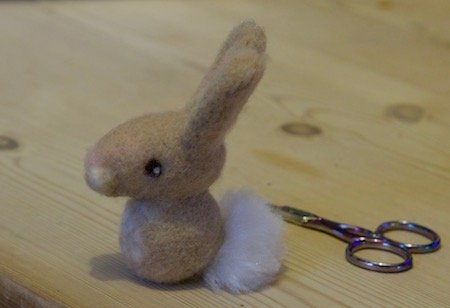
The finished bunny
Results from a live workshop
I taught this little needle felted bunny at a live workshop recently. Everyone's bunny turned out differently, but they were all super cute.
If you try this tutorial yourself, I would love to see your results.
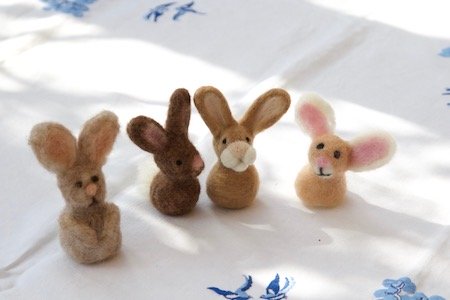
Bunnies from a live workshop
Continue your needle felting journey
Whether you're just getting started or ready for another project, these pages will help.
What is Needle Felting?
New to this craft? Learn the basic tools, what wool to use, and how to "paint with wool." A fun, low-cost way to make 2D and 3D art.
Read the beginner's guide →Needle Felting Tutorial
Learn to create simple felted shapes — the building blocks for this bunny and many other sculptures. Step-by-step with photos.
Start with shapes →You might like these
What is Needle Felting? A Fun, Low-Cost Guide for Beginners
New to needle felting? Learn the basic tools, what wool to use, and how to "paint with wool." A fun, low-cost way to make 2D and 3D art.
How to Needle Felt: Step-by-Step Tutorial for Beginners
How to needle felt from scratch: a beginner tutorial covering safety, equipment, technique, and your first flat felted shape with step-by-step photos.
Stay connected between projects
If you’d like occasional updates from my embroidery room, including new patterns, gentle tips, and little things I think you might enjoy, you’re warmly invited to join the Stitchin’ Times newsletter.
About Me - Contact Carol - Privacy Policy - Site Map - Testimonials
Please do not copy the content of this site. It is protected by Copyscape.
Copyright © 2006- www.needlework-tips-and-techniques.com All rights reserved