- Home
- Embroidery Floss
Tips for Using Embroidery Floss: Starting and Stopping
Are you ready to explore the versatile possibilities of embroidery floss?
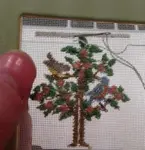
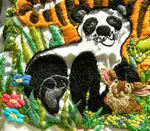
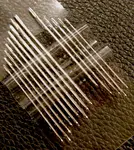
Embroidery floss, also known as stranded cotton, is a type of thread commonly used for cross-stitch and other embroidery projects. It is made from cotton and has a slightly shiny appearance. The thread consists of six strands that are loosely twisted together.
One of the great things about embroidery floss is its versatility.
You can separate the strands and use them individually or in various combinations, depending on the thickness of the line you want to create in your design. This allows for more intricate and detailed stitching.
This page provides comprehensive guidance on using embroidery floss, covering essential techniques like separating strands, determining the appropriate number of strands, securing the thread at the start and end of stitching, as well as advanced methods.

Getting Started
Separating strands of embroidery floss
To use embroidery floss effectively, you need to determine the appropriate number of strands to use for your project and separate them from the skein.
For example, you'll typically work with one to three strands at a time depending on your needle size.
The following video shows you a simple way of doing this that will avoid tangled thread and frustration.
How many strands of embroidery floss to use
This table provides the recommended number of strands for counted thread work based on the number of threads per inch in the fabric.
If you are unsure what that means I have another video on my Aida fabric page that will help.
Fabric Count |
Number of strands |
|
11 |
3 |
|
14 16 |
2 or 3 2 |
|
18 |
1 or 2 |
|
28 (over 2 threads) |
2 |
|
32 (over 2 threads) |
1 or 2 |
|
32 (over 2 threads) |
1 or 2 |
|
36 (over 2 threads) |
1 |
Don't economise on embroidery floss

Investing in high-quality embroidery floss from reputable brands like DMC, Anchor, Madeira, or Susan Bates, known for their colourfastness and consistent quality, will produce vibrant and long-lasting embroidery projects.
Each brand uses distinct colour coding systems, so a conversion chart may be helpful when substituting a different brand.
Many embroidery designers prefer to use a single brand of embroidery floss for a project to maintain consistent colour quality and shading, only substituting with another brand if their desired shade is unavailable.
Sewing thread, used in machine sewing and dressmaking, is thinner than embroidery floss and not suitable for hand embroidery.
Securing your embroidery floss
When students ask if they can start with a knot in my embroidery classes, I advise against it because knots can create unsightly lumps on the back of the work and may come untied.
Instead of knots, use the loop method to secure the thread's end when working with two strands of embroidery floss.
This approach involves doubling the thread, threading the folded end through the needle, and leaving about a third of the looped end loose.

Pull the needle through the fabric, leaving a thread loop at the back. Take the needle to the back and slip it through the loop. Then, gently tighten the initial stitch. It's a neat and effective alternative to knots.
It's drawback, however, is that if you make a mistake this can entail undoing all the stitches done with that length of thread, which is time consuming and wasteful.
Alternatively, thread an 18 inch length into your needle, leaving a short tail at the needle end.
Start in the middle of your row and push the needle through the fabric then continue stitching. Leave the remaining thread to come back to later.
When the first half runs out, fasten off and rethread the remaining loose end.
Starting with a waste Knot
Temporary waste knots are useful for starting embroidery projects because they can be easily removed once the stitching is complete, leaving no visible knots or lumps on the final work.
Tie a knot at the floss end and insert the needle from the front of the fabric, positioning it in the path of the stitches you will create.
As you stitch, work over the thread on the back to secure it then cut off the knot.
Starting with an away waste knot
Use an away waste knot to avoid stitching over the thread tail on the back.
Position the knot to the side, then after several stitches, cut it off. Secure the loose end by threading it under six stitches on the back and snip it near the stitching.
Other thread options
Embroidery floss is not suitable for all techniques.
The Norwegian technique of Hardanger, for instance, requires the use of Pearl (or Perlé) cotton. This is a non-divisible, lustrous, smooth cotton thread that comes in four different thicknesses.
Pulled work, a technique that puts a lot of strain on the thread, needs a robust fibre like linen. These stronger threads are also used for needle lace and stumpwork.
For a high gloss effect, consider rayon thread or silk threads, although they can be slippery to work with.
Crewel wool provides a matte finish for projects.
Ready to get stitching?
Embroidery floss, with its extensive range of vibrant colors and the ability to adjust the strand count for various techniques and fabric types, offers unparalleled versatility and creative potential for embroidery enthusiasts of all skill levels.
Choosing high-quality embroidery floss can contribute to better results, but your effort and passion are also essential for successful projects, regardless of your experience level.
Ask a question about threads and fibres
There is a vast array of threads available to stitch with nowadays. If you have any questions on how to use them, please use the form below.
What Other Visitors Have Asked
Click below to see contributions from other visitors to this page...
Thread terminology 
I'm following counted cross stitch instructions, but am confused by some terms:
one is easy - "use one strand folded double" is in essence, two strands …
Purchase all floss for cross stitch project?
I am starting a cross-stitch pattern purchased online. I have done cross-stitch kits only. The new pattern gives the chart with floss colors and numbers …
Vintage Anchor embroidery floss
I'm looking for a conversion chart that will convert the old Anchor floss numbers (pre-1960) to the current sytem.
I have been unable to find any …
What is a hank of embroidery thread
I am a beginner at this cross stitch. I am stumped at the very first pass.
What is a hank? There are colors on in the Hank 1 and Hank 2 chart. The …
Knotting and restarting thread
How do I knot my thread and then restart with a new thread?
Anchor silks - Old numbers to current ones
I have a lot of old Anchor silks which I want to be able to convert to DMC silk numbers. Is there any way of finding a conversion chart for this. I understand …
putting floss onto LR cards
I feel silly, but in order to get started, I must ask. I bought my floss (for cross stitch), bought a pack of cards, and I have had a nightmare with the …
Carrying thread across the back
I am beginner and wonder if it is possible/good practice to carry the yarn behind your work if there are small gaps between two areas to be worked with …
How do I separate my strands?
I have just begun cross-stitching again and the directions are not very clear.
All the directions say are "separate the strands." Does that mean separate …
Twisting Thread
Is there an easy way to keep threads from twisting while stitching?
It is the reason that I can actually see an "x" on my projects and they don't look …
threading the needle and satin stitch 
Is there an easy way to thread the needle? I use the "needle threaders" with the wire but after several uses the wire breaks. I also have trouble with …
You might like these
Why you need magnifying lamps for embroidery and other needlework
The benefit of using magnifying lamps to avoid eye strain when doing embroidery or other crafts in the evening
How to Use Embroidery Hoops - Step-by-Step Guide & Tightening Tips
Learn how to hoop fabric, get drum‑tight tension, and tighten embroidery hoops without puckers — step‑by‑step photos and a short demo.
How to Thread a Needle: Easy Tips and Techniques for Sewing Success
Learn how to thread a needle effortlessly with helpful needle threaders. Find easy tips and techniques to make stitching a breeze.


Stay connected between projects
If you’d like occasional updates from my embroidery room, including new patterns, gentle tips, and little things I think you might enjoy, you’re warmly invited to join the Stitchin’ Times newsletter.
No pressure. Just a friendly note now and then to keep you inspired.
About Me - Contact Carol - Privacy Policy - Site Map - Testimonials
Please do not copy the content of this site. It is protected by Copyscape.
Copyright © 2006- www.needlework-tips-and-techniques.com All rights reserved