- Home
- Needle Felting
Carol Leather — designer, teacher and author with 50+ years of needlework experience, who can still remember the trials of being a beginner.
Needle felt supplies
 A selection of my needle felted animals
Discover the fun and addictive world of needle felt, a craft that transforms wool fibers into shapes and sculptures using special needles. Let's explore the basics and helpful tips to start your needle felting journey.
What is Needle Felting?
Needle felting is a process that interlocks wool fibers using a notched needle with small barbs on the end.
As the needle enters the wool, it catches and tangles the fibers together, forming a compacted mass that can be shaped and sculpted. The wool compacts in the direction you poke the needle, so varying the angle allows you to create shapes.
Basic Equipment Needed
To get started with needle felting, you will need three essential pieces of equipment: notched needles, unspun wool fleece, and a needle felting surface.
Notched needle felt needles
Notched needles vary in length, strength, shape, and the number and position of the notches.
Each type of needle has a specific function in transforming raw wool into needle felt. Triangle, star, twisted or spiral, and reverse needles each contribute differently to the process.
To start, use longer, thicker needles that can penetrate deeper into the wool and capture more fibers.
As the wool compacts, switch to finer needles to smooth the surface and eliminate "fuzzies." For a fuzzy effect, use a reverse needle, which pulls fibers out of the work.
It is important to work carefully and avoid accidentally stabbing your fingers or hands with the needle. Some needle felters use finger protectors or leather thimbles to help prevent injuries.
 A close up of the notches in the tips of felting needles
Needle holders
The needles used for felting were manufactured for industrial machines. This can make them difficult to hold. You may prefer to try out one or more of the handles that are now available which hold single or multiple needles.
 3 types of wool, needles and tools for needle felting
Unspun fleece
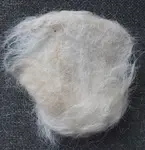
Unspun wool fleece comes in two main types: short fiber wool and long fiber wool.
Short fiber wool, such as core wool, is ideal for beginners due to its ease of felting and lower cost.
It is used for the center of your sculptures, with fibers laying in various directions to aid felt formation.
Long fiber wool, also known as tops, is combed so fibers run in the same direction, making them smooth.
They take more time to compact and are best used for surface work or wet felting.
Wool from different sources
Sheep's wool varies! Some breeds produce softer fleece than others.
On one end of the scale are the Herdwick sheep, which have a coarse fleece, at the other is the Merino, which has extra soft wool. Each has its own purpose when creating felt.
Other breeds, such as the Wensleydale, have wavy fleeces. This is ideal for creating doll hair or animals with curly locks.
 Amy, my first needle felted doll
Other fibers for needle felt
You can felt fibers from other creatures, such as alpaca, camels, angora goats, and rabbits. Even dog fur will work if you blend it with wool.
I do suggest starting with wool though, for its ease of use.
Needle felting surfaces
Needle felting surfaces protect the delicate needle tips from damage.
High-density upholstery foam and needle felting brushes are popular choices for beginners. The former provides a cushioned surface for stabbing, while the latter has bristles to work on top of, allowing you to felt more comfortably.
Getting Started with Needle Felting
To begin a needle felting project, scrunch up the wool, place it on the surface, and start stabbing it with the needle.
As you continue, the fibers will tangle together and form a compacted mass that you can shape and sculpt. Use paddles or hand carders to blend colors when creating realistic sculptures.
This page will explain how to create basic shapes.
It is important to always bring the needle back out at the same angle to avoid breaking the tip.
Mixing colors
When creating realistic sculptures, you may find it necessary to mix colors. To do this, you need two paddles or hand carders. These have wire "teeth" which grip hold of the fibers, helping them to align with each other and blend together.
Using a former
To shape the wool, wrap it around common household items like wooden spoon handles or skewers, which will serve as molds.
For smoother removal, consider sanding wooden items to prevent the wool from snagging.
Common Challenges and how to overcome them
Beginners may face several challenges, including uneven felting, accidental holes, difficulty shaping complex forms, and frustration with slow progress.
Solutions to these issues include using finer needles for smoothing, adding more wool to fix mistakes, breaking complex shapes into simpler parts, and being patient throughout the learning process.
Uneven felting
If your project has bumps or uneven areas, use a finer needle to smooth the surface. Be gentle and work evenly, focusing on the areas that need more attention. You can also roll the piece between your palms to help even it out.
Accidental holes or over-felting
If you make a mistake and create a hole or over-felt an area, you can add more wool to the spot and gently poke it with the needle to fix it. Use a small amount of wool at first, and add more if needed.
Difficulty shaping complex forms:
When working on more complex shapes, it can be helpful to break them down into simpler parts and gradually add smaller pieces to build it up using the felting needle.
Frustration with slow progress
Needle felting requires patience and practice to master.
If your initial projects aren't perfect, don't be discouraged. Enjoy the learning process, take breaks, and tackle smaller projects to build confidence and avoid burnout.
Remember, your skills will improve over time, allowing you to craft more intricate and detailed pieces.
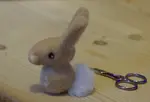
Your first needle felt project!
Understanding potential challenges and applying these tips will equip you for successful needle felting.
With the right materials and equipment at hand, jump into this captivating hobby, starting with our needle-felted rabbit tutorial—beware, it's addictive!
Dedication and practice will enable you to craft intricate designs. Remember to share your creations and encourage others to explore needle felting. Enjoy your felting journey!
Learned something new?
Learned something new and exciting? Share this article with your friends and family who might be interested in needle felting. Let them join you in this creative journey!
You might like these
Needle Felting Tutorial: Learn to create Woollen Masterpieces
Learn the art of needle felting with our step-by-step tutorial. Create beautiful felted creations with expert guidance and tips. Start needle felting today!
Needle Felted Bunny Tutorial — Step-by-Step for Beginners
Create a cute needle-felted bunny with this step-by-step beginner tutorial. Includes materials list, clear photos, ear & muzzle techniques, and finishing tips.
Stay connected between projects
If you’d like occasional updates from my embroidery room, including new patterns, gentle tips, and little things I think you might enjoy, you’re warmly invited to join the Stitchin’ Times newsletter.
No pressure. Just a friendly note now and then to keep you inspired.
Copyright © Carol Leather - 2006-2024
About Me - Contact Carol - Privacy Policy - Site Map - Testimonials
Please do not copy the content of this site. It is protected by Copyscape.
Copyright © 2006- www.needlework-tips-and-techniques.com All rights reserved