Cretan Stitch - are you making this mistake?
When I first tried Cretan stitch it did not turn out well at all! For something that looked so simple in the books, it proved a mystery to me. Why did mine always turn out as a wiggly line with bits sticking out, reminding me of barbed wire?
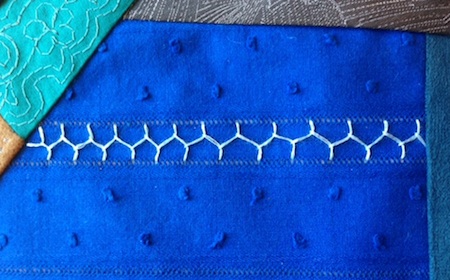
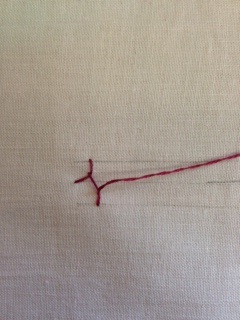
The photo below shows what it should look like, when stitched correctly.
I stitched it incorrectly in the photo below to show you what it should NOT look like.
So what was I doing wrong?
Imagine three parallel horizontal lines. So you have a top line, a middle line and a bottom line. These will help you to keep the stitches even and placed correctly.
I cheated here as the fabric I used had rows of holes across it so I used them.
The trick is to "see" two more lines between the top and middle, and the middle and bottom lines. You can draw them in if you like, but learning to do it without is good practice.
I was just using three lines and bringing the needle up on the center line each time when I first tried it.
How to work cretan stitch correctly
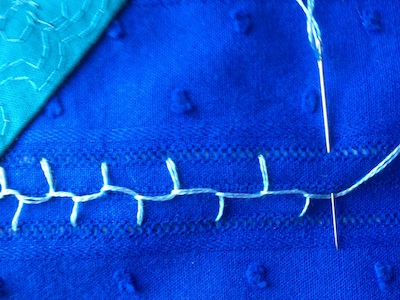
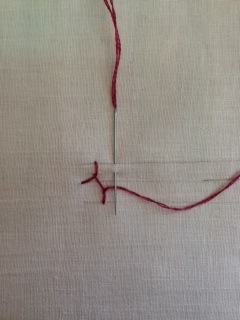
To start your row, bring the needle through from the back on the center line.
Then insert your needle in the top line a short distance ahead, and bring it back to the surface in between that top line and the center one (on that imagined or drawn line). Make sure the needle is laying over the working thread and pull it through.
This is a bit like a blanket stitch at this point.
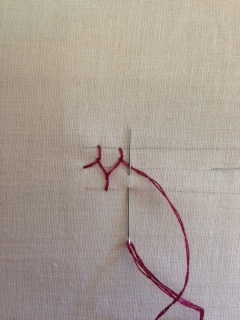
Now turn your needle around so it is pointing towards the top line, and insert it on the bottom line. Bring it back to the surface, between the bottom and middle line, as above.
Keep the thread tucked under the needle and pull it through. Your work should then look like the photograph below.
We are now going to repeat the above two steps across the row.
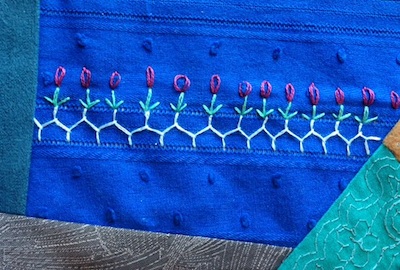
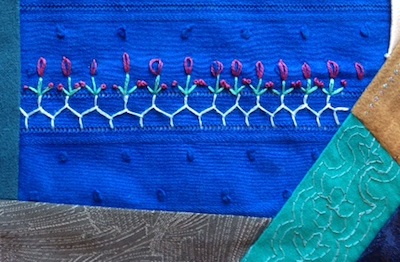
Using cretan stitch in crazy quilting
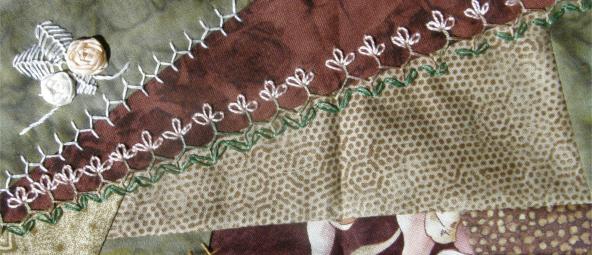
This stitch is often used along the seams of a crazy quilt block,. The top seam in this first photo shows plain cretan stitch, while the next shows two rows which have then been decorated with beads.
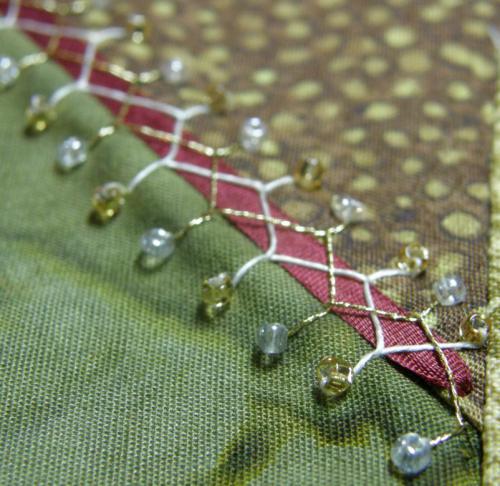
We can also use additional stitches to embellish the seams further, as in the next photo. Here three straight stitches in green, topped with a dark pink lazy daisy stitch to resemble a flower. I then added french knots to the shorter straight stitches.
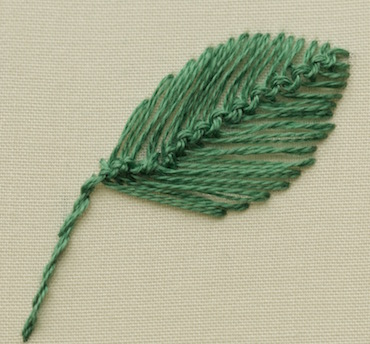
Variation on a theme
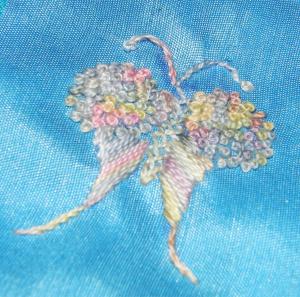
You may have noticed the two leaves in the first crazy quilt photo on this page? These were also worked in cretan stitch.
Rather than creating a line of spaced stitches you can work them close together to fill a shape, in this case a leaf. (For more ideas for stitching leaves click this link.)
You might like these
Learn two variations of Fishbone Stitch - flat and raised
Learn 2 types of Fishbone stitch to add to your range of basic embroidery stitches
Padded Satin Stitch Initial
Satin stitch tutorial showing a padded initial being embroidered
Stitch a French knot the easy way with this step by step tutorial
The best way to stitch a French knot without getting in a tangle. These clear instructions and video will show you how its done
Copyright © Carol Leather - 2006-2024
About Me - Contact Carol - Privacy Policy - Site Map - Testimonials
Please do not copy the content of this site. It is protected by Copyscape.