Padded satin stitch over a raised form

Are you one of those embroiders who shies away from Satin Stitch? Done well it gives a beautiful effect, but it takes a little practice to perfect.
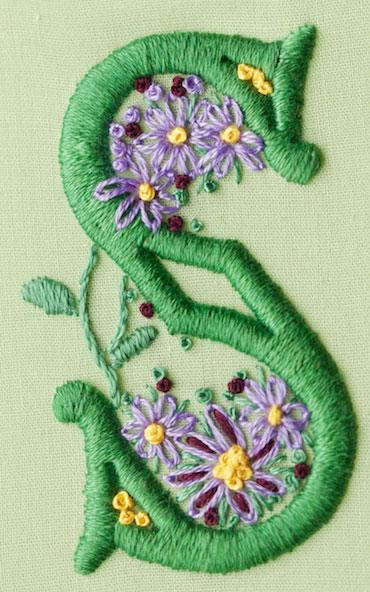
Watch over my shoulder as I stitch this initial in padded satin stitch and share some tips along the way.
I used DMC 505 stranded floss for this letter and worked on a green polycotton fabric.
I will show you one way of working padded satin stitch, which is over a shaped "form".
 A useful find in a box of transfers!
I found this raised foundation inside a box of transfers given to me by a friend. I do not know how old it is!
An initial, or other shape, cut out of firm felt or interfacing, would serve the same purpose. But keep in mind that felt would not be washable.
If you want to keep things simple, don't pick shapes with open areas. The initial I chose was more tricky, but useful for demonstrating the process. It was also my mother's initial, so I had something in mind for it when completed.
Place your work in an embroidery hoop to keep the fabric taut, ensuring it is large enough to fit the whole shape.
Hold the shape in place on your fabric, with tacking stitches, to prevent it moving position while you work.
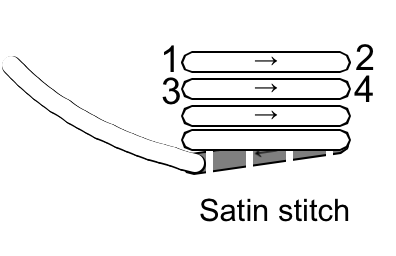
Work straight stitches across the shape, from side to side, keeping them close together. Try to bring the needle right against your shape, and likewise when you push it back through the fabric. Keeping a smooth edge in this way is important to a beautiful satin stitch.
Don't save thread by coming back up on the same side; take the needle behind the shape and up on the opposite side.

Start in the middle of the bottom curve and work downwards.
To work around a curve make slight adjustments to the placing of your stitches. On the wider side space your stitches further apart, but only a bit. Reuse the same needle hole on the inside curve where necessary.
This will enable you to change the direction of the stitches gradually as you work around the shape.
Where you reach an area that splits, (such as the ornamental hole in the S I stitched) you will work over each side.

Continue your satin stitch beyond where the split will occur, covering the entire width of the shape. The important thing here is not to leave any of the padding showing.
Then work around one side of the gap, tucking the stitches right into the point. Pierce the padding shape if necessary.
When you come to an abrupt corner, change the angle of your stitches to suit. Look at the turns in the area surrounding the diamond in the center of my S as an example.
Stitch the second side of the gap in the same manner. Then work across the full width of the shape when you reach it.

Sometimes you may come across a three-sided gap in your initial. Take a moment to plan the direction of your stitches before you continue. I wanted the vertical sections of my letter S to have horizontal stitching.
Explaining the way I tackled this may help you decide what to do for your project.
I took the stitching up the top long side of the triangular gap first. Then I worked from the top point down. When I met up with the existing stitching, I pierced the padded shape on the left-hand side.
At the bottom point of the triangle I went back to working over the entire width of the shape for the "ball" on the end. To finish my initial, I completed the last side of the triangle.
Padded satin stitch worked in this manner gives a smooth, raised result with a flat top. Alternative ways to create padding include...
- Working a layer of satin stitch in a different direction underneath
- Outlining the shape with split or back stitch, then filling with seed stitches
Why not give it a go yourself? Don't be too hard on yourself if your first attempts don't match up to your expectations. Practising is fun!
If the idea of embroidering letters interests you, click on the link for more information.
You may wish to decorate your letter with further embroidery, as I have done with this one. I used lazy daisy stitch, french knots and a few straight stitches to create the flowers. I also added a stem using stem stitch, and two tiny satin stitch leaves.
You might like these
Learn two variations of Fishbone Stitch - flat and raised
Learn 2 types of Fishbone stitch to add to your range of basic embroidery stitches
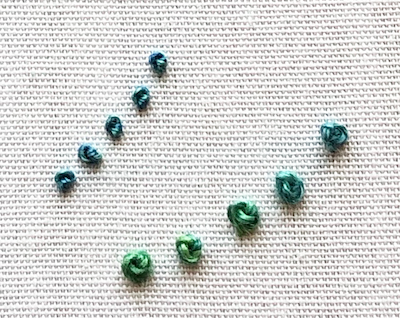
Stitch a French knot the easy way with this step by step tutorial
The best way to stitch a French knot without getting in a tangle. These clear instructions and video will show you how its done
Colonial knot or French knot, which is best for your project?
Learn the difference between a Colonial Knot and a French Knot stitch in embroidery

Copyright © Carol Leather - 2006-2024
About Me - Contact Carol - Privacy Policy - Site Map - Testimonials
Please do not copy the content of this site. It is protected by Copyscape.