- Home
- Cross Stitch
- Framing Cross Stitch
Framing cross stitch and blackwork projects
Framing cross stitch projects can work out expensive. So why not have a go at doing it yourself, following my simple step by step method below?
Your first step should be to wash your completed cross stitch piece to freshen it up and remove any oils that have been transferred to the fabric from your hands.
If you came to this page looking for frames on which to work your projects, rather than display them, please check out my page on embroidery hoops and frames.
What do you need for framing cross stitch?
- Your finished cross stitch piece
- Foam core board
- Steel rule and craft knife
- Brass pins
- A suitable frame (and mat if desired)
NOTE: Please do not substitute sticky matt board for the foam core. It tends to turn the fabric yellow after time. I learned this to my cost after framing my first few cross stitch projects this way.
Choosing a frame
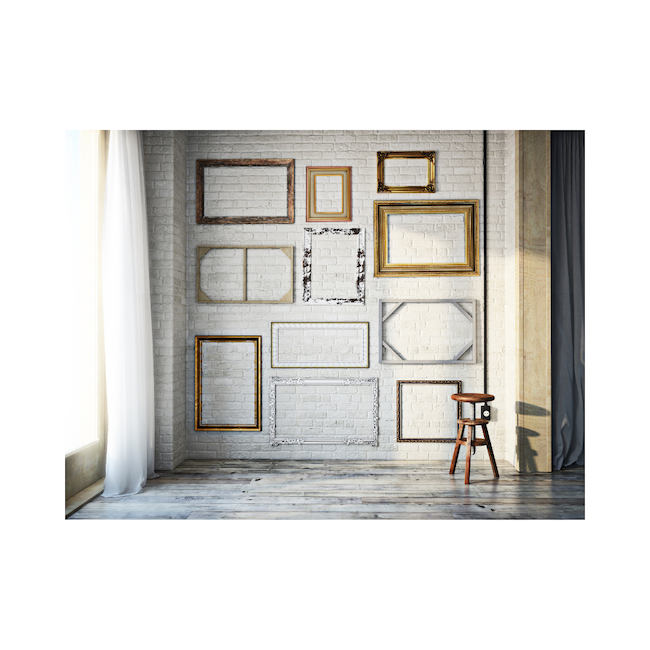
When choosing a frame it may be best to go for something traditional. An up to the minute unusual frame might look good now but could look really dated in years to come.
Think of the room in which the needlework will be hung when choosing the colour of the frame.
If most of the furniture is black, a black frame could fit in well. On the other hand if you love pine furniture then a pine frame may work better.
If you want to add some colour to your framed piece think about using a coloured mount or matt board that compliments the colours used in the picture.
If you have added beads to your cross stitch or are framing a raised embroidery piece you might want to look at frames with a deep rebate, that is the "lip" on the back where you sit the glass, fabric and mount boards. More room here will allow for a double matt to keep the work away from the glass.
Which brings me to a question. Should you frame cross stitch behind glass?
I guess we all have our own opinions on this subject. I tend not too, as my framed pictures travel around with me to shows, workshops and exhibitions. Glass would make them heavier and may break in transit.
However if your picture is going to be hung on the wall and hardly ever moved, then the points I mentioned above will not be relevant.
If it is going to hang in an area where smokers gather, glass would help protect your valuable work from tobacco smoke.
The important thing is to not let the glass touch the embroidery. One way to do this is to use a mount or matt board. You could also use small pieces of board, just under the frame so they don't show, called spacers.
The foam core board
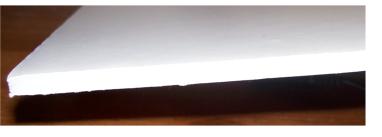
You may be wondering what foam core board is?
Basically it is a layer of foam sandwiched between two sheets of acid free card. You can purchase it in either a thick or thin option.
I would recommend the thicker foam core board, but do check that the rebate in your frame will hold it! Some frames have very little room if you want to include mounted work, matt board and glass in them.
The photo shows the edges of the foam core to give you a better idea of the construction.
I have used this foam core board from Amazon with good results. They also do a black board for use with dark fabrics.
You need to cut the foam core board to fit inside the frame opening. However, don't make it a really tight fit, as the fabric wrapped around it will take a little room.
Use a steel rule and a SHARP craft knife for this. The board is very easy to cut.
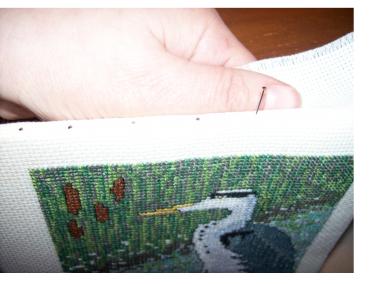
Framing cross stitch step one
For this step it helps to work on a dark surface so that you can easily see how much fabric is hanging over the edge of the foam core board.
Lay the work face up on top of the board. Position it so that an even amount of border shows on all four sides then move it up a little to give a slightly larger amount at the bottom of the design.
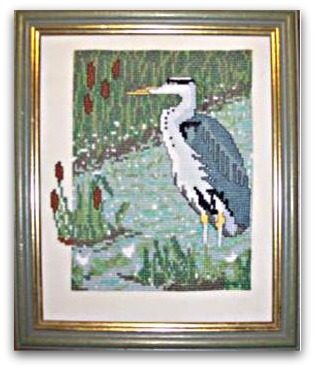
The design I have used in this example is the heron from my wildlife cross stitch section.
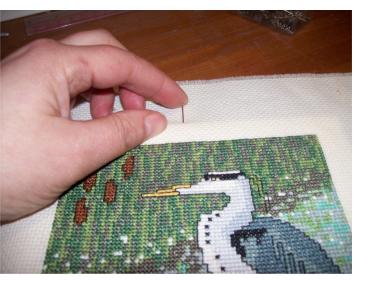
Take a pin and push it into the foam at the top centre as shown in the photo, left. Do the same at the bottom, pulling the fabric so it lies snug against the board and isn't floppy. Do not pull so hard as to distort the board though!
Repeat by placing a pin at the centre of the two sides as well.
Framing cross stitch step Two
Starting at the top centre push more pins into the foam on the edge of the board, placing each one about one half to one inch apart. Work out from the centre in one direction then the other. If you are framing cross stitch worked on Aida fabric try to line up the rows of squares so that the piece ends up straight. But don't panic, if it does go slightly wonky you can just remove the relevant pins and reposition them.
Repeat for the bottom of the piece, pulling the fabric just firmly enough to hold it close to the board with no puckers. Then repeat on each side until pins are holding the fabric on all four sides. Check that everything is even and the rows of Aida squares run as straight as possible.
Framing cross stitch step Three
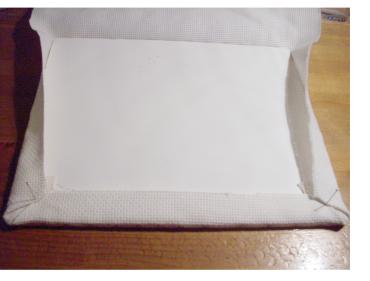
When all the pins are in place, turn the needlework over. We now need to tidy up those corners.
Fold the fabric point in each corner over the board, then fold the sides over the top and pin in place with one pin pushed right through the board and foam. Repeat for the other three corners. Then take a piece of strong thread and stitch the corners in place.
If you wish you can lace the back of your work by taking long stitches from top to bottom, then side to side but this is not really necessary with this method as we will be leaving the pins in place.
If you are using glass in your frame make sure it is clean and smear free before framing cross stitch pictures.
Then our last job is to drop the work into the frame and attach a back board to keep everything neat and tidy and enclosed.
One benefit of using this method is that it is easy to remove the work for washing, if it is ever necessary.
You might like these
Needlework Finishing Techniques: Expert Tips for a Professional Finish
Needlework finishing techniques can take your projects to the next level. Discover creative ideas for finishing your embroidery in our guide.
Handmade Greetings Cards: Personalized Designs for Every Occasion
Create your own handmade greetings cards by combining cross stitch and papercrafts
Cross stitch card making ideas
A visitor to the site, Rachel, shares one of her cross stitch card making ideas
Copyright © Carol Leather - 2006-2024
About Me - Contact Carol - Privacy Policy - Site Map - Testimonials
Please do not copy the content of this site. It is protected by Copyscape.