- Home
- Intro to blackwork
- Free Blackwork Pattern
FREE BLACKWORK COURSE · LESSON 2
Free Blackwork Pattern: Harvest Time
Learn double running stitch while creating a beautiful reversible coaster
I'm so excited to share this free blackwork pattern with you!
Blackwork embroidery has been my absolute passion for years, and I can't wait to help you fall in love with it too.
This pattern is perfect for anyone wanting to dip their toes into blackwork.
Its beauty is in how versatile it is. Use it for a cute coaster to keep cup stains off your desk, pop it into a card to send to a friend, or even frame it in a mini frame to make a mini work of art.
What You'll Need
About This Pattern
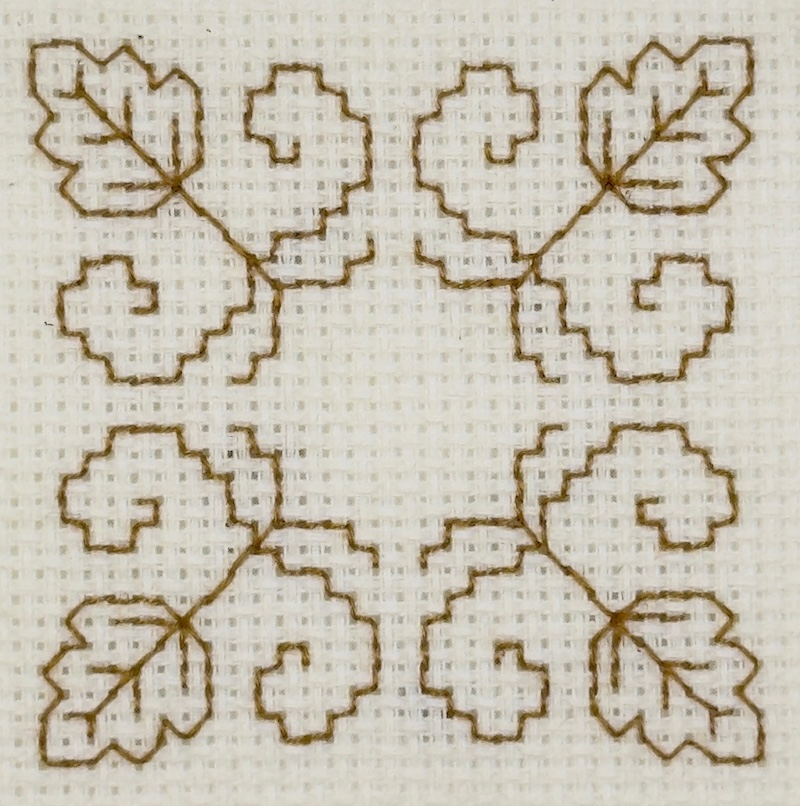
My Harvest Time design is an example of a blackwork motif. There are no fill patterns to tackle this time around.
You'll only need a single strand of cotton for this pattern (not the full six strands that come out of the skein of floss). I've recorded a quick video tutorial that'll make the process of separating one strand a breeze.
The design is built around four repeating corner motifs.
Underneath the chart you can step through the stitching journey one movement of the needle at a time, and switch between the front and the back of the work to see exactly why it comes out reversible.
We'll be using double running stitch which creates a crisp, clean line and makes the whole piece look professional.

Find the centre of your fabric by folding it in half, both ways, and lightly creasing the centre. If you wish, place your fabric in an embroidery hoop.
One journey, and the back looks after itself
Each leaf group is worked as one unbroken journey. Think of it as a drive: you follow the main road, turn off up a side road, then double back on yourself to rejoin it. That is exactly how the veins are worked, one at a time, out and back, which is why a line that stops in mid-air never strands you. Step through it and watch both sides of the fabric build up together.
- Stitch on the front
- Thread travelling behind
- Not stitched yet
106 stitches, 212 movements of the needle, one journey. It starts and finishes at the same hole, so there is nothing to fasten off in the middle. Work all four corners the same way. The back finishes identical to the front, which is what makes it reversible: press Both at the end and the two sides sit exactly on top of each other.
Stitching the Design
Start Your Thread
Begin your thread by tying a knot then pass the needle through from the front of the work up in a corner somewhere out of the way. Bring it back through in position to begin at the blue dot (5 fabric threads up and to the left of the centre) on the chart. We will cut this knot off later, when we have some stitches in place in which to anchor the loose thread.
Work the First Branch
Take your first stitch, over one fabric thread or block, toward the blue arrow (vertically down), then work the following two "blue" stitches. Bring the needle out one hole to the left and using the green lines on the chart as a guide work back towards the blue dot, filling in the gaps you left earlier.
Mirror and Extend
In the same manner create the mirror image toward the black arrow. You should end up one hole away from the blue dot. Work the blue diagonal stitch then branch off, again following the blue-coloured stitches and arrow on the chart. Return using the green stitches to end up at the centre line of the motif again. Repeat as before to stitch the bottom left section of the design.
Stitch the Leaf
Travel up the stem to the bottom of the leaf, this time following the purple lines and arrows. Work your way around the outside of the leaf in a counterclockwise direction. Make the return journey filling in the gaps to create a solid leaf outline.
Complete the Veins
Work each vein moving away from the central vein, then back again. Finally, bring the thread back down to the blue dot and fill in the gaps off the main diagonal leaf vein.
Turn Your Work
Turn your chart one quarter turn and work the next corner of your free blackwork pattern.
I hope you have enjoyed stitching Harvest Time.
Next Steps
You might be interested in my next lesson on pattern darning. This adapts the pattern you have just learned and adds a border.
Struggling with messy backs on your blackwork?
Blackwork for Beginners teaches the proven method for a neat, reversible back that looks as good behind as it does in front. 8 guided projects, clear step-by-step photos, and an instant PDF download for just £9.95.
Get the Ebook (£9.95) →Stitchin' Times Newsletter
Stay connected between projects
If you'd like occasional updates from my embroidery room, including new patterns, gentle tips, and little things I think you might enjoy, you're warmly invited to join the Stitchin' Times newsletter.
About Me - Contact Carol - Privacy Policy - Site Map - Testimonials
Please do not copy the content of this site. It is protected by Copyscape.
Copyright © 2006- www.needlework-tips-and-techniques.com All rights reserved