- Home
- What do I need?
- Embroidery Hoops
Using Embroidery Hoops: Tips and Techniques
Have you ever spent hours working on an embroidery project, only to be left with a wrinkled, bunched-up mess?
I have, and it's a frustrating reminder of a mistake I used to make.
Let me show you what happens when you don't use an embroidery hoop...

While digging through my old embroidery projects, I stumbled upon this telling example.
It showcases the consequences of embroidering without a hoop.
The fabric has puckered and wrinkled in areas where the thread tension varied.
Most noticeably around the panda's unstitched areas and beside the leaves on the left.
This unevenness is a common pitfall, but one that's easily avoided with the right tools.
Now, I always make sure to use a hoop to keep my fabric taut, ensuring a smooth and even finish.
What size hoop should you use
When it comes to embroidery, one question stands out among my students: what's the ideal hoop size?
The answer may surprise you - there's no single solution that fits everyone.
Your perfect hoop depends on a trifecta of factors: personal comfort, stitching style, and project type.
By understanding these variables, you'll be well on your way to choosing the right hoop for your unique needs.
Now that you know the factors that influence hoop size, it's time to make an informed decision.
Contrary to popular belief, your hoop size doesn't need to match your project size.
In fact, a smaller hoop can be a better option, offering greater ease of handling and flexibility during stitching.
But there's a crucial caveat to keep in mind: when working with delicate materials like beads, metallic threads, or blending filament, it's essential to exercise caution.
Avoid placing your hoop directly over these materials to prevent damage or tangling, ensuring your project remains neat and tidy.
With hoop sizes ranging from 4 to 12 inches, it can be overwhelming to choose the right one.
In my experience, the sweet spot lies in the 5, 6, and 8-inch sizes, which offer the perfect balance of versatility and practicality for a wide range of projects.
You may have noticed extra deep hoops on the market, but what's their purpose?
Designed specifically with quilters in mind, these larger-diameter hoops offer a unique advantage.
Their increased depth provides a secure grip on all three layers of fabric, preventing slipping and ensuring a smooth quilting process – especially crucial when working with thicker fabrics or multiple layers.
What if your smallest hoop is too big?
Have you ever encountered a frustrating situation where the embroidery fabric in your kit is too small for your smallest hoop?
Fortunately, you have three practical solutions to overcome this hurdle:
1. Stitch by hand, eliminating the need for a hoop.
2. Invest in a smaller hoop that fits the fabric.
3. Employ a clever technique to make the most of your existing hoop.
For the third option, you'll need a piece of spare fabric.
Securely attach your embroidery fabric to the spare fabric on all four sides using a large backstitch.
Then, place the inner ring on a hard surface, position the fabric with the embroidery side up, and carefully attach the outer ring.
Once you've attached the fabric, flip the work over and carefully trim the excess spare fabric from behind the stitching area using small, sharp scissors.
After completing your embroidery, simply remove the work from the hoop and snip the basting stitches.
Adjusting Tension for Drum-Like Tautness
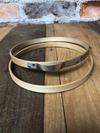
To ensure a smooth stitching experience, invest in good quality wooden embroidery hoops with adjustable brass screws.
This feature allows you to maintain the perfect fabric tension, which is crucial for even stitches.
A simple trick to achieve this is to keep a small flat-headed screwdriver handy to tighten the screw as needed.
When the fabric is taut enough to produce a drum-like sound when flicked, you'll know you're ready to start stitching.
Positioning the Screw for Comfortable Stitching
A common issue with embroidery hoops is thread getting tangled around the screw.
To avoid this frustration, try this simple trick: imagine the hoop as a clock face.
For right-handed stitchers, position the screw at 10 o'clock, while left-handed stitchers should move it to 2 o'clock.
By doing so, you'll keep the screw out of the way, ensuring a smoother stitching experience.
Binding the Inner Hoop to Prevent Slipping
To stop your fabric from working loose, take the extra step of binding your inner hoop with a thin, flexible material like fine fabric, bias binding, or a finger bandage.
By wrapping the strip tightly around the ring and securing it with a few discreet stitches, you'll maintain a taut, snag-free fabric surface.
This tip prevents frustrating setbacks and keeps your project on track.
Loosening Hoops When Not in Use
To avoid damaging your fabric, it's essential to consider what to do with your hoop when you're not working on your project.
Leaving the ring in place for extended periods can cause marks on the fabric, which can be frustrating and time-consuming to fix.
To prevent this, make it a habit to loosen or remove the hoop entirely when you put your work away at the end of a session.
Modern Embroidery Hoop Alternatives
When it comes to embroidery, wooden hoops are the classic choice, but if you're looking to mix things up, modern alternatives offer exciting possibilities.
Let's explore some innovative options.
Flexi-Hoops: Flexible Outer Rings
Flexi-hoops are a popular alternative, featuring a sturdy plastic inner ring and a flexible outer ring that gently grips your fabric. This design allows for easy fabric tensioning.
One important consideration is that they may not be suitable for those with hand mobility issues, such as arthritis, as they can be challenging to assemble.
If this is a concern for you, you may want to explore other options.
A bonus feature of flexi-hoops is that they can serve as a frame for your completed embroidery piece, adding a professional touch to your finished work.
Q-Snap Frames: Plastic Tubing
Q-snaps offer another innovative solution.
These clever frames comprise lengths of plastic tubing that fit together into a square or rectangle. You simply push separate sleeves onto each side of the frame, and they hold the fabric in place.
Q-snaps are lightweight, easy to store, and portable – perfect for on-the-go projects.
However, I find that they don't keep the fabric as taut as a hoop, requiring constant adjustments.
Spring Hoops: Designed for Machine Embroidery
Spring hoops, originally designed for machine embroidery, offer a unique solution.
These almost-flat hoops slip under the sewing machine foot, featuring a plastic outer ring and a spring-loaded metal inner ring with handles.
While they keep the work nice and taut, I've found that the thread can get caught over the handles, and the spring-loaded mechanism can be finicky to work with.
Putting Your New Hoop into Practice
Now that you have a better understanding of the importance of embroidery hoops and how to choose the right one for your project, it's time to take action.
Don't let the abundance of information overwhelm you - instead, focus on making progress.
Start by selecting a hoop size that suits your personal comfort, stitching style, and project type.
Remember, the key to success lies not in finding the perfect hoop, but in learning how to work with the one you have to achieve a smooth, even finish.
What Other Visitors Have Said
Click below to see contributions from other visitors to this page...
Sprung hoops 
I'm searching for sprung hoops. I hadn't realised how rare and unusual they were, until after I lost my grandmother's beautiful 8" Princess hoop.
After …
When were embroidery hoops invented?
I'm watching a show on Edwardians and the ladies were stitching without hoops. I was wondering when hoops were invented. I would have assumed a long time …
Do spring hoops leave marks?
My granddaughter and husband are having trouble with hoops marks on their work. It seems to be coming from the metal part of the spring hoop. I remind …
Spring hoops, I like them
I like spring hoops because of the tension.
I always put the hoop on a flat surface place the front of the fabric facing me because after I place the …
Cross stitch fabric too stiff
Is it OK to wash the fabric to soften it before starting a cross stitch project? It is very hard to get the Hoop on and work with it.
Making the fabric taut
I am starting on my second cross stitch project. The first one I never finished because it was looking so bad.
What I am having a problem with is getting …
needlework frames that keep the fabric taut 
Is there any scroll frame that holds the sides of the fabric?
I find that with a scroll frame, while the fabric can be tight, it always sags on the …
Will putting a hoop over my work damage it Not rated yet
I have returned to doing cross stitching from years ago and never used a hoop or frame. But now I am, and like it feel my work is neater.
However, …
Wood embroidery hoops Not rated yet
What kind of wood are embroidery hoops made from? I am embroidering a large tablecloth as a keepsake. What size hoop is optimal? Help please!
Carol …
You might like these
Embroidery Floss 101: Starting and Stopping Techniques Simplified
Learn embroidery floss techniques: Discover how to separate strands, choose the right number to use, and secure your stitches.
Small Sewing Room Ideas: Maximizing Space & Inspiring Creativity
Transformative small sewing room ideas for a functional, beautiful and inspiring workspace - its all about making the most of what you have.
The Ultimate Embroidery and Cross Stitch Planner For You
Stay focused with the Embroidery and Cross Stitch Planner - Keep your ideas and notes at your fingertips - A must-have for embroiderers keen to get organised


Copyright © Carol Leather - 2006-2024
About Me - Contact Carol - Privacy Policy - Site Map - Testimonials
Please do not copy the content of this site. It is protected by Copyscape.