Raised buttonhole stitch flowers
"How do I do raised buttonhole stitch?" was a question I recently received by e-mail from a lady called Lynn.
This is a name that can mean different things, so I asked her to send me a scan of what she was trying to achieve. It turned out to be a stitch that is also commonly called a Raised cross stitch flower. I promised to create a little tutorial for her, so here it is. I hope it helps, Lynn.
The stitch is easiest to do with your fabric held in an embroidery hoop or frame.
Working the raised buttonhole stitch flower
Start by making an upright cross stitch, a - b and then c - d.
I have marked the points with a disappearing ink pen to make it easier to follow the step-by-step photos. There is no need to write these letters on your project.
Bring your needle back up in the center.
Take your needle under the strand of thread labelled B. Ensure the thread is under the point of the needle, and work a buttonhole stitch. The needle does not go through the fabric, just under the horizontal part of the cross stitch.
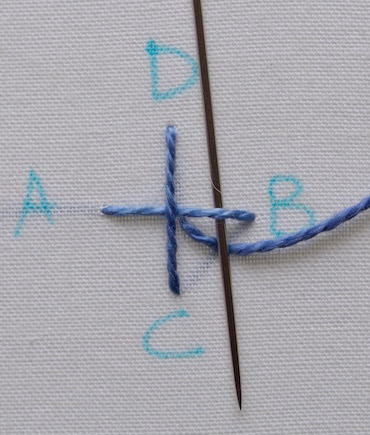 Fig 1 - Start with an upright cross stitch
We are now going to work in an anti-clockwise direction.
Take your needle under the thread leading to point D in the photo. Keep the working thread under the needle and work a buttonhole stitch again.
Gently pull the buttonhole stitches towards the center of your flower as you go until they sit snugly.
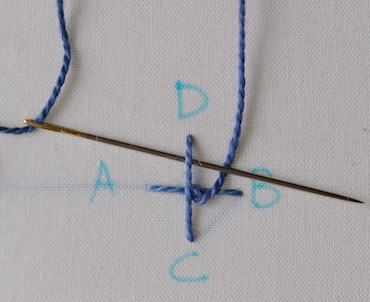 Fig 2 - working the buttonhole stitches
Continue in the same manner, working around the "spokes" of your flower, creating a buttonhole stitch over each spoke.
You may find it easier to turn your fabric as you go. I didn't want to confuse you by taking the photos from different directions.
Remember to pull the stitch gently to snug it up around the center.
For your information I am using a hand-dyed perle 8 thread for this demonstration flower.
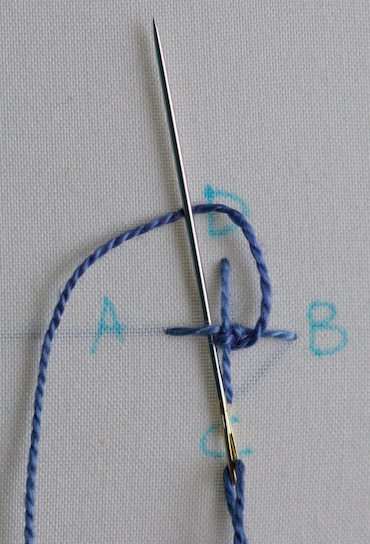 Fig 3 - continue working anti-clockwise
Fig 4 shows the circular flower appearing in the center.
After you complete the first circuit of the cross stitch threads, continue around and around, packing in your buttonhole stitches carefully.
You will need to watch your tension. You don't want the stitches too tight or too loose. They should comfortably lay in a spiral, round and around, not bunching up or looking straggly. It can take a little practice.
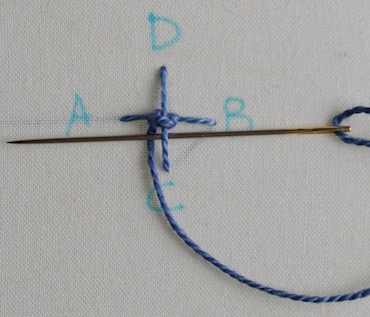 Fig 4 - first circuit completed
I took the photo in fig 5 from a lower angle, so you can see how the needle just slides under the "spoke" and over the working thread.
 Fig 5 - a different camera angle
Fig 6 shows a later stage of the raised buttonhole stitch flower.
You can see from this photo how the stitches wrap around the previous ones, increasing the diameter of the flower. Relax the tension a little as you get closer to the outside.
There is still plenty of room for more stitches here!
 Fig 6 - Building up the flower
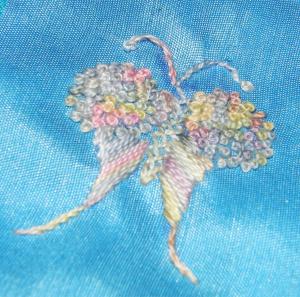
Fig 7 shows the completed flower. Quite by chance, I got the lighter tones of the hand-dyed thread to sit in the center, surrounded by the darker shades. I think it looks quite effective.
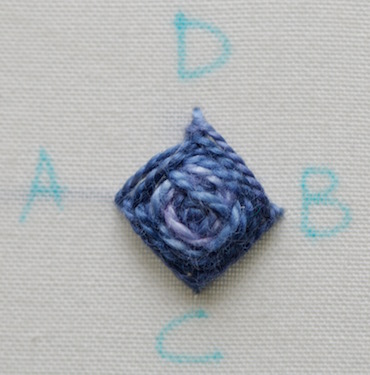 Fig 7 - Completed flower
The three photographs below show...
- a second flower worked in the same blue thread, without the distraction of the lettered markings
- one worked in a plain pearl 8 cream thread
- and a raised buttonhole stitch flower worked in 4mm silk ribbon
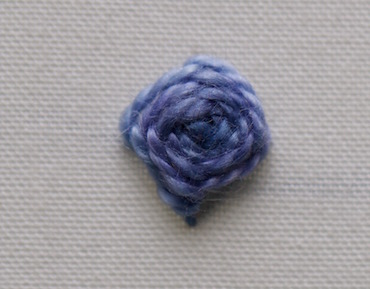 Fig 8 - Without the guide lettering
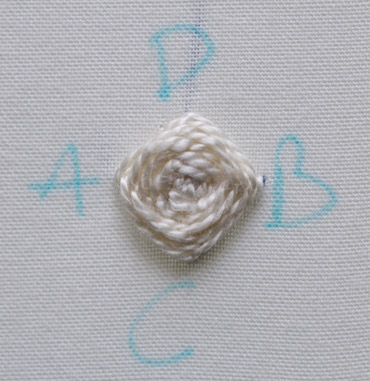 Fig 9 - Plain pearl 8 in cream
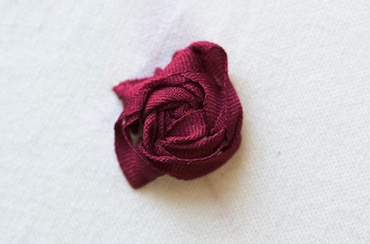 Fig 10 - worked in silk ribbon
You might like these
Learn two variations of Fishbone Stitch - flat and raised
Learn 2 types of Fishbone stitch to add to your range of basic embroidery stitches
Padded Satin Stitch Initial
Satin stitch tutorial showing a padded initial being embroidered
Stitch a French knot the easy way with this step by step tutorial
The best way to stitch a French knot without getting in a tangle. These clear instructions and video will show you how its done
Copyright © Carol Leather - 2006-2024
About Me - Contact Carol - Privacy Policy - Site Map - Testimonials
Please do not copy the content of this site. It is protected by Copyscape.